How to Build a Raised Hearth for a Gas Fireplace
A raised hearth provides a stylish and functional platform for your gas fireplace. It elevates the firebox, creating a more visually appealing focal point and improving heat distribution throughout the room. Here's a step-by-step guide to help you build a raised hearth for your gas fireplace:
Materials Required:
* Fire-resistant backer board * Cement board * Mortar * Tile or stone * Grout * Thinset * Trim molding * Nails or screwsStep 1: Prepare the Base
* Remove any existing flooring or materials from the hearth area. * Level the floor and ensure it's flat and stable. * Install a layer of fire-resistant backer board to create a base for the hearth. Secure it with nails or screws.Step 2: Build the Framing
* Frame the raised hearth using 2x4 or 2x6 lumber. The height of the framing should match the desired height of the hearth. * Ensure the framing is level and square.Step 3: Install the Cement Board
* Cover the framing with a layer of cement board. Use thinset to secure the cement board to the framing. * Smooth out any excess thinset and allow it to dry completely.Step 4: Tile or Stone the Hearth
* Lay out the tiles or stone on the cement board to determine the pattern and fit. * Apply thinset to the cement board and press the tiles or stone into place. * Use spacers to ensure even spacing between the tiles or stone.Step 5: Grout the Tiles or Stone
* Once the tiles or stone are set, apply grout to the joints. Use a grout float to spread the grout evenly. * Wipe away any excess grout and smooth the joints with a damp sponge.Step 6: Install the Trim Molding
* Cut the trim molding to fit around the perimeter of the hearth. * Secure the trim molding with nails or screws. * Caulk the joints between the trim molding and the hearth to prevent water damage.Step 7: Install the Gas Fireplace
* Insert the gas fireplace into the opening in the raised hearth. * Connect the gas line and electrical connections according to the manufacturer's instructions. * Secure the fireplace in place.Tips:
* Choose tiles or stone that are non-porous and heat-resistant. * Allow ample time for the thinset and grout to dry before using the fireplace. * Seal the grout and tile or stone with a penetrating sealer to protect it from moisture and stains. * Keep flammable materials away from the hearth. * Have the gas fireplace and hearth inspected regularly by a qualified professional.
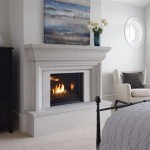
How To Build A Raised Fireplace Hearth Design

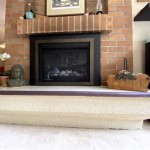
How To Build A Raised Fireplace Hearth Design

How To Build A Raised Fireplace Hearth Design

How To Build A Raised Fireplace Hearth Design

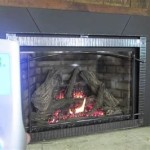
Install A Gas Fireplace Framing Finishing Pt 2 Diy Living Room Remodel

Diy Fireplace Makeover At Home With The Barkers

Our New Diy Raised Electric Fireplace Hearth With Stone

Is Your Fireplace Dated And In Need Of A Makeover Check Out This Easy To Follow Diy Tutorial On How Build Remodel

How To Build A Raised Fireplace Hearth Design

Fireplace Hearths An In Depth Guide With S
Related Posts