Heat Resistant Tile Paint For Fireplaces: A Comprehensive Guide
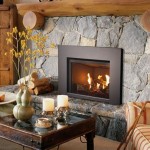
Fireplaces are often the focal point of a living space, offering both aesthetic appeal and functional warmth. However, the tiles surrounding a fireplace can become dated, damaged, or simply not align with evolving interior design preferences. Replacing the entire tile surround can be a costly and labor-intensive undertaking. Heat-resistant tile paint provides a viable alternative, allowing homeowners to refresh the appearance of their fireplaces without the expense and disruption of a full renovation. This article provides an in-depth exploration of heat-resistant tile paint for fireplaces, covering key attributes, application techniques, and considerations for long-term durability.
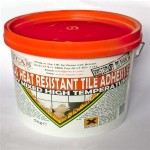
The performance of tile paint near a fireplace hinges upon its ability to withstand elevated temperatures without blistering, cracking, or releasing harmful fumes. Standard paints are not formulated for such conditions and will likely fail rapidly when exposed to the heat generated by a fire. Heat-resistant tile paint, on the other hand, is specially formulated with pigments and binders that can tolerate high temperatures, typically up to 200-300 degrees Fahrenheit (93-149 degrees Celsius). This resistance ensures the paint film remains intact and aesthetically pleasing despite regular exposure to heat.
Selecting the appropriate heat-resistant tile paint requires careful consideration of several factors, including the type of tile, the expected maximum temperature, and the desired finish. Different types of tile, such as ceramic, porcelain, or stone, may require specific primers or preparation techniques to ensure proper adhesion. Furthermore, the paint's heat resistance rating should be sufficient to accommodate the highest temperature the tile is likely to reach during fireplace use. Finally, the desired finish, whether matte, satin, or gloss, should be carefully chosen to complement the overall aesthetic of the room.
Key Considerations for Selecting Heat-Resistant Tile Paint
Choosing the right heat-resistant tile paint is crucial for achieving a durable and aesthetically pleasing result. Several factors must be taken into account to ensure the selected paint is suitable for the specific application.
Firstly, understanding the paint's heat resistance rating is paramount. Fireplaces can generate significant heat, and the paint must be capable of withstanding the maximum temperature the tiles are likely to reach. Review the manufacturer's specifications to confirm the paint's heat tolerance and ensure it exceeds the expected operating temperature. It is advisable to err on the side of caution and choose a paint with a higher heat resistance rating than strictly necessary, providing a safety margin and potentially extending the paint's lifespan.
Secondly, the compatibility of the paint with the existing tile material is a critical consideration. Different types of tiles, such as ceramic, porcelain, natural stone, or manufactured stone veneer, may have varying surface properties that affect paint adhesion. Some paints may require specific primers to ensure proper bonding to the tile surface. Consult the paint manufacturer's recommendations to identify compatible primer options and follow the recommended application procedures meticulously. Proper surface preparation, including cleaning and priming, is essential for achieving a durable and long-lasting finish.
Thirdly, the desired finish and color should be carefully chosen to complement the overall aesthetic of the room. Heat-resistant tile paints are available in a variety of finishes, including matte, satin, semi-gloss, and gloss. The choice of finish can significantly impact the appearance of the fireplace surround. Matte finishes offer a subtle, non-reflective appearance, while gloss finishes provide a more reflective and vibrant look. Consider the existing decor and lighting conditions when selecting the appropriate finish. Color selection is equally important, as the painted tile should seamlessly integrate with the room's color scheme. Test paint samples in a discrete area before committing to a full application to ensure the desired color and finish are achieved.
Preparing the Tile Surface for Painting
Proper preparation of the tile surface is essential for achieving a successful and long-lasting paint job. Neglecting this step can lead to poor adhesion, peeling, and premature failure of the paint. The preparation process typically involves cleaning, repairing, and priming the tile surface to create an optimal bonding surface for the paint.
The first step in preparing the tile surface is thorough cleaning. Remove any dirt, dust, grease, or other contaminants that may be present on the tile. Use a strong degreaser or tile cleaner and scrub the surface vigorously with a brush or sponge. Rinse the tile thoroughly with clean water and allow it to dry completely. For heavily soiled or greasy tiles, multiple cleaning cycles may be necessary. Pay particular attention to grout lines, as they tend to accumulate dirt and grime. A grout brush or specialized grout cleaner can be used to effectively clean these areas.
Following cleaning, inspect the tile for any damage, such as cracks, chips, or loose grout. Repair any damage before proceeding with painting. Small cracks can be filled with tile repair caulk or epoxy. Larger cracks may require patching with a tile repair compound. Loose or crumbling grout should be removed and replaced with fresh grout. Allow the repair materials to cure completely according to the manufacturer's instructions before proceeding with priming. Addressing any damage at this stage will ensure a smooth and uniform surface for painting and prevent further deterioration of the tile.
Priming the tile surface is crucial for promoting adhesion and ensuring a uniform finish. Choose a primer specifically designed for use on tile and that is compatible with the chosen heat-resistant paint. Apply the primer in a thin, even coat using a brush, roller, or spray gun, following the manufacturer's instructions. Allow the primer to dry completely before proceeding with painting. Some primers may require multiple coats for optimal performance. Priming not only improves adhesion but also helps to seal the tile surface, preventing the paint from being absorbed into the tile and ensuring a more consistent color and finish.
Applying Heat-Resistant Tile Paint for Optimal Results
Applying the heat-resistant tile paint correctly is critical for achieving a durable and aesthetically pleasing finish. The application process typically involves applying multiple thin coats of paint, allowing each coat to dry completely before applying the next. Proper technique and attention to detail are essential for achieving optimal results.
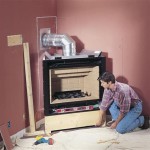
Before beginning the painting process, ensure the work area is well-ventilated and protected from dust and debris. Cover any surrounding surfaces, such as walls, floors, and furniture, with drop cloths or plastic sheeting. Wear appropriate personal protective equipment, such as gloves, safety glasses, and a respirator, to protect yourself from paint fumes and splatters. Proper ventilation is crucial to prevent the build-up of harmful vapors.
Apply the heat-resistant tile paint in thin, even coats using a brush, roller, or spray gun. Avoid applying too much paint in a single coat, as this can lead to drips, runs, and uneven drying. For brush application, use a high-quality brush designed for use with tile paint. Apply the paint in smooth, overlapping strokes, following the direction of the tile. For roller application, use a foam roller designed for smooth surfaces. Apply the paint in a thin, even layer, overlapping each stroke slightly. For spray application, use a spray gun specifically designed for paint. Adjust the spray pattern and pressure to achieve a fine, even mist. Maintain a consistent distance from the tile surface and avoid excessive overspray.
Allow each coat of paint to dry completely before applying the next. Follow the manufacturer's instructions for drying times. Typically, a drying time of several hours is required between coats. Applying subsequent coats before the previous coat is fully dry can lead to adhesion problems and an uneven finish. Multiple thin coats are preferable to a single thick coat, as they provide better adhesion and durability. At least two coats of paint are typically required for optimal coverage and protection. After the final coat of paint has dried completely, allow the paint to cure for the recommended time before using the fireplace. Curing allows the paint to fully harden and develop its maximum heat resistance.
In conclusion, heat-resistant tile paint offers a cost-effective and convenient way to update the appearance of a fireplace surround. By carefully selecting the appropriate paint, properly preparing the tile surface, and applying the paint using the correct techniques, homeowners can achieve a durable and aesthetically pleasing finish that will enhance the beauty of their living space for years to come.

How To Paint Tile Easy Fireplace Makeover Setting For Four Interiors

How To Paint Tile Easy Fireplace Makeover Setting For Four Interiors

Modern Rustic Update To Fireplace Paint And Wall Behr

Tikkurila Muuri Heat Resistant Paint For Interior Fireplaces Firewalls Water Based 3 Litres Diy At B Q

Fireplace Paint Everything You Ever Wanted To Know

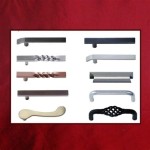
Use Fireplace Paint To Update Old Hardware For A Makeover

Easy Diy Fireplace Makeover How To Stencil Paint Tile Guitar Lace

How To Paint Tile Easy Fireplace Makeover Setting For Four Interiors

Can You Paint A Fireplace Tile Stone Brick More Tips

How To Paint Fireplace Tile Look Like Marble Lantern Lane Designs
Related Posts