Framing a Fireplace: A Step-by-Step Guide to Create a Focal Point
A fireplace is a natural focal point in any room, and framing it properly can enhance its beauty and functionality. Whether you're starting from scratch or remodeling an existing fireplace, framing is an essential step that requires careful planning and execution. This guide will provide you with a step-by-step approach to ensure a successful fireplace framing project.
Before you begin, it's important to gather the necessary tools and materials. These include:
- Framing lumber (2x4s, 2x6s, and 2x8s)
- Plywood or drywall sheathing
- Insulation
- Fire-resistant drywall
- Nails or screws
- Caulk
- Tools (hammer, nail gun, saw, level, etc.)
Safety is paramount when working with fireplaces, so always follow these precautions:
- Wear safety glasses and gloves.
- Turn off the gas or electricity to the fireplace before starting work.
- Let the fireplace cool completely before framing.
- Ensure proper ventilation to avoid smoke or fumes.
Step 1: Plan and Mark the Framing
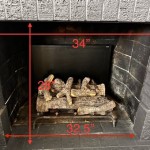
Begin by determining the size and shape of the framing. Measure the fireplace opening and add the desired width and height of the frame. Use a level and a chalk line to mark the framing lines on the floor and walls.
Step 2: Build the Header
The header is the top horizontal piece of the frame. Cut two 2x8s or 2x10s to the desired width of the opening. Nail or screw them together into an "L" shape, facing the inside of the room. Install the header at the top of the opening, ensuring it is level.
Step 3: Frame the Sides
Cut two vertical pieces of 2x4s or 2x6s to the desired height of the frame. Position them on the left and right sides of the opening, flush with the header. Nail or screw them to the header and the floor.
Step 4: Frame the Bottom
Cut a horizontal piece of 2x6 or 2x8 to the width of the opening. Nail or screw it to the bottom of the vertical pieces, forming the base of the frame.
Step 5: Install the Sheathing
Cut pieces of plywood or drywall to fit the front and sides of the frame. Nail or screw them to the framing, ensuring a snug fit.
Step 6: Insulate and Cover
Fill the cavity between the framing and the fireplace with insulation. Install fire-resistant drywall over the plywood or drywall sheathing. Use screws or nails to secure it.
Step 7: Caulk and Finish
Caulk all joints and seams to prevent air leaks and drafts. Paint or finish the framing to complement your décor and complete the fireplace's transformation.
Framing a fireplace is a rewarding project that can enhance the beauty, comfort, and functionality of your home. By following these steps carefully and adhering to safety precautions, you can create a stunning and safe focal point for your living space.

Diy Fireplace And Mantel Rebecca Propes Design

Fireplace Framing

Electric Fireplace Frame How To Build And Install It Very Good

Basement West Wall Framing And Fireplace Install Gas Ideas Living Rooms Frame Bars For Home

How To Install A Gas Fireplace Framing Finishing Tylynn M

Our Fireplace Renovation Part 3 Framing And Shiplap Nor Cal Diyers

How To Build A Diy Built In Fireplace With An Electric Insert The Creative Mom

All About Prefabricated Fireplaces Chimney Savers

How To Frame And Build A Fireplace

How To Frame In A Gas Fireplace Framing For Brick Makeover
Related Posts

