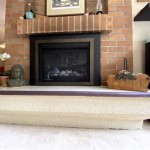
Achieving a Faux Marble Finish on a Fireplace Surround
A fireplace serves as a focal point in many homes, and its aesthetic appeal significantly contributes to the overall ambiance of the room. A faux marble finish on the fireplace surround can elevate its elegance and sophistication without the expense and complexity of installing genuine marble. This article details the process of painting a fireplace surround to mimic the appearance of marble, providing a comprehensive guide for achieving a convincing and durable faux marble effect.
The process involves several stages, from initial preparation to the final sealing. Each step is crucial for achieving a realistic marble look and ensuring the longevity of the painted finish. Careful planning, meticulous execution, and the selection of appropriate materials are all essential components of a successful faux marble transformation.
Preparing the Fireplace Surround
Before commencing the painting process, thorough preparation of the fireplace surround is paramount. This step ensures proper adhesion of the paint and contributes to the overall durability and longevity of the faux marble finish. The specific preparation required will depend on the existing surface of the fireplace surround.
If the surround is already painted, it is necessary to assess the condition of the existing paint. Loose or flaking paint should be removed using a scraper or sandpaper. Sanding the entire surface is recommended to create a slightly rough texture, which will improve the adhesion of the primer. Glossy surfaces should be thoroughly sanded to dull the sheen completely.
For unpainted surfaces, such as brick or concrete, cleaning is the primary concern. Remove any dirt, dust, or soot using a brush and a mild detergent solution. Rinse thoroughly with clean water and allow the surface to dry completely before proceeding. In some cases, a masonry sealant may be necessary to prevent moisture wicking from the brick or concrete into the paint layers.
Regardless of the original surface, filling any cracks or imperfections with a suitable patching compound is vital. Allow the compound to dry completely according to the manufacturer's instructions and then sand it smooth to blend seamlessly with the surrounding surface. Dust thoroughly after sanding to ensure a clean working surface.
Once the surface is clean, smooth, and dry, apply a primer specifically formulated for the existing material of the fireplace surround. A primer provides a uniform base for the paint, improves adhesion, and helps to prevent the underlying surface from affecting the color of the faux marble finish. Allow the primer to dry completely before proceeding to the next stage.
Applying the Base Coat and Veining
The base coat forms the foundation of the faux marble finish. Choose a color that resembles the predominant color of the desired marble effect. White, off-white, cream, or light gray are common choices, depending on the specific marble variety being emulated. Apply the base coat evenly using a brush, roller, or spray gun, ensuring complete coverage of the primed surface. Two coats may be necessary to achieve a solid, uniform color.
Once the base coat is completely dry, the veining process can begin. Veining is what gives the faux marble its characteristic appearance and requires careful planning and execution. Before starting, study images of real marble to understand the patterns, colors, and densities of the veins. This will help in creating a more realistic and convincing effect.
Several techniques can be used to create the veins. One common method involves using artist brushes of varying sizes and shades of paint. Start with a lighter shade of the base coat color and create thin, meandering lines across the surface. Gradually add darker shades to create depth and dimension in the veins. Use a feather or a soft cloth to soften the edges of the veins and blend them seamlessly into the base coat.
Another technique involves using a sea sponge or crumpled plastic wrap to apply the veins. Dip the sponge or plastic wrap into paint and gently dab it onto the surface, creating a more textured and organic look. Experiment with different pressures and angles to achieve a variety of vein patterns. This method is particularly effective for creating the more mottled and irregular veins found in some types of marble.
A feathering technique can be employed to soften the edges of the veins, creating a more realistic appearance. Use a dry, soft brush to gently blend the edges of the veins into the base coat. This helps to eliminate harsh lines and creates a more subtle and natural transition between the veins and the surrounding surface. This step is crucial for achieving a convincing marble effect.
Observe the overall pattern and adjust the veining accordingly. Step back periodically to assess the effect from a distance and make any necessary adjustments. Remember that real marble is rarely perfectly symmetrical, so strive for a natural and organic look rather than a perfectly uniform pattern.
Glazing and Sealing the Faux Marble Finish
After completing the veining, a glaze is typically applied to enhance the depth and richness of the faux marble finish. A glaze is a translucent coating that adds subtle color variations and highlights the details of the veins. It also helps to blend the different layers of paint together, creating a more cohesive and realistic effect.
Choose a glaze color that complements the base coat and vein colors. A slightly darker shade of the base coat color or a subtle earth tone can work well. Apply the glaze evenly over the entire surface using a brush, roller, or spray gun. Immediately after application, use a clean cloth or sponge to wipe away some of the glaze, leaving it concentrated in the crevices and around the veins. This technique, known as "ragging," enhances the depth and dimension of the faux marble finish.
Allow the glaze to dry completely according to the manufacturer's instructions. Once the glaze is dry, apply a clear topcoat to protect the faux marble finish and enhance its durability. Choose a topcoat that is specifically designed for painted surfaces and that is resistant to heat and moisture. A water-based polyurethane varnish is a good choice for fireplace surrounds, as it is durable, easy to apply, and provides a clear, non-yellowing finish.
Apply the topcoat evenly using a brush, roller, or spray gun. Two or three coats may be necessary to provide adequate protection. Allow each coat to dry completely before applying the next. Lightly sand between coats with fine-grit sandpaper to create a smooth and even surface.
The final topcoat should be allowed to cure completely according to the manufacturer's instructions. This may take several days or even a week, depending on the specific product used. During this time, avoid placing any objects on the fireplace surround or exposing it to excessive heat or moisture. Once the topcoat is fully cured, the faux marble finish will be durable, easy to clean, and will provide a beautiful and elegant focal point for the room.
Consider adding a sealant around the edges of the fireplace surround where it meets the wall or floor. This will prevent moisture from seeping behind the surround and damaging the paint or the underlying surface. Use a paintable sealant that matches the color of the surrounding wall or floor.
Regular cleaning and maintenance will help to preserve the beauty and longevity of the faux marble finish. Use a soft cloth and a mild detergent solution to clean the surround as needed. Avoid using abrasive cleaners or harsh chemicals, as these can damage the paint and the topcoat. Touch up any scratches or chips as soon as they appear to prevent them from spreading.

Faux Marble Fireplace Savvy Apron

Transform Your Fireplace With Faux Marble Paint

Painted Marble Effect On Victorian Fireplace Imaginative Interiors

Faux Marble Fireplace Savvy Apron

Diy Marble Fireplace And Mantel Makeover Top Shelf

Faux Marble Hand Painted Fireplaces Traditional Painter

Painted Marble Effect On Victorian Fireplace Imaginative Interiors

Faux Marble Fireplace Traditional Painter

Fusion Mineral Paint Faux Marble Fireplace The Interior Diyer

Easy Diy Marble Hearth And A Fireplace Makeover The Painted Hive
Related Posts


