Electric Fireplace Insert Installation: A Comprehensive Guide
Electric fireplace inserts offer a convenient and aesthetically pleasing alternative to traditional wood-burning or gas fireplaces. They provide supplemental heat, visual ambiance, and a focal point for a room without the complexities associated with fuel supply, venting, and extensive cleaning. This article provides a detailed guide to electric fireplace insert installation, covering key considerations, necessary tools, step-by-step instructions, and safety precautions.
Before embarking on the installation process, it's crucial to understand the different types of electric fireplace inserts available. These generally fall into two categories: plug-in inserts and hardwired inserts. Plug-in inserts are designed for simple installation, plugging directly into a standard electrical outlet. Hardwired inserts, on the other hand, require connection to the home's electrical system and typically offer higher heating capabilities and more advanced features. The selection of the appropriate insert should be based on the desired functionality, available space, and electrical capacity of the room.
Proper planning is also essential for a successful installation. This includes measuring the existing fireplace opening to ensure compatibility with the dimensions of the chosen insert. Furthermore, it is important to assess the structural integrity of the existing fireplace and chimney to ensure they can safely accommodate the weight and operation of the insert. If there are any doubts about the structural soundness, consulting a qualified professional is highly recommended.
Key Point 1: Pre-Installation Assessment and Preparation
The first step in installing an electric fireplace insert involves a thorough assessment of the existing fireplace and surrounding area. This assessment includes verifying the dimensions of the firebox opening, inspecting the existing chimney for obstructions or damage, and ensuring that the electrical supply is adequate for the chosen insert. Neglecting these initial steps can lead to installation difficulties and potential safety hazards.
Accurate measurements are paramount. The insert should fit snugly within the firebox opening without being forced. A small amount of clearance around the insert is desirable to allow for ventilation and ease of installation. If the existing opening is too large, it may be necessary to construct a custom surround or use filler panels to create a more suitable fit. If the opening is too small, modifications to the firebox may be required, which could involve removing brick or masonry. It is strongly advised to consult a professional mason or contractor if structural modifications are necessary.
Next, the chimney should be inspected for any signs of blockage, such as bird nests, debris, or accumulated soot. A blocked chimney can impede airflow and create a fire hazard, even with an electric insert. If any obstructions are found, they should be removed before proceeding with the installation. Additionally, the chimney should be checked for any signs of structural damage, such as cracks, crumbling mortar, or water damage. If significant damage is present, it may be necessary to repair the chimney before installing the insert.
Finally, the electrical supply must be verified. For plug-in inserts, confirm that the outlet is properly grounded and can handle the electrical load of the insert. Consult the manufacturer's specifications for the required voltage and amperage. For hardwired inserts, it is essential to consult a qualified electrician to ensure that the electrical circuit is appropriately sized and wired to meet the insert's power requirements. Running the insert on an undersized circuit can lead to tripped breakers, overheating, and potential fire hazards.
Gathering the necessary tools and materials is essential before beginning the installation process. These typically include: a measuring tape, a level, a screwdriver (both Phillips and flathead), a drill, a stud finder, safety glasses, work gloves, and potentially a saw or chisel if modifications to the firebox are required. Additional materials, such as filler panels, shims, or electrical wiring, may also be needed depending on the specific installation.
Key Point 2: Step-by-Step Installation Process
Once the pre-installation assessment and preparation are complete, the actual installation process can begin. The following steps provide a general guideline, but it is always important to refer to the manufacturer's instructions for specific details and recommendations.
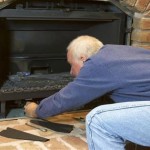
Step 1: Preparing the Firebox: Thoroughly clean the existing firebox to remove any dust, debris, or soot. This will ensure a clean and stable surface for the insert to sit on. If necessary, clean any remaining residue of the previous fireplace function. Consider painting the interior of the firebox with a heat-resistant paint to improve the aesthetic appeal and provide a clean backdrop for the insert.
Step 2: Installing the Insert: Carefully lift the electric fireplace insert and position it within the firebox opening. Ensure that the insert is centered and level. Use shims as needed to adjust the height and ensure that the insert is sitting evenly. Avoid forcing the insert into the opening, as this can damage the unit or the surrounding structure. If the insert is a plug-in model, plug it into the designated electrical outlet at this stage. If it is a hardwired model, proceed to the next step involving a qualified electrician.
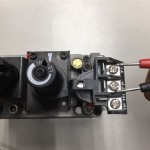
Step 3: Hardwiring (for hardwired inserts only): If the insert requires hardwiring, this step should be performed by a qualified electrician. The electrician will connect the insert to the home's electrical system, following all applicable building codes and safety regulations. This typically involves running electrical wiring from the insert to a junction box and connecting it to a dedicated circuit breaker in the electrical panel. It is crucial to ensure that the circuit breaker is properly sized to handle the electrical load of the insert. After installation, the electrician should verify the proper operation of the insert and test the circuit breaker.
Step 4: Securing the Insert: Once the insert is properly positioned and connected to the electrical supply, it should be secured in place. This typically involves using screws or brackets to attach the insert to the firebox or surround. Follow the manufacturer's instructions for the recommended method of securing the insert. Ensure that the screws or brackets are properly tightened to prevent the insert from shifting or moving during operation.
Step 5: Finishing Touches: After the insert is secured, complete any finishing touches to enhance the aesthetic appeal of the installation. This may include installing filler panels to cover any gaps between the insert and the firebox opening, applying sealant around the edges of the insert to prevent air leaks, or adding decorative trim to create a more finished look. Finally, carefully review the manufacturer's instructions and familiarize oneself with the insert's operating controls and safety features.
Key Point 3: Safety Considerations and Post-Installation Check
Safety is paramount throughout the entire installation process. Adhering to safety guidelines not only protects individuals from injury but also ensures the long-term safe operation of the electric fireplace insert.
Always wear safety glasses and work gloves when handling tools and materials. Avoid working alone, and enlist the help of another person to assist with lifting and positioning the insert. If working at heights, use a stable ladder or scaffolding and take precautions to prevent falls. When working with electrical wiring, always disconnect the power supply at the circuit breaker before beginning any work. Never attempt to perform electrical work if unfamiliar with electrical codes and safety regulations. Consult a qualified electrician if any doubts exist.
After the installation is complete, perform a thorough post-installation check to ensure that everything is functioning correctly. Verify that the insert is level and securely mounted. Check that all electrical connections are properly made and that there are no exposed wires. Test the heating function of the insert and ensure that it is producing heat evenly. Test all other features, such as the flame effect, lighting, and remote control. Listen for any unusual noises or vibrations during operation. If any problems are detected, consult the manufacturer's troubleshooting guide or contact a qualified technician.
Additionally, familiarize oneself with the insert's safety features, such as the overheat protection and automatic shut-off function. Ensure that the insert is properly ventilated to prevent overheating. Keep flammable materials away from the insert and surrounding area. Regularly clean the insert to remove dust and debris. Follow the manufacturer's recommendations for maintenance and servicing.
By following these guidelines and taking the necessary precautions, individuals can successfully install an electric fireplace insert and enjoy the warmth, ambiance, and convenience it provides. Remember to prioritize safety and consult professionals when needed to ensure a smooth and trouble-free installation.
Following these steps will lead to a successful installation, adding warmth and aesthetic value to the space.

How To Install An Electric Fireplace Insert Fireplaces Direct Learning Center

ᑕ❶ᑐ How To Install An Electric Fireplace Insert Magikflame Blog

How To Install An Electric Fireplace Insert

How To Install An Electric Fireplace

Recessed Or Wall Mount Electric Fireplace Installations Explained Touchstone Home S Inc

ᑕ❶ᑐ How To Install An Electric Fireplace Insert In Wall

How To Install An Electric Fireplace Diy Family Handyman

How To Install An Electric Fireplace Insert Fireplaces Direct Learning Center

Electric Fireplace Inserts Ventless Installation

How To Install An Electric Fire Fireplace Co