Creating an Easy Faux Fireplace Mantel: A Comprehensive Guide
A fireplace mantel serves as a focal point in a room, adding architectural interest and providing a surface for displaying decorative items. However, installing a traditional fireplace can be a costly and complex undertaking. A faux fireplace mantel offers an accessible alternative, providing the aesthetic benefits of a fireplace without the need for structural modifications or gas lines. This article explores the process of creating an easy faux fireplace mantel, outlining the necessary materials, tools, and steps involved in the construction.
The advantages of a faux mantel extend beyond cost-effectiveness. They are readily customizable, allowing homeowners to tailor the design to match their existing décor. Faux fireplaces are also suitable for apartments and homes where a traditional fireplace is not feasible or permitted. The project is generally achievable for individuals with basic woodworking skills, offering a satisfying DIY experience.
Planning and Design Considerations
Before commencing construction, careful planning is essential. This stage involves determining the desired dimensions of the mantel, selecting the appropriate materials, and considering the overall design aesthetic. The size of the mantel should be proportional to the dimensions of the room and the wall on which it will be mounted. Consider the height of the ceiling and the width of the wall to ensure a balanced visual effect.
The style of the mantel should complement the existing décor of the room. Common styles include traditional, modern, rustic, and farmhouse. Traditional mantels often feature ornate carvings and moldings, while modern mantels tend to be more streamlined and minimalist. Rustic mantels may incorporate reclaimed wood and distressed finishes. Farmhouse mantels typically have a simple, clean design with a focus on natural materials.
When selecting materials, consider both aesthetics and durability. Wood is a popular choice for mantel construction, offering a wide range of options in terms of species, grain patterns, and finishes. Pine is a cost-effective option that is easy to work with, while hardwoods like oak and maple provide greater durability and resistance to wear and tear. MDF (medium-density fiberboard) is another option that is less expensive than solid wood and can be painted or veneered to achieve the desired look.
The design should also incorporate a method for securing the mantel to the wall. This typically involves using screws or construction adhesive, depending on the weight of the mantel and the type of wall. Ensure that the wall is structurally sound and capable of supporting the weight of the mantel and any decorative items that will be placed on it.
Materials and Tools Required
The specific materials required will depend on the chosen design and construction method. However, the following list provides a general overview of the materials and tools commonly used in creating a faux fireplace mantel:
- Wood or MDF for the mantel shelf
- Wood or MDF for the mantel legs or supports
- Wood glue
- Screws
- Construction adhesive (optional)
- Wood filler
- Sandpaper (various grits)
- Primer
- Paint or stain
- Polyurethane or other sealant (optional)
- Measuring tape
- Pencil
- Square
- Saw (circular saw, miter saw, or hand saw)
- Drill with screwdriver bits
- Clamps
- Sanding block or power sander
- Paintbrushes or rollers
- Safety glasses
- Dust mask
The selection of appropriate safety equipment is paramount. Safety glasses will protect the eyes from debris, while a dust mask will prevent inhalation of sawdust and other airborne particles.
Step-by-Step Construction Process
The construction process can be broken down into several key steps:
- Cutting the Wood: Using the measurements determined during the planning phase, cut the wood or MDF to the required sizes for the mantel shelf and legs or supports. Ensure that the cuts are accurate and square to prevent gaps or misalignments during assembly. A miter saw is particularly useful for making precise angled cuts, which may be required for certain designs.
- Assembling the Mantel: Assemble the mantel shelf and legs or supports using wood glue and screws. Apply wood glue to the joining surfaces and clamp the pieces together until the glue dries. Reinforce the joints with screws, ensuring that the screws are countersunk to prevent them from protruding above the surface. For added stability, consider using pocket screws to join the pieces together from the inside.
- Filling and Sanding: Once the glue has dried, fill any gaps or imperfections with wood filler. Allow the wood filler to dry completely, then sand the entire mantel smooth using sandpaper. Start with a coarse grit sandpaper to remove any major imperfections, then gradually move to finer grits to achieve a smooth, even surface. Sanding should be performed in the direction of the wood grain to avoid scratching the surface.
- Priming and Painting or Staining: Apply a coat of primer to the entire mantel to prepare the surface for painting or staining. Primer helps to improve adhesion and create a uniform finish. Once the primer has dried, apply one or two coats of paint or stain, allowing each coat to dry completely before applying the next. If using stain, apply a sealant such as polyurethane to protect the finish and prevent it from scratching or fading.
- Mounting the Mantel: Locate the wall studs using a stud finder. Mark the location of the studs on the wall. Position the mantel against the wall and align it with the marked stud locations. Secure the mantel to the wall using screws that are long enough to penetrate the wall studs. For added security, consider using construction adhesive in addition to screws. If wall studs are not conveniently located, hollow wall anchors may be required. Follow the manufacturer’s instructions carefully when installing the anchors.
During the assembly process, constantly check for squareness and alignment. Use a square to ensure that corners are at right angles and that the mantel is level. Adjustments may be necessary to ensure a professional-looking result. Taking the time to carefully assemble the mantel will result in a more durable and aesthetically pleasing finished product.
After installation, the faux fireplace mantel can be decorated with various items such as candles, vases, picture frames, and seasonal decorations. The mantel can serve as a central display area, enhancing the ambiance of the room.
Alternative Construction Techniques
While the previous section outlined a typical construction process, several alternative techniques can be employed to create a faux fireplace mantel. These variations may be suitable for individuals with different skill levels or aesthetic preferences.
Using Reclaimed Wood: Reclaimed wood can add a rustic, characterful touch to a faux fireplace mantel. Salvaged barn wood, pallet wood, or driftwood can be used to create a unique and visually appealing mantel. When using reclaimed wood, it is important to thoroughly clean and inspect the wood for any signs of rot, insect infestation, or hazardous materials. Sanding the wood to remove splinters and smooth the surface is also recommended.
Creating a Floating Mantel: A floating mantel appears to be suspended from the wall without any visible supports. This effect can be achieved by using hidden brackets or a reinforced mounting system. Floating mantels are often used in modern or minimalist designs. The construction of a floating mantel requires careful planning and precise execution to ensure that the mantel is securely attached to the wall and can support the weight of any decorative items.
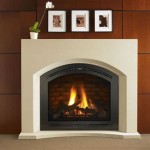
Incorporating Electric Fireplace Inserts: To enhance the realism of a faux fireplace, an electric fireplace insert can be added. Electric fireplace inserts provide the visual effect of a real fire, complete with flickering flames and glowing embers. These inserts typically include a heating element that can provide supplemental heat to the room. When incorporating an electric fireplace insert, the mantel design must be adapted to accommodate the dimensions of the insert. Adequate ventilation should also be provided to prevent overheating.
Using Ready-Made Components: For individuals who prefer a less involved construction process, ready-made mantel shelves and legs can be purchased from home improvement stores. These components can be easily assembled and customized to create a faux fireplace mantel. Using ready-made components can save time and effort, but it may limit the degree of customization that is possible.
The choice of construction technique will depend on the individual's skill level, budget, and desired aesthetic. Regardless of the technique chosen, careful planning and attention to detail are essential for creating a successful faux fireplace mantel.

Easy Diy Faux Fireplace And Mantel Zucchini Sisters

Faux Fireplace Mantel Surround

One Of My Favorite Things To Decorate Is Our Fireplace Mantle I Don T Know What Mantles Were Originally Design Faux Diy

Diy Faux Fireplace And Mantel Complete Tutorial Twelve On Main

Diy Faux Fireplace Mantel From An Old Bed Love Of Family Home

Easy Diy Faux Fireplace And Mantel Zucchini Sisters

Diy Faux Fireplace With Mantel Engineer Your Space

Diy Faux Fireplace For Under 600 The Big Reveal Bless Er House

Diy Faux Fireplace Mantel With Tile And Brick

Faux Fireplace Mantel Surround Rogue Engineer
Related Posts

