DIY Stacked Stone Veneer Fireplace: A Guide to Enhance Your Living Space
A fireplace is a focal point in any living room, adding warmth, ambiance, and visual appeal. While a traditional stone fireplace can be costly and time-consuming to build, stacked stone veneer offers a more affordable and accessible alternative. DIY stacked stone veneer fireplaces provide homeowners with the opportunity to transform their living spaces with the rustic charm and elegance of natural stone, adding a touch of sophistication without breaking the bank. This article will guide you through the process of installing stacked stone veneer on your fireplace, highlighting key steps and considerations.
Planning and Preparation
Before embarking on your DIY project, meticulous planning and preparation are essential. This involves carefully measuring your fireplace, choosing the appropriate materials, and gathering the necessary tools. First, measure the fireplace area, including the width, height, and depth, to determine the amount of stone veneer needed. Consider the size and shape of the stones to ensure they fit seamlessly on the fireplace surface.
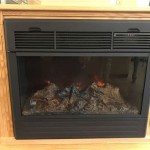
When choosing stacked stone veneer, explore various options, such as natural stone or manufactured alternatives like cultured stone. Natural stone offers a more authentic and unique appearance, while cultured stone provides a more affordable and readily available solution. Select a style and color that complements your existing décor and personal preferences. Consider the weight of the stone veneer, as it will affect the structural integrity of the fireplace. Ensure that the fireplace's structure can support the additional weight.
Gather the essential tools for the project, including a level, measuring tape, pencil, saw, hammer, trowel, mortar mix, safety glasses, and gloves. It's also a good idea to wear appropriate clothing and footwear for protection while working with mortar and stone.
Installation Process
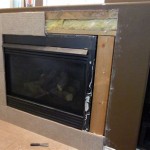
Once you have gathered all the necessary materials and tools, you can begin the installation process. Start by preparing the fireplace surface for the veneer. Ensure that the surface is clean, dry, and free from any loose paint or debris. For smooth surfaces like drywall, apply a layer of thinset mortar with a trowel to create a rough texture for the veneer to adhere to. This will provide better bonding and prevent the veneer from slipping.
Begin laying the stones from the bottom up, starting with the most prominent corner of the fireplace. Apply a thin layer of mortar to the back of each stone and press it firmly against the fireplace surface. Use a level to ensure that each stone is positioned correctly, creating a consistent and aesthetically pleasing pattern. Allow the mortar to dry completely before moving on to the next layer of stones.
As you progress, consider the arrangement and size of the stones to create a visually appealing design. Maintain consistency in the spacing between the stones and use spacers to achieve a uniform look. Apply mortar to the edges of the stones as you go, securing them to adjacent ones. Remember to wear gloves and safety glasses during the installation process to protect your hands and eyes.
Finishing Touches
Once the stone veneer is fully installed and the mortar has dried, you can proceed with the finishing touches. Use a grout float to apply grout between the stones, creating a smooth and consistent finish. Choose a grout color that complements the stone veneer and your overall fireplace design. Allow the grout to dry completely before cleaning excess grout with a damp sponge.
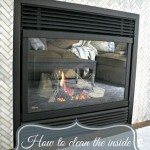
After the grout has dried, you can seal the stone veneer to protect it from moisture and stains. Apply a sealant with a brush or roller, ensuring even coverage. Allow the sealant to dry completely before applying any paint or stains. This will enhance the lifespan of your stone veneer, maintaining its beauty and durability.
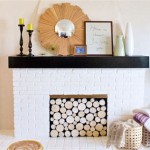
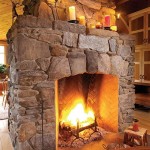
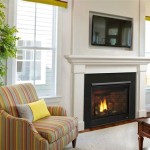
Finally, consider adding decorative accents to your fireplace, such as a mantel, hearth, or fire screen. These elements can further enhance the aesthetic appeal of your fireplace and create a warm and inviting atmosphere in your living space.

Diy Stacked Stone Fireplaces On A Budget Msi Blog

Thin Stone Veneers Make A Fireplace Update Easy Swenson Granite 100 Natural Stones

How To Build An Outdoor Stacked Stone Fireplace

A Step By Diy Stone Veneer Installation On Fireplace In Only 4 Days This Customer To Faux Fireplaces Designs

12 Stacked Stone Fireplace Ideas For Optimal Coziness

Diy Fireplace Design Using Stacked Stone Genstone

Transform Your Space With A Diy Stacked Stone Fireplace

Diy Stacked Stone Fireplace Reveal And How To Thrifty Decor Organizing

Mary S Diy Stone Veneer Fireplace Surround Genstone

Stacked Stone Fireplace Cost Installation Examples Ideas
Related Posts