DIY Refacing a Brick Fireplace with Tile: A Comprehensive Guide
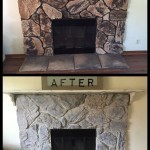
Refacing a brick fireplace with tile offers a transformative way to update a living space, breathing new life into an existing focal point. This do-it-yourself project can dramatically alter the aesthetic appeal of a room for a fraction of the cost of a complete fireplace renovation. Careful planning, proper materials, and diligent execution are key to a successful outcome. This article details the necessary steps, materials, and considerations involved in refacing a brick fireplace with tile.
Planning and Preparation: The Foundation of Success
The initial stage involves careful planning, which includes assessing the existing fireplace structure and choosing the desired tile design. The structural integrity of the existing brick fireplace must be evaluated. Cracks or loose bricks need to be addressed before commencing the refacing process. Any necessary repairs should be completed to ensure a stable and safe surface for tile installation. Neglecting these initial assessments can compromise the integrity and longevity of the tiled fireplace.
Selecting the appropriate tile is crucial. Consider factors like size, material, color, and texture. Porcelain and ceramic tiles are popular choices due to their durability, moisture resistance, and wide variety of styles. Natural stone, such as slate or marble, offers a more luxurious aesthetic but may require more specialized installation techniques. Smaller tiles, like mosaics, can create intricate patterns but necessitate more grout work. The chosen tile should complement the overall design scheme of the room.
Accurate measurements of the fireplace are essential for calculating the quantity of tile needed. It is advisable to purchase at least 10% more tile than the calculated amount to account for cuts, breakage, and potential design adjustments. This buffer helps prevent delays and ensures uniformity in the final product. After obtaining the necessary tiles, gather all required tools and materials. This includes a tile saw (wet saw recommended for precise cuts), notched trowel, thin-set mortar, grout, grout float, sponge, level, measuring tape, pencil, safety glasses, and gloves. A drop cloth should be used to protect the surrounding area from mortar and grout splatters.
The Installation Process: A Step-by-Step Guide
The first step in the installation process is cleaning the brick surface. Remove any dirt, soot, or debris with a wire brush and mild detergent. A pressure washer can be employed for heavily soiled brick, but subsequent drying time must be factored in. This ensures proper adhesion of the thin-set mortar to the brick surface. A clean surface is paramount for optimal bonding.
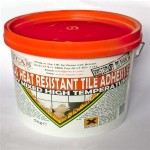
Apply a thin, even layer of thin-set mortar to the brick surface using the flat side of the notched trowel. Then, using the notched side, create ridges in the mortar. These ridges help the tile adhere firmly to the mortar and prevent air pockets. The thin-set mortar should be mixed according to the manufacturer's instructions to achieve the correct consistency. Avoid mixing too much mortar at once, as it can dry out before it is used. A good rule of thumb is to mix only what can be used within 30 minutes.
Carefully position the tiles onto the mortar, pressing them firmly into place. Use tile spacers to ensure uniform grout lines. A level should be used to verify that the tiles are aligned vertically and horizontally. Begin tiling from the bottom up, working in small sections. For tiles that require cutting, measure and mark the tile accurately before using the tile saw. Safety glasses should be worn during the cutting process. Carefully place the cut tiles into position. Allow the thin-set mortar to dry completely according to the manufacturer's instructions, typically 24-48 hours, before proceeding to the next step.
Grouting and Finishing: The Final Touches
Once the thin-set mortar has completely dried, remove the tile spacers. Prepare the grout according to the manufacturer's instructions. The grout should have a consistency similar to that of peanut butter.
Apply the grout liberally to the tile surface using a grout float. Work the grout into the grout lines, ensuring they are completely filled. Hold the grout float at a 45-degree angle and use firm, even pressure. Remove excess grout from the tile surface with the grout float, angling it to scrape off the excess. A damp sponge should be used to clean the tile surface, but avoid wiping away the grout from the grout lines. Rinse the sponge frequently to avoid smearing the grout. After allowing the grout to set for the recommended time, usually 15-30 minutes, use a clean, damp sponge to further clean the tile surface and smooth the grout lines. Several passes with a clean sponge may be necessary to remove all grout residue.
Allow the grout to cure completely, typically 24-72 hours, according to the manufacturer's instructions. Once the grout is cured, apply a grout sealant to protect the grout from stains and moisture. The sealant will also make the grout easier to clean. Follow the manufacturer's instructions for applying the sealant. After the sealant has dried, the refaced fireplace is ready to be enjoyed. Periodically cleaning the tiled surface with a mild detergent will help maintain its appearance and prolong its lifespan.

A Step By Guide To Fireplace Refacing Diy Family Handyman

How To Tile A Brick Fireplace Jenna Kate At Home

How To Tile A Fireplace Even If It S Brick The Handyman Daughter

Diy Fireplace Makeover Wood Slat

A Step By Guide To Fireplace Refacing Diy Family Handyman

Our Transformed Fireplace Before After Reface Diy Update

Er Friendly Fireplace Makeover With L Stick Tiles The Homes I Have Made

Diy Painted Brick Fireplace Makeover On A Budget Before After The Confused Millennial

Brick Fireplace Makeover Pine And Prospect Home

A Step By Guide To Fireplace Refacing Diy Family Handyman
Related Posts