DIY Raised Fireplace Hearth: A Comprehensive Guide
A raised fireplace hearth can dramatically enhance the visual appeal of a living space, adding depth and dimension to a fireplace. Constructing a raised hearth is a manageable DIY project for individuals with basic carpentry skills and a willingness to invest time and effort. This article provides a comprehensive guide to building a durable and aesthetically pleasing raised fireplace hearth.
Before embarking on the construction process, it is imperative to consult local building codes and regulations. Many municipalities have specific requirements regarding fireplace hearth construction, particularly concerning clearances from combustible materials and fire-resistant properties. Failure to comply with these regulations can lead to costly rework and potential safety hazards. Obtain necessary permits prior to commencing the project.
The foundation of a successful raised hearth lies in meticulous planning and accurate measurements. Determine the desired dimensions of the hearth, considering the size of the fireplace opening and the overall proportions of the room. A well-proportioned hearth will complement the fireplace and create a balanced visual aesthetic. Sketch a detailed plan that includes all dimensions and material specifications. This blueprint will serve as a guide throughout the construction process.
Material selection is a critical aspect of hearth construction. The primary considerations are durability, fire resistance, and aesthetic appeal. Common materials include concrete blocks, bricks, natural stone, and manufactured stone veneer. Concrete blocks provide a solid and cost-effective base, while bricks and stone veneer offer a range of textural and color options. Select materials that complement the existing fireplace and surrounding décor. Ensure that all materials used are rated for high-temperature applications.
Framing the Hearth
The initial step in the construction process involves framing the hearth. Construct a sturdy wooden frame using pressure-treated lumber. Pressure-treated lumber is resistant to rot and insect infestation, ensuring the longevity of the hearth. The frame should be built to the exact dimensions specified in the plan. Ensure that the frame is level and square for a professional-looking finish. Secure the frame to the floor using appropriate fasteners, such as concrete anchors or wood screws, depending on the floor material.
Once the frame is assembled, it is necessary to reinforce the structure to support the weight of the chosen facing materials. This can be achieved by adding internal support beams within the frame. The spacing of these beams will depend on the size of the hearth and the weight of the materials. As a rule of thumb, space the beams no more than 16 inches apart. Secure the support beams to the frame using screws or nails.
The next stage involves sheathing the frame with a fire-resistant material, such as cement board. Cement board provides a stable and non-combustible surface for attaching the facing materials. Cut the cement board to fit the frame, ensuring that all edges are flush. Secure the cement board to the frame using cement board screws, spacing them approximately 6 inches apart. Ensure that the screws are countersunk to avoid protruding surfaces that could interfere with the installation of the facing materials.
Installing the Facing Material
The installation of the facing material is where the aesthetic appeal of the hearth truly emerges. Begin by preparing the surface of the cement board. Apply a thin layer of mortar to the surface, using a notched trowel to create ridges. The notching provides a better bond between the mortar and the facing material. Choose a mortar specifically designed for use with the chosen facing material.
Carefully position the facing materials, such as bricks or stone veneer, onto the mortar bed. Work in small sections to ensure that the mortar remains workable. Use spacers to maintain uniform gaps between the facing materials. The width of the gaps will depend on the desired aesthetic. A narrow gap creates a more contemporary look, while a wider gap provides a more rustic appearance. Ensure that the facing materials are level and plumb.
Once the facing materials are in place, allow the mortar to cure for the recommended time period, as specified by the manufacturer. Avoid disturbing the hearth during the curing process. After the mortar has cured, remove the spacers and apply grout to fill the gaps between the facing materials. Select a grout color that complements the facing materials. Use a grout float to press the grout into the gaps, ensuring that they are completely filled. Wipe away excess grout with a damp sponge.
Finishing Touches
After the grout has dried, apply a sealant to protect the hearth from moisture and stains. Select a sealant that is specifically designed for use with the chosen facing material. Apply the sealant according to the manufacturer's instructions. Allow the sealant to dry completely before using the fireplace. Applying a sealant will increase the lifespan of the hearth and make it easier to clean.
Consider adding decorative elements to enhance the visual appeal of the hearth. These elements could include a decorative tile border, metal accents, or a mantelpiece. Choose elements that complement the overall design of the room. Secure the decorative elements using construction adhesive or screws. Ensure that the decorative elements are fire-resistant.
Finally, inspect the hearth for any defects or imperfections. Repair any cracks or chips in the facing materials or grout. Ensure that all surfaces are clean and free of debris. A well-maintained hearth will provide years of enjoyment and enhance the aesthetic appeal of the living space. Regular cleaning and maintenance will ensure the longevity of the hearth.

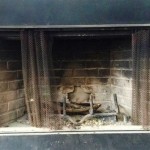
Diy Fireplace Hearth And Stacked Stone Wall Tile Newlywoodwards

Is Your Fireplace Dated And In Need Of A Refresh Check Out This Makeover The Before Aft Diy Build Home

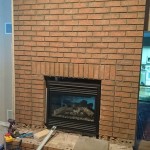
Diy Fireplace Makeover At Home With The Barkers

Diy Fireplace Hearth And Stacked Stone Wall Tile Newlywoodwards

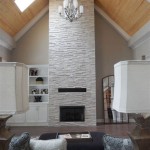
Our New Diy Raised Electric Fireplace Hearth With Stone

Is Your Fireplace Dated And In Need Of A Makeover Check Out This Easy To Follow Diy Tutorial On How Build Remodel

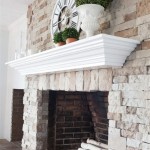
Diy Fireplace Mantel And Hearth Makeover Fox Hollow Cottage

Diy Fireplace Makeover At Home With The Barkers

Pin On Fireplace

How To Tile Over A Brick Hearth Shine Your Light
Related Posts