DIY Painted Fireplace Insert: A Comprehensive Guide
The fireplace, traditionally a focal point of the home, often undergoes transformations to reflect evolving aesthetics and functional needs. Fireplace inserts, particularly older or outdated models, may not always align with contemporary design preferences. While a full replacement can be costly and disruptive, a DIY painted fireplace insert presents a viable and budget-friendly alternative. This article provides a comprehensive guide to painting a fireplace insert, covering preparation, paint selection, application techniques, and essential safety considerations.
Understanding Fireplace Insert Types and Materials
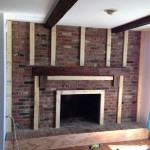
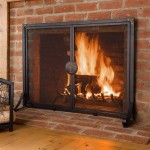
Before embarking on a painting project, it is crucial to identify the type of fireplace insert and the materials it comprises. Common fireplace inserts are constructed from cast iron, steel, brick, or a combination thereof. Each material exhibits unique properties that influence paint adhesion and heat resistance requirements. Cast iron, known for its durability and heat retention, often features intricate designs. Steel inserts offer a lighter weight option and are generally more resistant to corrosion. Brick inserts, while providing a rustic charm, can be porous and require specialized primers to ensure proper paint adherence. Identifying the primary material of the insert is essential for selecting the appropriate type of paint and primer.
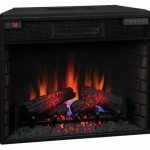
Different types of fireplace inserts exist, including wood-burning, gas, and electric models. While the exterior of any insert can be painted, special care must be taken with wood-burning and gas inserts, as high heat conditions can affect paint durability and potentially release harmful fumes. Electric inserts, which typically generate less heat on their exterior surfaces, may offer a wider range of paint options. It is imperative to consult the manufacturer's instructions for specific recommendations regarding painting the insert, particularly if it is a gas or wood-burning unit.
Furthermore, consider any existing finishes on the insert. Previous paint layers, rust, or soot buildup can impede paint adhesion and compromise the final result. Thoroughly evaluating the existing surface condition is a vital step in the preparation process.
Essential Preparation Steps for a Successful Paint Job
Proper preparation is paramount for achieving a durable and aesthetically pleasing finish on a fireplace insert. Neglecting these steps can lead to paint peeling, blistering, or uneven coverage. The preparation process involves cleaning, repairing, and priming the surface to ensure optimal paint adhesion.
The first step is a thorough cleaning. Remove any loose debris, soot, or rust using a wire brush, scraper, or sandpaper. For heavily soiled surfaces, a degreasing cleaner specifically designed for fireplace inserts may be necessary. Follow the manufacturer's instructions for dilution and application, ensuring that the cleaner is thoroughly rinsed and the surface is completely dry before proceeding.
Repair any imperfections in the surface. Cracks, chips, or dents can detract from the overall appearance of the painted insert. Use a high-temperature epoxy filler specifically designed for use on metal or masonry surfaces. Apply the filler according to the manufacturer's instructions, allowing it to dry completely before sanding smooth. For brick inserts, mortar repair may be necessary to fill any gaps or crumbling areas.
Priming is a critical step in preparing the surface for paint. A high-temperature primer formulated for the specific material of the insert (cast iron, steel, or brick) is essential. The primer provides a uniform surface for the paint to adhere to, improving its durability and longevity. Apply the primer in thin, even coats using a brush, roller, or spray gun, following the manufacturer's recommendations for drying time. Ensure the primer is fully cured before applying the topcoat.
Masking is another crucial preparation step. Use painter's tape and drop cloths to protect surrounding surfaces, such as the fireplace surround, walls, and flooring, from overspray or accidental paint splatters. Pay particular attention to masking off any glass doors or intricate details that you do not wish to paint.
Selecting the Right Paint and Application Techniques
Choosing the appropriate paint is essential for achieving a durable and aesthetically pleasing finish on a fireplace insert. High-temperature paint, specifically formulated for use on stoves, grills, and other heat-exposed surfaces, is the only suitable option. These paints are designed to withstand high temperatures without blistering, peeling, or releasing harmful fumes. Common types of high-temperature paint include aerosol spray paints and brush-on paints.
Aerosol spray paints offer ease of application and a smooth, even finish. They are particularly well-suited for intricate designs and hard-to-reach areas. However, they require careful masking and ventilation to prevent overspray from contaminating surrounding surfaces. Brush-on paints provide greater control over paint application and are ideal for larger, flat surfaces. They may require multiple coats to achieve optimal coverage.
When selecting a paint color, consider the overall aesthetic of the room and the desired effect. Dark colors tend to absorb more heat, while lighter colors reflect it. Matte finishes offer a subtle, understated look, while gloss finishes provide a more reflective and dramatic appearance. It is advisable to test a small, inconspicuous area with the chosen paint color to ensure it meets expectations before applying it to the entire insert.
Proper application techniques are crucial for achieving a professional-looking finish. Whether using aerosol spray paint or brush-on paint, apply thin, even coats, allowing each coat to dry completely before applying the next. Avoid applying thick coats, as this can lead to drips, runs, and uneven drying. Follow the manufacturer's instructions for drying time and curing time.
For aerosol spray paint, hold the can approximately 10-12 inches from the surface and move it in a steady, back-and-forth motion. Overlap each pass slightly to ensure complete coverage. For brush-on paint, use a high-quality brush designed for the specific type of paint. Apply the paint in long, smooth strokes, following the grain of the material. Avoid overloading the brush with paint, as this can lead to drips and runs.
After applying the final coat of paint, allow it to cure completely before exposing the insert to heat. Curing involves allowing the paint to fully harden and bond to the surface. The manufacturer's instructions will specify the recommended curing time, which can range from several hours to several days. During the curing process, avoid touching or scratching the painted surface.
For gas or wood-burning inserts, a burn-off period may be required after painting. This involves gradually increasing the heat output of the insert over a period of several hours to allow any residual solvents to evaporate. Consult the manufacturer's instructions for specific recommendations regarding the burn-off procedure.
Safety Precautions and Considerations
Painting a fireplace insert involves working with potentially hazardous materials and tools. It is essential to prioritize safety throughout the entire process. Wear appropriate personal protective equipment (PPE), including safety glasses, gloves, and a respirator, to protect yourself from paint fumes and dust.
Work in a well-ventilated area to prevent the buildup of harmful fumes. Open windows and doors to provide adequate airflow. If working indoors, use a fan to circulate air and exhaust fumes to the outside. Avoid painting in enclosed spaces with limited ventilation.
Follow the manufacturer's instructions for all paints, primers, cleaners, and fillers. Pay particular attention to warnings and precautions regarding flammability, toxicity, and disposal. Store all materials in a safe place, away from heat, sparks, and open flames.
When sanding or scraping surfaces, wear a dust mask to protect yourself from inhaling dust particles. Use a vacuum cleaner with a HEPA filter to clean up dust and debris. Dispose of used sandpaper, rags, and other materials properly.
If working with a gas or wood-burning insert, ensure that the gas supply is turned off and the insert is completely cool before beginning any work. Disconnect the insert from the gas line or flue if necessary. Have a qualified technician inspect the insert after painting to ensure that it is functioning properly and safely.

How To Spray Paint A Brass Fireplace Insert Erfly House

How To Spray Paint A Brass Fireplace Insert Erfly House

How To Spray Paint A Brass Fireplace Insert Inserts Diy Projects Improve Your Home

How To Spray Paint A Brass Fireplace Insert Erfly House

How To Update Brass Fireplace Insert With Spray Paint Iekel Road Home

How To Spray Paint A Brass Fireplace Insert Erfly House

Painted Fireplace Insert Step By Tutorial Prodigal Pieces

Brass Fireplace Makeover With Spray Paint Make Sure You Use The Right Give Diy

How To Paint Metal Fireplace Surround Four Generations One Roof

Diy Fireplace With Electric Insert Angela Marie Made
Related Posts