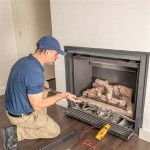
DIY Fireplace Stone Work: Adding Rustic Charm and Value to Your Home
A fireplace is a focal point in any home, providing warmth and ambiance to the space. A DIY fireplace stonework project can transform a plain fireplace into a stunning and unique feature. With the right materials and a little effort, you can add rustic charm and significant value to your home. This article explores the key aspects of DIY fireplace stonework, offering guidance on selecting the right material, preparing the surface, and installing the stones.
Choosing the Perfect Stone
The first step in your DIY fireplace stonework project is selecting the ideal stone. Several options cater to different aesthetics and budgets. Some of the most popular choices include:
- Fieldstone: These naturally occurring stones offer a rustic and organic look. Each stone is unique, adding character and charm to your fireplace.
- Flagstone: Known for their flat, rectangular shape, flagstones offer a more refined and modern look. They are available in various sizes and colors, providing flexibility in design.
- Slate: This durable and weather-resistant stone comes in various colors and textures, making it a popular choice for fireplaces. Its natural cleavage provides a distinctive, layered appearance.
- Brick: A traditional choice, brick offers a classic and timeless look. Bricks are readily available in a wide range of colors and styles, allowing you to tailor your fireplace to your preferences.
Consider the style of your home and the overall aesthetic you want to achieve. If you prefer a rustic cabin-style fireplace, fieldstone might be the optimal choice. For a modern and minimalist look, flagstone would complement your design. Ultimately, the selection of the stone depends on your personal taste and vision.
Preparing the Surface for Stonework
Once you've chosen your stone, you need to prepare the fireplace surface for installation. This step is crucial for a clean and durable finish. Follow these steps:
- Clean the Existing Surface: Thoroughly remove any dirt, debris, or loose paint from the existing fireplace surface. Use a wire brush or scraper to remove any stubborn residues. This ensures a solid foundation for the stonework.
- Repair Any Damage: Repair any cracks or damaged areas on the existing surface before proceeding. Use a patching compound or mortar to fill in the gaps and create a smooth, even surface for stone installation.
- Apply a Waterproofing Primer: Apply a layer of waterproofing primer to the fireplace surface. This layer protects the surface from moisture and prevents mold and mildew growth behind the stonework.
- Install a Firebox Liner or Hearth: Install a firebox liner or hearth if necessary. These components provide safety and protection for your fireplace. A firebox liner prevents heat damage to the surrounding walls, while a hearth protects your flooring from sparks and embers.
Completing these steps ensures a smooth and even surface for the stonework, preventing issues like uneven surfaces, cracks, and moisture problems.
Installing the Stone
The final step in your DIY fireplace stonework project is installing the stone. This process involves several steps, each requiring careful attention to detail:
- Mark the Stone Layout: Plan the layout of your stones on the fireplace surface. Use tape or markers to outline the desired arrangement. Consider the shape and size of the stones, ensuring a balanced and aesthetically pleasing design.
- Apply Mortar: Apply a thin layer of mortar to the fireplace surface, ensuring it's evenly distributed. Use a trowel to spread the mortar, leaving a smooth and consistent layer for the stone installation.
- Install the Stones: Start from the bottom of the fireplace and work your way upward. Carefully place the stones onto the mortar layer, using a level to ensure they are straight and secure. Leave small gaps between the stones for grout application.
- Allow the Mortar to Cure: Let the mortar cure completely before proceeding to the next step. This process typically takes 24-48 hours, depending on the type of mortar used and the environmental conditions.
- Apply Grout: Once the mortar has cured, apply grout to the gaps between the stones. Use a grout float to spread the grout evenly, wiping away excess material with a damp sponge. Allow the grout to cure completely before using the fireplace.
Installing the stone requires patience and attention to detail. Take your time and ensure proper alignment and support for each stone. Remember, this is a long-term project, and investing time to achieve a quality finish will pay off in the long run.
By following these steps, you can create a stunning fireplace that enhances the beauty and value of your home. Remember to consult with a professional if you are unsure of any aspect of the project. Proper planning and execution will ensure a safe and satisfying outcome for your DIY fireplace stonework project.

Thin Stone Veneers Make A Fireplace Update Easy Swenson Granite 100 Natural Stones

Diy Whitewashed Stone Fireplace Makeover The Nook On 32

Hirondelle Rustique Diy Stacked Stone Fireplace First Remodeling Project Part 2 Fireplaces Brick Makeover Remodel

Diy Painted Stone Fireplace Refresh Live Edge Mantle Lemon Thistle

How To Install A Stone Veneer Fireplace Shoe Makes New

How To Build An Outdoor Stacked Stone Fireplace

How To Build A Diy Stone Fireplace Hometalk

Diy Faux Stone Fireplace Chimney H2obungalow

See How I Made Over An Ugly Clunky Stone Veneer Fireplace With Paint

Stone Fireplace Makeover Taryn Whiteaker Designs


