DIY Fireplace Mantel Kits: An Essential Guide
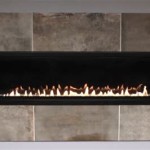
A fireplace mantel is the decorative framework that surrounds your fireplace opening. It not only adds a stylish touch to your living space but also serves as a functional element by concealing any unsightly gaps or imperfections around the firebox. For DIY enthusiasts, installing a fireplace mantel kit can be a rewarding and cost-efficient project.
Components of a DIY Fireplace Mantel Kit
DIY fireplace mantel kits typically include pre-cut and pre-shaped components that make assembly a breeze. The main components include:
- Mantle Shelf: The horizontal piece that forms the top of the mantel.
- Legs or Supports: Vertical pieces that support the mantel shelf.
- Corbels or Brackets: Decorative elements that support the mantel shelf and add visual interest.
- Hardware: Nails, screws, and other fasteners.
Choosing the Right Mantel Kit
When selecting a DIY fireplace mantel kit, consider the following factors:
- Fireplace Size: Ensure the kit is compatible with the dimensions of your fireplace opening.
- Style: Choose a style that complements your décor and personal taste.
- Material: Fireplace mantel kits are available in various materials such as wood, stone, marble, and composite. Consider factors like durability, maintenance, and budget.
- Ease of Assembly: Look for kits that offer clear instructions and minimal assembly time.
Step-by-Step Installation Guide
Installing a DIY fireplace mantel kit is a straightforward process. Follow these steps:
- Clean the Fireplace Opening: Remove any dust, debris, or old mortar from the fireplace opening.
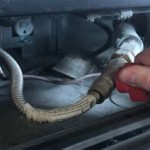
- Mark the Studs: Use a stud finder to locate the studs in the wall behind the fireplace opening. These will provide support for the mantel.
- Attach the Legs: Position the mantel legs on the sides of the fireplace opening, ensuring they are level and secure them to the studs.
- Mount the Corbels: Install any decorative corbels or brackets below the mantel shelf to provide additional support and visual appeal.
- Place the Mantel Shelf: Carefully lift the mantel shelf onto the legs and corbels, ensuring it is centered and level.
- Secure the Mantel: Use the included hardware to secure the mantel shelf to the legs and corbels.
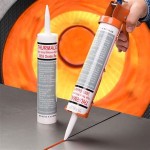
- Caulk and Touch Up: Fill any gaps or joints with caulk and touch up any nicks or scratches with paint or stain.
- Measure twice, cut once to avoid costly mistakes.
- Use a level to ensure all components are straight and plumb.
- Tighten all screws and nails securely, but avoid over-tightening.
- Allow adequate curing time for any adhesives or caulk used.
- If you encounter any difficulties, don't hesitate to consult a professional.
Tips for a Successful Installation
Here are a few tips to ensure a successful DIY fireplace mantel installation:
With careful planning and attention to detail, you can achieve a stunning fireplace mantel that enhances the beauty and warmth of your home.

Shaker Fireplace Surround Build Kit Free How You Can Make It

Faux Fireplace Mantel Surround
:max_bytes(150000):strip_icc()/sandandsisal-bdc76ad938a44d28ae9e23ef6c9fa331.jpg?strip=all "17 Diy Fireplace Mantel Plans")
17 Diy Fireplace Mantel Plans

Diy Fireplace Mantel And Surround Jenna Kate At Home

Diy Fireplace Surround Plans Mantel Kits Kit

Diy Rustic Fireplace Mantel The Cure For A Boring

How To Build A Fireplace Mantel In Only 5 Steps

Faux Fireplace Mantel Surround

Diy Fireplace Mantel Kits Custom Design Rustic Mantels

Building An Easy Modern Fireplace Mantel Young House Love
Related Posts