DIY Fireplace Candelabra: A Guide to Creating Rustic Elegance
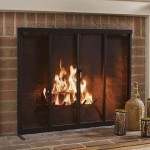
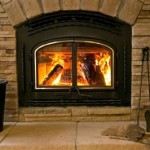
A fireplace, often the focal point of a living space, exudes warmth and comfort. While traditional wood-burning fireplaces offer a nostalgic charm, many modern homes feature gas or electric models, or even non-functional fireplaces purely for aesthetic purposes. Regardless of the fireplace's operational status, a decorative candelabra placed within its opening can transform the area into a captivating visual display, imbuing the room with a sense of rustic elegance and ambient light.
Crafting a DIY fireplace candelabra provides a cost-effective and personalized alternative to purchasing pre-made options. It allows for the selection of materials, dimensions, and styles perfectly suited to the individual's taste and the existing décor of the room. This project can range from simple and minimalist designs to more elaborate and intricate creations, offering a wide range of creative possibilities for both novice and experienced DIY enthusiasts.
The construction of a fireplace candelabra involves several crucial steps: planning the design, gathering the necessary materials, assembling the structure, and finishing the piece to achieve the desired aesthetic. Each step requires careful consideration and attention to detail to ensure both the visual appeal and the safety of the finished product. The following sections will delve into each of these stages, providing a comprehensive guide to building a stunning and safe DIY fireplace candelabra.
Planning and Design Considerations
The initial stage of any DIY project is planning. This involves conceptualizing the desired appearance of the candelabra and translating that vision into a practical design. Several factors should be considered during this phase, including the size and style of the fireplace opening, the desired number of candles, the overall aesthetic of the room, and the materials that will be used.
Accurately measuring the fireplace opening is paramount. The candelabra should fit comfortably within the space without being cramped or appearing lost within the larger framework. Consider the height, width, and depth of the opening to determine the maximum dimensions of the candelabra. It's generally advisable to leave a small margin of space on each side for ease of placement and removal.
The style of the candelabra should complement the existing décor of the room. A rustic, farmhouse-style room might benefit from a candelabra crafted from reclaimed wood or wrought iron, while a more contemporary space might call for a sleek, minimalist design using metal or polished stone. Consider the color palette and textures of the room to ensure the candelabra blends seamlessly into the overall design scheme.
The number of candles desired will influence the size and structure of the candelabra. A larger number of candles will require a more robust and stable base to prevent tipping or wobbling. Consider the spacing between the candles to allow for adequate airflow and prevent overheating. The height of the candle holders should also be considered to ensure a visually balanced and aesthetically pleasing arrangement.
Sketching the design on paper or using a digital design tool can be helpful in visualizing the finished product. This allows for experimentation with different shapes, sizes, and arrangements before committing to the final design. The sketch should include accurate measurements and details of the materials to be used.
Materials and Tools Required
The choice of materials will significantly impact the overall appearance and durability of the fireplace candelabra. Several options are available, each with its own unique characteristics and aesthetic appeal. Common materials include wood, metal, stone, and glass. The selection should be based on the desired style, budget, and skill level of the DIYer.
Wood offers a warm and rustic aesthetic and is relatively easy to work with. Reclaimed wood can add character and charm to the candelabra, while new wood can be stained or painted to match the existing décor. Metal provides a sleek and modern look and is known for its durability and stability. Wrought iron is a popular choice for rustic or traditional designs, while stainless steel or aluminum can be used for more contemporary looks. Stone, such as slate or marble, adds a touch of elegance and sophistication to the candelabra. However, stone can be more challenging to work with and may require specialized tools.
In addition to the primary materials, several other components will be needed, including candle holders, screws, nails, glue, and finishing products. The type of candle holders will depend on the size and type of candles to be used. Votive candle holders, pillar candle holders, and taper candle holders are all common options. The fasteners used to assemble the candelabra should be appropriate for the materials being joined. Wood screws are suitable for wood projects, while metal screws or welding may be required for metal projects. Glue can provide additional strength and stability to the joints.
A range of tools will be necessary to cut, shape, and assemble the materials. These tools may include a saw, drill, screwdriver, hammer, measuring tape, level, and safety glasses. A power drill with various drill bits is essential for creating holes for screws and other fasteners. A saw, such as a circular saw or jigsaw, will be needed to cut the materials to the desired size and shape. Safety glasses should always be worn to protect the eyes from debris.
Assembly and Finishing Techniques
Once the materials have been gathered and the design has been finalized, the assembly process can begin. This involves cutting, shaping, and joining the various components to create the candelabra structure. The specific steps involved will depend on the design and materials being used, but some general guidelines can be followed.
Start by cutting the materials to the appropriate size and shape according to the design plan. Use a saw to cut wood or metal to the desired dimensions. Ensure the cuts are accurate and clean to create a professional-looking finish. Any rough edges should be sanded or filed down to prevent splinters or sharp points.
Next, assemble the base of the candelabra. This will provide a stable foundation for the candle holders. Use screws, nails, or glue to join the various components of the base. Ensure the base is level and sturdy to prevent tipping or wobbling. A level can be used to check the alignment of the base.
Attach the candle holders to the base. The method of attachment will depend on the type of candle holders being used. Some candle holders may be screwed directly to the base, while others may require the use of glue or other fasteners. Ensure the candle holders are securely attached to the base to prevent them from falling off.
Once the candelabra has been assembled, the finishing process can begin. This involves sanding, painting, staining, or otherwise treating the surface to achieve the desired aesthetic. Sanding the surface smooths out any rough edges or imperfections. Paint or stain can be applied to protect the materials from the elements and to enhance their appearance. A clear coat of varnish or sealant can be applied to protect the finish and to provide a durable and long-lasting surface.
Consider safety precautions when using power tools and finishing products. Always wear safety glasses to protect the eyes from debris. Work in a well-ventilated area when using paints, stains, or varnishes. Follow the manufacturer's instructions for the safe use and disposal of these products.
By following these guidelines, individuals can create a stunning and safe DIY fireplace candelabra that will add a touch of rustic elegance to their living space. The project offers a rewarding opportunity to express creativity and to personalize the home décor. The resulting candelabra will serve as a unique and eye-catching focal point, enhancing the ambiance and warmth of the room.
Furthermore, consider the type of candles you intend to use. Real flame candles require careful monitoring and should never be left unattended. Battery-operated LED candles offer a safer alternative and can be used to create a similar ambiance without the risk of fire or smoke. Choose candles that are appropriately sized for the candle holders and that complement the overall design of the candelabra.
The longevity of the finished piece will also depend on the quality of the materials utilized in the construction process. Investing in high-quality wood, metal, or stone will ensure that the candelabra remains a visually appealing and functional addition to the fireplace for years to come. Regular cleaning and maintenance, such as dusting and polishing, will further enhance the longevity and preserve the aesthetic appeal of the candelabra.

20 Simple Ways To Decorate A Fireplace Mantle With Flameless Candles

20 Simple Ways To Decorate A Fireplace Mantle With Flameless Candles

20 Simple Ways To Decorate A Fireplace Mantle With Flameless Candles

20 Simple Ways To Decorate A Fireplace Mantle With Flameless Candles

47 Adorable Fireplace Candle Displays For Any Interior Digsdigs

Fireplace Friendly Diy Candle Holders From Home Made Simple

68 Ways To Style A Fireplace With Candles Or Lights Shelterness

Fireplace Candle Ideas To Create A Cozy Space 30 Photos Decoist

Best Tiered Candle Holders For In Fireplace Junkies
:max_bytes(150000):strip_icc()/274180013_110601951552506_404252035821797329_n-95357e7b617d405ea6e070aa8d75c5b9-c537546fd2b94a70a83ac5ed32069e32.jpg?strip=all "24 Ideas For Putting Candles In A Fireplace")
24 Ideas For Putting Candles In A Fireplace
Related Posts