DIY Built-In Bookcase Next to Fireplace: A Comprehensive Guide
A built-in bookcase flanking a fireplace provides a focal point for a living space, blending aesthetic appeal with functional storage. The project, while demanding, is achievable for a determined do-it-yourselfer with intermediate carpentry skills. Proper planning and execution are essential for a successful outcome that complements both the fireplace and the overall room design. This article will guide a reader through the key aspects of designing and building a custom bookcase adjacent to a fireplace.
Planning and Design Considerations
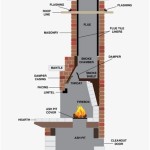
Before initiating any construction, meticulous planning is paramount. Accurate measurements of the space, including the height, width, and depth of the area beside the fireplace, are critical. Verify that the space is truly square using a framing square, as discrepancies may require adjustments to the bookcase design. Furthermore, it's crucial to understand local building codes regarding clearances around fireplaces and combustibles. These codes often dictate minimum distances between wood structures and the fireplace opening, chimney, or any components that generate heat. Consultation with local building inspectors can prevent potential fire hazards and ensure compliance.
Design considerations should encompass not only the aesthetics but also the functionality of the bookcase. Determine the desired number of shelves, their adjustability, and the overall style – whether it's a traditional design with raised panels and crown molding or a more contemporary minimalist approach. Consider the type of items to be stored. Books typically require less shelf depth than larger decorative objects. Integrating lighting, such as recessed lights in the top of the bookcase or LED strip lighting behind the shelves, can enhance the visual appeal and functionality.
Material selection is another critical aspect of the planning phase. Options range from solid hardwood (e.g., oak, maple, cherry) to plywood with a hardwood veneer. Solid hardwood offers durability and a rich appearance but is generally more expensive. Plywood with a veneer provides a more cost-effective alternative while still offering a pleasing aesthetic when properly finished. Consider the existing trim and millwork in the room when selecting materials to ensure a cohesive design. MDF (Medium Density Fiberboard) is also a common choice for painted bookcases as it provides a smooth, paintable surface.
Sketching the design, either by hand or using computer-aided design (CAD) software, can help visualize the finished product and identify potential issues before construction begins. Include detailed dimensions, shelf spacing, and trim details in the drawings. Consider creating a 3D model to assess the bookcase's appearance from different angles and perspectives. A well-defined plan will serve as a roadmap throughout the project, minimizing errors and ensuring a satisfactory result.
Construction Techniques and Procedures
Once the design is finalized, gather the necessary tools and materials. Essential tools include a table saw, miter saw, router, drill/driver, nail gun, level, measuring tape, and clamps. Safety equipment, such as safety glasses and hearing protection, should always be worn. Ensure the work area is well-ventilated, especially when working with paints, stains, or adhesives.
The construction process typically begins with building the bookcase frame. This usually consists of a base, sides, top, and a back panel. The base can be constructed from solid wood or plywood and should be sturdy enough to support the weight of the bookcase and its contents. The sides are typically constructed from plywood with a hardwood veneer or solid wood, depending on the design and budget. Ensure the sides are perfectly square using the framing square, as any deviation will affect the overall appearance of the bookcase.
The top of the bookcase can be constructed similarly to the sides. The back panel can be made from plywood or MDF and serves to add structural rigidity and create a clean backdrop for the shelves. Secure the back panel to the frame using nails or screws. The joints between the frame components can be reinforced with wood glue and screws or nails. Clamping the pieces together while the glue dries ensures a strong and durable bond.
Installing the shelves is a critical step. Adjustable shelves offer flexibility in accommodating items of different sizes. Adjustable shelves can be supported by shelf pins inserted into pre-drilled holes on the sides of the bookcase. A shelf-pin drilling jig can help ensure that the holes are evenly spaced and aligned. Alternatively, fixed shelves can be secured to the sides of the bookcase using wood glue and screws or nails. Ensure the shelves are level before securing them in place.
Adding trim and molding enhances the bookcase's aesthetic appeal. Crown molding can be installed at the top to create a more elaborate look. Base molding can be added at the bottom to match the existing trim in the room. Face frames, which are decorative frames that cover the exposed edges of the plywood, can also be added to create a more finished appearance. The trim can be attached using nails and wood glue. Miter cuts are typically required for installing trim at corners, so a miter saw is essential.
Installation and Finishing
Installing the built-in bookcase requires careful preparation and execution. Before moving the bookcase into place, ensure that the area next to the fireplace is clean and clear of obstructions. The flooring should be level. If the floor is uneven, shims can be used to level the bookcase. Carefully slide the bookcase into place next to the fireplace. Ensure that it is aligned properly and that there is adequate clearance between the bookcase and the fireplace, as required by local building codes.
Securing the bookcase to the wall is crucial for stability and safety. Locate the wall studs using a stud finder and mark their locations on the back of the bookcase. Use screws to attach the bookcase to the wall studs. This will prevent the bookcase from tipping over, especially if it is heavily loaded with books or other items. For added security, consider using L-brackets to attach the bookcase to the wall. These brackets can be installed on the sides of the bookcase and then screwed into the wall studs. Cover the screw heads with wood putty for a seamless appearance.
Finishing the bookcase is the final step in the project. This involves sanding, priming, and painting or staining the wood. Begin by sanding all surfaces of the bookcase to create a smooth base for the finish. Use a fine-grit sandpaper (e.g., 220-grit) for the final sanding. Remove all sanding dust with a tack cloth before applying primer.
Apply a coat of primer to the bookcase. Primer seals the wood and provides a better surface for the paint or stain to adhere to. Use a high-quality primer that is suitable for the type of wood and the type of finish that will be applied. Allow the primer to dry completely before proceeding to the next step.
If painting the bookcase, apply two coats of paint, allowing each coat to dry completely before applying the next. Use a high-quality paint that is suitable for interior woodwork. If staining the bookcase, apply the stain according to the manufacturer's instructions. Use a brush or a rag to apply the stain evenly. Allow the stain to soak into the wood for the desired amount of time, then wipe off any excess stain. Apply a clear coat of varnish or polyurethane to protect the stain and enhance the wood's natural beauty. Several coats may be desired depending on the look.
After the paint or stain has dried, install the shelves and any other accessories, such as lighting or hardware. Carefully place the shelves on the shelf pins or secure them to the sides of the bookcase using screws or nails. Connect any electrical wiring for the lighting, ensuring that all connections are secure and comply with local electrical codes. Finally, stand back and admire the finished product. A well-built and properly finished built-in bookcase next to a fireplace can significantly enhance the aesthetic appeal and functionality of any living space.

White Built In Bookshelves Around The Fireplace Green With Decor

Diy Built In Bookshelves From Billy Bookcases With Fireplace Thrifty And Chic

How To Build Easy Custom Built In Shelving Basic
:max_bytes(150000):strip_icc()/freeandunfettered-24c0b3d4e3a5492fbf4cb5325c0de5ac.jpg?strip=all)
How To Make Diy Built In Bookshelves 20 Ideas Tutorials

White Built In Bookshelves Around The Fireplace Green With Decor

Diy Built In Cabinets Around The Fireplace Part 2 Honeybear Lane

Diy Built Ins Cabinets Designing In For The Johnson Files

How To Build Fireplace Built Ins From Bookcases

My Big Finish Diy Fireplace Built Ins

Reader Question How Can I Build Symmetrical Bookcases Around This Fireplace Addicted 2 Decorating

