Building an Electric Fireplace Into a Wall: A Comprehensive Guide
Integrating an electric fireplace into a wall offers a sophisticated and space-saving design solution for modern homes. Unlike traditional fireplaces, electric models require no venting, reducing installation complexity. This article provides a detailed overview of the process, encompassing planning, preparation, installation, and finishing, suitable for homeowners and contractors alike.
Before embarking on the project, it is crucial to understand the key advantages of electric fireplaces. They offer ease of installation, requiring only a standard electrical outlet. They are energy-efficient, providing supplemental heat only when needed. They are also aesthetically versatile, available in various styles and sizes to complement diverse interior designs. Furthermore, electric fireplaces present a safer alternative to wood-burning options, eliminating the risks associated with open flames and emissions.
Key Point 1: Planning and Preparation
The initial phase of building an electric fireplace into a wall involves meticulous planning. This step dictates the success and safety of the entire project. Critical aspects include selecting the appropriate fireplace unit, assessing the wall structure, and ensuring adequate electrical capacity.
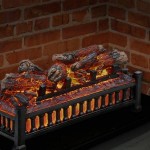
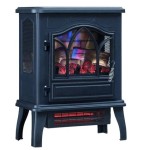
Choosing the Right Electric Fireplace: Electric fireplaces are not created equal. Consider the size of the room you intend to heat. Larger rooms require models with higher BTU (British Thermal Units) output. Investigate different flame effects, heat settings, and control options such as remote control or thermostat adjustability. Also, verify the fireplace's dimensions to ensure it fits seamlessly within the intended wall opening. Recessed fireplaces designed specifically for in-wall installation are generally the most suitable choice.
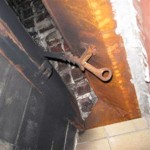
Assessing the Wall Structure: The wall’s composition (drywall, plaster, or brick) will influence the installation method. Determine if the wall is load-bearing. If it is, consult with a structural engineer before making any modifications. Locate studs and any existing wiring or plumbing within the wall cavity. Use a stud finder to accurately identify the stud locations. Photograph the areas behind the wall before commencing any work. Obstructions must be addressed before creating the opening.
Ensuring Adequate Electrical Capacity: Electric fireplaces require a dedicated circuit. Overloading a circuit can lead to electrical hazards. Examine the electrical panel to determine the available amperage and whether a new circuit is necessary. Consult with a qualified electrician to ensure the electrical system can safely handle the fireplace's power requirements. A dedicated 15-amp or 20-amp circuit is generally recommended. The electrician should also install any required outlets or wiring according to local electrical codes.
Gathering Necessary Tools and Materials: Assemble all the required tools and materials before beginning the installation process. These commonly include: a stud finder, level, measuring tape, drywall saw or reciprocating saw (depending on the wall material), drill with appropriate drill bits, screwdriver, safety glasses, dust mask, wiring strippers, wire connectors, electrical tape, drywall screws, joint compound, sandpaper, paint primer, and paint. The specific materials may vary depending on the chosen finishing method. It's wise to have extra materials on hand to accommodate unexpected issues.
Key Point 2: Installation Process
The installation process involves creating the opening in the wall, running electrical wiring, mounting the fireplace unit, and connecting the electrical components. Precision and adherence to safety guidelines are essential throughout this phase.
Creating the Wall Opening: Once the planning is complete, and the fireplace dimensions are known, mark the outline for the opening on the wall. Use a level to ensure the lines are straight and plumb. Cut along the marked lines using a drywall saw or reciprocating saw. Proceed with caution, being mindful of hidden wiring or plumbing. Remove the cut section of the wall and dispose of the debris appropriately.
Framing the Opening: Build a supporting frame inside the wall opening using lumber. This frame will provide structural support for the fireplace and ensure it is securely mounted. The dimensions of the frame should be slightly larger than the fireplace unit to allow for easy installation and ventilation. Secure the frame to the existing wall studs using screws. Ensure the frame is level and plumb before proceeding further. Adding insulation within the frame can enhance energy efficiency.
Running Electrical Wiring: If a new electrical circuit is required, the electrician will run the wiring from the electrical panel to the location of the fireplace. The outlet should positioned within the framed opening, accessible for connecting the fireplace. Ensure the wiring is installed according to local electrical codes. Never attempt electrical work without proper training and certification.
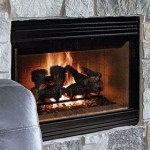
Mounting the Fireplace Unit: Carefully position the electric fireplace unit within the framed opening. Refer to the manufacturer's instructions for specific mounting guidelines. Most units are secured using screws and brackets. Ensure the fireplace is level and flush with the wall surface. Double-check all connections and wiring before powering on the unit.
Connecting the Electrical Components: Connect the fireplace to the electrical outlet using the appropriate wiring and connectors. Use wire strippers to expose the wires and wire connectors to securely join the wires. Wrap the connections with electrical tape to insulate them. Exercise extreme caution when working with electrical components. Never work with live wires. If unsure, consult with a qualified electrician.
Key Point 3: Finishing and Aesthetics
The final stage involves finishing the wall around the fireplace to create a seamless and aesthetically pleasing design. This includes patching any gaps, applying joint compound, sanding, painting, and adding decorative elements.
Patching and Mudding: Fill any gaps between the fireplace unit and the wall with joint compound. Apply multiple thin layers, allowing each layer to dry completely before applying the next. Use a putty knife to smooth the joint compound and create a seamless transition between the fireplace and the wall. Feather the edges of the joint compound to blend it seamlessly with the surrounding wall surface.
Sanding and Priming: Once the joint compound is completely dry, sand the surface smooth using fine-grit sandpaper. Remove any dust and debris with a damp cloth. Apply a coat of primer to the patched area to prepare it for painting. The primer will help the paint adhere properly and provide a uniform finish.
Painting and Finishing: Paint the wall around the fireplace with the desired color and finish. Apply multiple coats, allowing each coat to dry completely before applying the next. Consider using a paint that is durable and easy to clean. The paint color should complement the overall design of the room and the style of the fireplace.
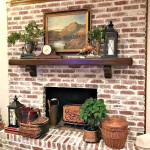
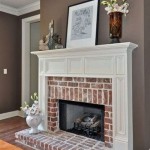
Adding Decorative Elements: Enhance the aesthetic appeal of the fireplace by adding decorative elements such as a mantel, surround, or decorative stone. A mantel can provide a place to display artwork or other decorative items. A surround can frame the fireplace and add a touch of elegance. Decorative stone can create a rustic or contemporary look. Choose elements that complement the style of the fireplace and the overall design of the room.
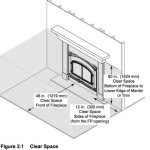
Ensuring Proper Ventilation: Most electric fireplaces require adequate ventilation to prevent overheating. Ensure there is sufficient space around the unit for airflow. Do not block any vents or openings. Refer to the manufacturer's instructions for specific ventilation requirements. Proper ventilation will prolong the life of the fireplace and ensure safe operation.
By following these guidelines, integrating an electric fireplace into a wall can be a successful and rewarding home improvement project. The result is a visually appealing and functional addition that enhances the ambiance and comfort of the living space.

How To Install A Built In Electric Fireplace Rw Flame

Diy How To Build A Fireplace In One Weekend Whitney Hansen Money Coaching

Diy Electric Fireplace Full Hearted Home

Diy Modern Electric Fireplace Tutorial Sponsored Pennies For A Fortune

Diy Fireplace Using An Electric Insert Tutorial The Beauty Revival Built In Build A Makeover

How To Build A Diy Electric Brick Fireplace Hilltown House

Built In Electric Fireplace Lolly Jane

Diy Fireplace Build Out Simple Made Pretty 2024

Diy Electric Fireplace Built In How To Frame And Install The Simply Aligned Home

How To Diy Built In Electric Fireplace Jenna Sue Design