Building A Tile Fireplace Hearth: A Comprehensive Guide
A fireplace hearth serves as both a functional and aesthetic element, providing fire safety and enhancing the visual appeal of a living space. Building a tile fireplace hearth is a project that, while demanding precision, offers substantial rewards in terms of home improvement and increased property value. This article provides a detailed guide to constructing a tile fireplace hearth, covering planning, preparation, installation, and finishing touches.
Planning and Preparation: Foundation for Success
The foundation of any successful hearth project lies in meticulous planning and preparation. This phase involves assessing existing structures, determining dimensions, selecting materials, and gathering the necessary tools. Neglecting this stage can lead to costly errors and structural instability later in the process.
The initial step is to evaluate the existing floor structure around the fireplace. Concrete slabs generally provide a stable base for a tile hearth. However, wooden subfloors require reinforcement to handle the significant weight of the tile, mortar, and any underlying materials. Consult with a structural engineer or experienced contractor if concerns arise regarding the load-bearing capacity of the existing floor.
Accurate measurements are crucial. Determine the desired dimensions of the hearth, considering both aesthetic proportions and fire safety regulations. Local building codes often stipulate minimum hearth extensions beyond the fireplace opening to prevent sparks or embers from contacting combustible materials. These regulations must be adhered to strictly.
Material selection plays a significant role in the overall aesthetic and durability of the hearth. Tile options range from natural stone like granite and slate to ceramic and porcelain. Each material possesses different properties regarding heat resistance, porosity, and maintenance requirements. Choose a tile specifically rated for fireplace applications and capable of withstanding high temperatures. Consider the overall design of the room and select a tile that complements the existing décor.
In addition to the tile itself, other necessary materials include: cement board (for creating a stable underlayment), thin-set mortar (for adhering the tile to the cement board), grout (for filling the spaces between the tiles), grout sealer (to protect the grout from staining and moisture), and backer rod (for larger expansion joints). These materials should be high-quality and specifically formulated for tile installation.
Gather the necessary tools before beginning the project. Essential tools include a tile saw (for cutting tiles to size), a notched trowel (for applying mortar), a level (for ensuring a flat and even surface), a rubber mallet (for setting tiles), a grout float (for applying grout), a sponge (for cleaning excess grout), a measuring tape, a pencil, safety glasses, and gloves. A dust mask is also recommended during cutting and mixing processes.
Installation: The Art of Tile Setting
The installation process involves creating a stable underlayment, applying mortar, setting the tiles accurately, and allowing sufficient drying time. This phase requires patience, precision, and attention to detail. A well-executed installation ensures a durable and visually appealing hearth.
Begin by preparing the subfloor. If the existing floor is wood, install a layer of cement board to create a stable and fire-resistant base. Cut the cement board to the desired dimensions using a utility knife and score-and-snap technique. Secure the cement board to the subfloor with cement board screws, spaced according to the manufacturer's instructions. Ensure the cement board is level and flush with the surrounding floor.
Next, apply a layer of thin-set mortar to the cement board using a notched trowel. Hold the trowel at a 45-degree angle and create consistent ridges in the mortar. The size of the notch on the trowel should correspond to the size and type of tile being used. Consult the mortar manufacturer's recommendations for the appropriate trowel size.
Carefully set the tiles onto the mortar bed, pressing firmly and using a slight twisting motion to ensure good adhesion. Use tile spacers to maintain consistent grout lines between the tiles. Check the level of each tile with a level and adjust as needed using a rubber mallet. Work in small sections, applying mortar and setting tiles before the mortar begins to dry.
For tiles that require cutting, use a tile saw to achieve clean, precise cuts. Wear safety glasses to protect your eyes from flying debris. Practice cutting on scrap tiles to develop proficiency with the saw. Ensure the cut edges are smooth and free of sharp points.
Once all the tiles are set, allow the mortar to cure completely according to the manufacturer's instructions. This typically takes 24 to 48 hours. Avoid walking on the tiles during the curing process. Once the mortar is fully cured, remove the tile spacers.
Finishing Touches: Grouting and Sealing
The finishing touches involve applying grout to fill the spaces between the tiles, cleaning excess grout, and sealing the grout to protect it from staining and moisture. These steps enhance the aesthetic appeal of the hearth and ensure its long-term durability.
Mix the grout according to the manufacturer's instructions. The grout should have a consistency similar to that of peanut butter. Apply the grout to the tile surface using a grout float, pressing firmly to fill all the grout lines. Work in small sections and remove excess grout with the grout float. Hold the float at a 45-degree angle and scrape diagonally across the tile surface.
After the grout has set for approximately 15 to 30 minutes (depending on the type of grout and environmental conditions), begin cleaning the excess grout from the tile surface with a damp sponge. Use a clean sponge and rinse it frequently in a bucket of clean water. Avoid using too much water, as this can weaken the grout. Wipe the tile surface in a circular motion to remove any remaining grout haze. Allow the grout to cure completely according to the manufacturer's instructions. This typically takes 72 hours.
Once the grout is fully cured, apply a grout sealer to protect it from staining and moisture. Follow the manufacturer's instructions for applying the sealer. Apply the sealer evenly to the grout lines using a small brush or applicator. Allow the sealer to penetrate the grout for the recommended time and then wipe off any excess sealer with a clean cloth. The grout sealer will help to prevent stains and make the hearth easier to clean.
Inspect the completed hearth for any imperfections or areas that require touch-ups. Repair any cracks or chips and re-seal any areas that appear to be insufficiently protected. Consider adding a decorative trim or molding around the perimeter of the hearth to create a finished look.
Finally, ensure proper ventilation surrounding the fireplace and hearth. Clear any obstructions that may impede airflow and consult with a qualified professional to ensure that the fireplace operates safely and efficiently.
:strip_icc()/101343186-8909e34a95d74e0087ce39e27577ca41.jpg?strip=all "How To Tile A Fireplace Hearth")
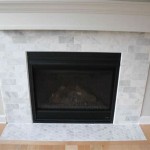
How To Tile A Fireplace Hearth

Diy Tiling A Fireplace Surround What We Learned Along The Way

Diy Tiling A Fireplace Surround What We Learned Along The Way

How To Tile A Fireplace My Uncommon Slice Of Suburbia

Diy Tile Fireplace Makeover The Home Depot

How To Tile A Fireplace South Georgia Style

How To Tile Over A Brick Hearth Shine Your Light

How To Tile Over A Brick Hearth Shine Your Light

110 Diy Fireplace Makeover How To Paint Tile Jessica Welling Interiors
/102661017-6a23c040b71843379188b96b21ac1a08.jpg?strip=all "How To Tile A Fireplace")
How To Tile A Fireplace
Related Posts