Build Your Own Electric Fireplace Mantel: A Step-by-Step Guide
An electric fireplace mantel is a great way to add warmth and ambiance to your home. It is also a relatively easy and inexpensive project to build yourself. Here is a step-by-step guide on how to build your own electric fireplace mantel.
Materials
You will need the following materials to build your electric fireplace mantel:
- 1x10 pine boards (2)
- 1x12 pine boards (3)
- 1/2-inch plywood (1 sheet)
- 1/4-inch plywood (1 sheet)
- Wood glue
- 1-1/4-inch wood screws
- 2-1/2-inch wood screws
- Brad nails
- Paintable caulk
- Paint or stain
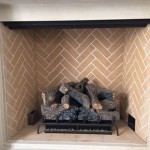
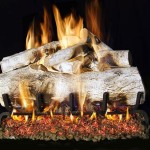
- Electric fireplace insert
Tools
You will need the following tools to build your electric fireplace mantel:
- Table saw
- Miter saw
- Drill
- Brad nailer
- Caulk gun
- Paintbrush or roller
Instructions
Step 1: Cut the base
The base of the mantel is made up of two 1x10 pine boards and two 1x12 pine boards. Cut the 1x10 pine boards to the length of your desired mantel. Then, cut the 1x12 pine boards to the same length, but miter the ends at a 45-degree angle. Assemble the base by gluing and screwing the boards together.
Step 2: Cut the sides
The sides of the mantel are made up of two 1x12 pine boards. Cut the boards to the height of the base plus 6 inches. Then, miter the tops of the boards at a 45-degree angle.
Step 3: Cut the top
The top of the mantel is made up of a single 1/2-inch plywood board. Cut the board to the same length as the base. Then, cut a rabbet around the edges of the board that is 1/4 inch deep and 1/2 inch wide.
Step 4: Cut the trim
The trim around the mantel is made up of 1/4-inch plywood. Cut the trim to the desired width and length. Then, miter the ends of the trim at a 45-degree angle.
Step 5: Assemble the mantel
Assemble the mantel by gluing and screwing the sides to the base. Then, glue and screw the top to the sides. Finally, glue and nail the trim around the edges of the mantel.
Step 6: Paint or stain the mantel
Paint or stain the mantel to the desired color. Be sure to apply several coats of paint or stain to ensure a durable finish.
Step 7: Install the electric fireplace insert
Follow the manufacturer's instructions to install the electric fireplace insert into the mantel.
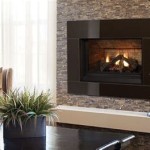
Step 8: Enjoy your new electric fireplace mantel!
Your new electric fireplace mantel is now complete and ready to enjoy. You can sit back, relax, and enjoy the warmth and ambiance of your new fireplace.

How To Build A Diy Built In Fireplace With An Electric Insert The Creative Mom

How To Diy An Amazing Electric Fireplace Surround And Mantle Drawer

Electric Fireplace Diy With Custom Surround Angela Rose Home

Building A Custom Electric Fireplace Surround Planitdiy

Diy Fireplace With Electric Insert Angela Marie Made

Diy Fireplace Mantel Designatedspacedesign Com

Run Your Own Race Diy Fireplace Projects For Every Timeline Touchstone Home S Inc

How To Build A Diy Fireplace With Electric Insert H2obungalow

Diy Electric Fireplace For Under 500

Diy Faux Plaster Electric Fireplace Chelsey Freng
Related Posts