Building a Raised Fireplace Hearth: A Comprehensive Guide
A fireplace hearth is a fundamental architectural element designed to provide a non-combustible surface surrounding a fireplace. It serves multiple purposes, including protecting flooring from embers and radiant heat, providing a safe zone for tending the fire, and contributing to the overall aesthetic of the fireplace. Building a raised fireplace hearth involves elevating this surface, creating a more prominent and visually appealing feature within the room. This article provides a detailed guide to constructing a raised hearth, covering essential considerations, materials, and construction techniques.
The decision to build a raised hearth often stems from a desire to enhance the visual impact of the fireplace. It can make the fireplace a more significant focal point, especially in rooms with high ceilings or large dimensions. Functionally, a raised hearth can offer a more comfortable height for tending the fire, reducing strain on the back. Furthermore, it can provide additional seating or display space. However, raising the hearth requires careful planning to ensure structural integrity, adherence to building codes, and compatibility with the existing architecture.
Planning and Design Considerations
Before initiating the construction process, thorough planning is crucial. This phase involves assessing the existing fireplace and surrounding area, determining the desired dimensions and height of the raised hearth, and selecting appropriate materials. It’s essential to consult local building codes to ensure compliance with regulations regarding fireplace construction and clearances to combustible materials.
The dimensions of the raised hearth should be proportional to the size of the fireplace and the room. A hearth that is too large can overwhelm the space, while one that is too small may appear insignificant. The height of the hearth is another critical factor. A typical raised hearth height ranges from 6 to 18 inches, but this can be adjusted based on individual preferences and functional considerations. Consider the height of any furniture that will be placed near the fireplace, as well as the sightlines from various points in the room.
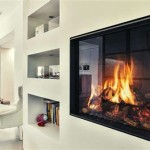
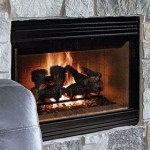
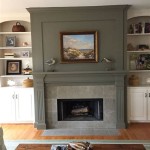
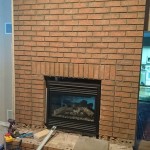
Material selection is a defining aspect of the hearth's appearance and durability. Common materials include brick, stone, concrete, and tile. Brick offers a classic and durable option, while stone provides a more natural and rustic aesthetic. Concrete can be molded into various shapes and finishes, allowing for a contemporary look. Tile offers a wide range of colors, patterns, and textures, making it a versatile choice. The chosen material should be non-combustible and capable of withstanding high temperatures. Additionally, ensure the chosen material complements the existing fireplace surround and the overall design of the room.
Consider the structural requirements of the raised hearth. A raised hearth will add significant weight, so the subfloor must be able to support it. If the existing subfloor is inadequate, it may need to be reinforced. Consult a structural engineer to determine the necessary reinforcement measures. Additionally, ensure that the raised hearth is properly anchored to the existing fireplace and the surrounding walls to prevent movement or instability.
Once the initial planning is complete, create detailed drawings or sketches of the raised hearth. These drawings should include all dimensions, materials, and construction details. This visual representation will serve as a guide during the construction process and help prevent errors.
Construction Process: Step-by-Step Guide
The construction of a raised fireplace hearth typically involves several stages, including preparing the subfloor, building the supporting structure, installing the facing material, and finishing the hearth. Each stage requires careful attention to detail to ensure a structurally sound and aesthetically pleasing result.
The first step is to prepare the subfloor. Clean the area where the raised hearth will be built, removing any debris, dust, or old flooring. Inspect the subfloor for any signs of damage, such as cracks or rot. Repair any damage before proceeding. If the subfloor is wood, it may be necessary to reinforce it with additional joists or plywood to support the weight of the raised hearth. Consult a structural engineer to determine the necessary reinforcement measures.
Next, build the supporting structure. This usually involves constructing a frame using lumber. The size and shape of the frame will depend on the desired dimensions of the raised hearth. Cut the lumber to the appropriate lengths and assemble the frame using screws or nails. Ensure that the frame is level and square. Attach the frame to the subfloor using screws or nails. For added stability, anchor the frame to the surrounding walls using screws or masonry anchors. The frame should be designed to bear the load of the facing material and any additional weight placed on the hearth.
After the frame is constructed, fill it with a suitable fill material. This can include concrete blocks, brick rubble, or gravel. The fill material should be compacted to provide a solid base for the facing material. Avoid using combustible materials as fill, as they can pose a fire hazard. Level the fill material to create a smooth surface. Alternatively, a solid concrete pour can be used to fill the frame, providing a very stable and robust base.
Once the supporting structure is complete, install the facing material. This is the visible surface of the raised hearth and should be chosen based on aesthetic preferences and functional considerations. If using brick or stone, apply a layer of mortar to the supporting structure and carefully position each brick or stone. Use a level to ensure that the facing material is even and aligned. If using tile, apply a layer of thin-set mortar to the supporting structure and carefully position each tile. Use tile spacers to ensure uniform spacing between the tiles. Allow the mortar to dry completely before proceeding to the next step.
After the facing material is installed, finish the hearth. This may involve applying grout to the joints between the bricks, stones, or tiles. Choose a grout color that complements the facing material. Apply the grout according to the manufacturer's instructions. After the grout has dried, clean the surface of the hearth with a damp sponge to remove any excess grout. Alternatively, if a concrete surface is desired, it can be poured and finished to a smooth or textured surface. This may involve staining or sealing to achieve the desired aesthetic.
Ensuring Safety and Compliance
Safety is paramount when building a raised fireplace hearth. Adherence to building codes and best practices is essential to prevent fires and ensure the structural integrity of the hearth. This includes maintaining proper clearances to combustible materials and using non-combustible materials in the construction of the hearth.
Maintain proper clearances to combustible materials. Building codes typically specify minimum distances that combustible materials, such as wood framing or drywall, must be kept away from the fireplace opening and the hearth. These clearances are designed to prevent the ignition of combustible materials due to radiant heat or sparks. Consult local building codes for specific requirements. Insulate the hearth from combustible materials using non-combustible insulation, such as mineral wool or ceramic fiber insulation.
Use non-combustible materials in the construction of the hearth. All materials used in the construction of the hearth, including the facing material, the supporting structure, and the fill material, should be non-combustible. Avoid using wood or other combustible materials in areas that will be exposed to high temperatures. For instance, the frame of the raised hearth can be constructed from metal studs instead of wood to provide enhanced fire resistance. Employ fire-resistant mortar and grout to ensure the long-term integrity and safety of the structure.
Install a fire-resistant barrier between the hearth and the subfloor. This barrier will prevent heat from transferring to the subfloor and potentially igniting combustible materials. Use a layer of cement board or a similar fire-resistant material. Ensure that the barrier extends beyond the edges of the hearth to provide adequate protection. This is particularly important if the subfloor is made of wood.
Regularly inspect the hearth for signs of damage or deterioration. Cracks, loose bricks or stones, or crumbling mortar can indicate structural problems or fire hazards. Repair any damage promptly to prevent further deterioration and ensure the safety of the fireplace. Periodically clean the hearth to remove any accumulated debris or soot. This will help to maintain its appearance and prevent the buildup of flammable materials.
Building a raised fireplace hearth can significantly enhance the aesthetic and functional value of a fireplace. By carefully planning the design, selecting appropriate materials, and adhering to building codes and best practices, it is possible to create a safe, durable, and visually appealing feature that will be enjoyed for years to come. While this article provides a comprehensive guide, it's recommended to consult with experienced professionals for complex projects or to ensure compliance with specific local regulations. The proper construction of a raised hearth not only improves the aesthetics of a living space but also contributes to the overall safety and value of the property.

How To Build A Raised Fireplace Hearth Design

How To Build A Raised Fireplace Hearth Design

Our New Diy Raised Electric Fireplace Hearth With Stone

Is Your Fireplace Dated And In Need Of A Makeover Check Out This Easy To Follow Diy Tutorial On How Build Remodel

Diy Fireplace Makeover At Home With The Barkers

Our New Diy Raised Electric Fireplace Hearth With Stone

Diy Fireplace Hearth And Stacked Stone Wall Tile Newlywoodwards

Diy Fireplace Hearth And Stacked Stone Wall Tile Newlywoodwards

How To Build A Raised Fireplace Hearth Design

How To Build A Raised Fireplace Hearth Design
Related Posts