Build a Fireplace Surround for a Cozy and Stylish Ambiance
A fireplace is the centerpiece of any living room, and a well-crafted surround can elevate its aesthetic appeal and create a warm and inviting ambiance. Building a fireplace surround is a rewarding DIY project that can enhance the character of your home while adding a touch of personal style. Here are some essential aspects to consider:
Choose the Right Materials
The material you choose for your fireplace surround will impact its durability, appearance, and cost. Popular options include:
* Natural stone: Marble, granite, and limestone offer a timeless and elegant look, but can be expensive. * Tile: Ceramic or porcelain tiles are a versatile and affordable option, available in a wide range of colors, patterns, and textures. * Wood: Wooden surrounds exude warmth and rustic charm, but require regular maintenance to protect against moisture and heat. * Brick: Exposed brick creates a cozy and industrial feel, but requires professional installation for proper support.Design and Layout
The design of your fireplace surround should complement the style of your room. Consider the following factors:
* Height: The height of the surround should extend a few inches above the mantelpiece to create a visually balanced look. * Width: The width of the surround should be proportional to the size of the fireplace opening, ensuring it frames the firebox without overpowering it. * Depth: The depth of the surround can vary depending on your preference, but it should be deep enough to provide a comfortable ledge for placing decorations or books.Preparing the Fireplace Opening
Before constructing the surround, ensure that the fireplace opening is clean and level. Remove any existing materials, such as an old surround or mantle. If necessary, consult with a mason or carpenter for any structural alterations.
Installing the Surround
Depending on the material you choose, the installation process will vary. Here are some general steps:
* Tile surround: Apply a thin layer of adhesive to the fireplace opening and firmly press the tiles into place, using spacers to maintain even spacing. * Stone surround: Use a mortar mix to adhere the stone panels to the fireplace opening, carefully aligning and leveling each piece. * Wood surround: Secure the wooden frame to the fireplace opening with screws or nails, and then attach the paneling or decorative trim. * Brick surround: Lay bricks on a bed of mortar, starting from the bottom and building up the surround one row at a time. Ensure each brick is level and securely mortared.Finishing Touches
Once the surround is installed, add finishing touches such as:
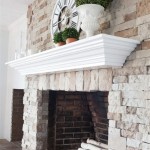
* Mantelpiece: Installing a mantelpiece above the fireplace creates a focal point and provides a surface for displaying artwork or decorative objects. * Fireplace Screen: A fireplace screen protects your living area from sparks and embers, while adding a decorative touch. * Accessories: Enhance the ambiance with fireplace tools, such as a log holder, poker, or brush, and consider adding plants or sculptures to create a cozy and inviting atmosphere.
Diy Fireplace Mantel And Surround Jenna Kate At Home

Diy Fireplace Mantel Designatedspacedesign Com

How To Make An Easy Diy Fireplace Mantel Sprucing Up Mamahood

Easy Fireplace Mantel Diy

Diy Rustic Fireplace Mantel The Cure For A Boring

Building An Easy Modern Fireplace Mantel Young House Love

How To Build A Diy Built In Fireplace With An Electric Insert The Creative Mom

Diy Fireplace With Electric Insert Angela Marie Made

How To Build A Diy Fireplace Mantel Fixthisbuildthat

How To Build A Faux Fireplace Mantel And Surround The Home Depot
Related Posts

