Allen Roth Electric Fireplace Media Mantel Assembly: A Comprehensive Guide
The Allen Roth electric fireplace media mantel offers a combination of aesthetic appeal and functional heating. This type of furniture often serves as a focal point in a living room, providing both a display surface for media devices and decorative items, and a source of supplemental heat. The assembly process, while generally straightforward, requires careful attention to detail to ensure a structurally sound and visually pleasing final product. This article provides a comprehensive guide to assembling an Allen Roth electric fireplace media mantel, outlining key preparations, step-by-step instructions, and essential troubleshooting tips.
Before beginning the assembly process, it is crucial to verify that all necessary components are present and accounted for. Most Allen Roth electric fireplace media mantels come with a detailed parts list included in the packaging. Compare the contents of the box against this list to ensure nothing is missing. This proactive measure can prevent frustration and delays later in the assembly process. Common components include the mantel top, side panels, base, back panels, fireplace insert, hardware (screws, bolts, dowels), and any decorative moldings. If any parts are missing or damaged, contact the retailer or manufacturer for replacements. Discarding the packaging before confirming the completeness of the parts is not advisable.
The tools required for assembly are typically basic and readily available in most households. A Phillips head screwdriver, a flathead screwdriver, a level, a measuring tape, and a soft mallet are generally sufficient. In some cases, a power drill with appropriate drill bits may be helpful, particularly when dealing with pre-drilled holes that are not perfectly aligned. However, caution should be exercised when using a power drill to avoid over-tightening screws and potentially damaging the wood or veneer of the mantel. A rubber mallet can be useful for gently tapping pieces into place without causing scratches or dents. Eye protection is also recommended to prevent dust or small particles from entering the eyes during assembly.
Adequate workspace is essential for a smooth assembly process. Clear a large, flat area where all components can be laid out and easily accessed. Protect the floor with a drop cloth or cardboard to prevent scratches or damage to the flooring material. Good lighting is also crucial, enabling clear visibility of the parts and pre-drilled holes. Consider assembling the mantel in the room where it will ultimately be placed, as moving the assembled unit can be cumbersome and potentially damaging. If assembling in a different location, ensure that the doorway is wide enough to accommodate the completed mantel.
Key Point 1: Understanding the Assembly Instructions
The assembly instructions provided by Allen Roth are the primary guide for constructing the media mantel. Before beginning any physical assembly, carefully read through the entire instruction manual. Pay close attention to the diagrams, which illustrate the correct orientation of each component and the order in which they should be attached. Identify any potentially confusing steps or unclear instructions and address them before proceeding. Familiarizing oneself with the assembly process beforehand can significantly reduce errors and time spent during the actual construction.
Most assembly instructions break down the process into sequential steps, each involving the attachment of specific components using designated hardware. It is crucial to follow these steps in the order presented, as skipping steps or deviating from the recommended sequence can lead to structural instability or misalignment. The instructions will typically indicate which type of screw or bolt is required for each connection, and it is essential to use the correct hardware to ensure a secure and lasting assembly. Avoid using excessive force when tightening screws, as this can strip the threads or damage the surrounding material.
The instructions often include notes or warnings regarding specific aspects of the assembly process. These notes should be heeded carefully, as they often highlight potential pitfalls or areas where extra caution is required. For example, the instructions may warn against over-tightening screws in certain areas or specify a particular orientation for a component that is not immediately obvious. Ignoring these warnings can lead to damage to the mantel or compromise its structural integrity.
If the assembly instructions are unclear or incomplete, consult the manufacturer's website or contact their customer service department for clarification. Many manufacturers provide online resources, such as videos or FAQs, that can offer additional guidance. It is also helpful to search online forums or communities for tips and advice from other users who have assembled the same model of media mantel. Learning from the experiences of others can help avoid common mistakes and streamline the assembly process.
Key Point 2: Step-by-Step Assembly Process
The specific steps involved in assembling an Allen Roth electric fireplace media mantel will vary depending on the model and design. However, the general process typically follows a similar pattern. The initial steps usually involve assembling the base of the mantel, which provides a stable foundation for the rest of the structure. This may involve attaching side panels to a bottom panel using screws or bolts. Ensure that the panels are aligned correctly and that the connections are secure before proceeding.
Once the base is assembled, the next step is often to attach the back panels. These panels provide structural support and conceal the electrical components of the fireplace insert. The back panels are typically attached to the side panels and the base using screws or dowels. Ensure that the back panels are flush with the surrounding surfaces to create a visually appealing and structurally sound assembly. In some cases, the back panels may be divided into multiple sections, requiring careful alignment and precise fastening.
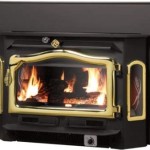
The installation of the electric fireplace insert is a critical step in the assembly process. Carefully follow the instructions provided with the fireplace insert to ensure proper placement and secure attachment. The insert typically slides into a designated opening in the mantel and is secured with screws or brackets. Ensure that the electrical cord is routed properly and that it does not interfere with the operation of the fireplace. Verify that the fireplace insert is level and that it functions correctly before proceeding with the final assembly.
The final steps usually involve attaching the mantel top and any decorative moldings or trim. The mantel top is typically the largest and heaviest component of the assembly, and it requires careful handling to avoid damage. Ensure that the mantel top is aligned correctly with the base and that it is securely fastened using screws or bolts. Decorative moldings and trim are often attached using adhesive or small nails. These elements add the finishing touches to the mantel and enhance its overall aesthetic appeal. Once all components are assembled, inspect the entire structure to ensure that it is stable, level, and visually appealing.
Key Point 3: Troubleshooting Common Issues
Despite careful planning and execution, unforeseen issues may arise during the assembly process. One common problem is misaligned holes, which can make it difficult to insert screws or bolts. In such cases, a power drill with an appropriate drill bit can be used to slightly enlarge the holes. However, exercise caution when drilling to avoid damaging the surrounding material. Another solution is to loosen the surrounding screws and attempt to realign the components before tightening them again.
Another common issue is stripped screw threads, which can occur when screws are over-tightened. If a screw thread is stripped, it may be necessary to replace the screw with a slightly larger one or to use a wood filler to repair the damaged thread. Avoid using excessive force when tightening screws to prevent stripping the threads. If a screw is difficult to turn, try applying a small amount of lubricant to the threads.
Uneven surfaces can also be a problem, particularly when assembling the base of the mantel. Use a level to check the alignment of the base and adjust the feet as needed to ensure that it is perfectly level. Shims can be used to compensate for uneven flooring. An unlevel base can lead to instability and can affect the overall appearance of the mantel.
If the electric fireplace insert does not function correctly after installation, check the electrical connections and ensure that the unit is plugged into a working outlet. Refer to the troubleshooting section of the fireplace insert's instruction manual for further guidance. If the problem persists, contact the manufacturer or a qualified electrician for assistance. Do not attempt to repair the fireplace insert yourself, as this could void the warranty or create a safety hazard.
Finally, keeping the assembly area organized and clean can help prevent many common issues. Label all parts and hardware clearly to avoid confusion. Dispose of packaging materials promptly to prevent clutter. Take breaks as needed to avoid fatigue and maintain focus. Rushing through the assembly process can lead to errors and frustration. A methodical and patient approach is essential for a successful outcome.

Allen Roth Electric Fireplace Manual 4317fm 33 202 Infrared Quartz

Allen Roth 62 In W Weathered Gray Tv Stand Infrared Quartz Electric Fireplace At Com

Allen Roth Electric Fireplace Manual 4317fm 33 202 Infrared Quartz

Allen Roth 53 In Electric Fireplace Assembly

Allen Roth 51 In W Bright White Infrared Quartz Electric Fireplace The Fireplaces Department At Com

Allen Roth 4317fm 33 201 White Infrared Quartz Electric Fireplace Instruction Manual

Allen Roth 62 In W Brown Tv Stand With Infrared Quartz Electric Fireplace The Fireplaces Department At Com

Allen Roth 53 In Electric Fireplace Assembly

Allen Roth Infrared Quartz Electric Fireplace 52 5 In White 2267fm 28 201 Réno Dépôt

Allen Roth 54 In W Stanton Birch Tv Stand With Infrared Quartz Electric Fireplace Com