Resurfacing a Fireplace: A Comprehensive Guide to Revitalizing Your Hearth
Whether you're updating the look of your home or restoring an old family heirloom, resurfacing a fireplace can be a rewarding project that transforms the heart of your living space. Here's a comprehensive guide to help you navigate the essential aspects of this renovation:
1. Assessment and Preparation
Before embarking on the resurfacing process, thoroughly assess the fireplace's condition. Determine the material of the existing surface, such as tile, brick, or stone. Inspect for any cracks, loose tiles, or structural weaknesses. Protect the surrounding area with drop cloths and remove any furniture or objects that could be damaged.
2. Surface Removal
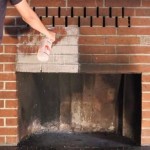
Depending on the existing material, different techniques may be employed for removal. For tile, use a hammer and chisel to carefully break and pry away the tiles. For brick or stone, a hammer drill with a masonry bit can be used to cut out damaged or uneven sections. Wear appropriate safety gear and exercise caution during removal to avoid injury or damage to the fireplace.
3. Surface Preparation
Once the old surface is removed, the underlying substrate needs to be prepared. Clean the area thoroughly, removing any dust, debris, or adhesive residue. Level the surface using self-leveling compound if necessary. Apply a primer specifically designed for the new resurfacing material to ensure proper adhesion.
4. Resurfacing Material Selection
Choose a resurfacing material that complements your home's style and meets your functional needs. Tile is a classic and versatile option, offering a wide range of colors, textures, and patterns. Stone veneer provides a natural and rustic look, while faux stone panels offer a more budget-friendly alternative. Consider heat resistance and durability when selecting your material.
5. Installation
Follow the manufacturer's instructions carefully when installing the new resurfacing material. Use thinset mortar and a notched trowel to apply the tiles or stone to the prepared surface. Stagger the joints and maintain even spacing. Allow the mortar to cure according to the manufacturer's recommendations.
6. Grouting
For tile or stone installations, grouting is necessary to fill in the gaps and seal the surface. Choose a grout color that enhances the look of your resurfacing material. Apply the grout with a grout float, ensuring it fully penetrates the joints. Wipe away excess grout and allow it to dry completely.
7. Finishing Touches
Once the grout is dry, apply a sealant to protect the surface from moisture and stains. Use a brush or sponge to apply the sealant evenly, allowing it to penetrate the pores of the material. Allow the sealant to cure according to the manufacturer's instructions before using the fireplace.
Conclusion
Resurfacing a fireplace can be a transformative project that breathes new life into your home's focal point. By following these essential steps, you can successfully restore or update your fireplace, creating a cozy and elegant ambiance for years to come.

15 Fabulous Fireplace Refacing Ideas Average But Inspired

Refacing Fireplace And Chimney Authority

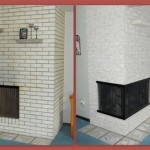
10 Fireplace Makeover Ideas Before And After Regency

15 Fabulous Fireplace Refacing Ideas Average But Inspired

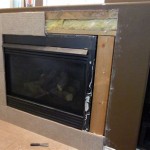
Gas Fireplace Refacing New Jersey Fireplaces Kjb

Refacing Fireplace And Chimney Authority

Debbie Travis Update Your Fireplace By Refacing The Surround Victoria Times Colonist

Refaced Fireplaces Charlotte Nc Santi Designs

10 Fireplace Makeover Ideas Before And After Regency

Fireplace Refacing How You Can Improve Your
Related Posts

