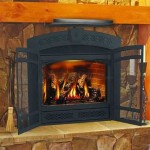
DIY Fireplace Stone: A Comprehensive Guide to Transforming Your Hearth
The fireplace serves as a focal point in many homes, providing both warmth and aesthetic appeal. Over time, however, a fireplace surround can become outdated or simply lack the character desired. Instead of incurring the significant expense of hiring a professional, homeowners can revitalize their fireplace with a DIY stone project. This article provides a detailed guide to installing stone veneer on a fireplace, covering planning, preparation, installation techniques, and essential safety considerations.
Planning and Preparation: The Foundation of a Successful Stone Fireplace Project
Before commencing any physical work, thorough planning is paramount. This stage involves accurately measuring the fireplace surround, selecting the desired stone veneer, and gathering all necessary tools and materials. Accurate measurements are crucial for calculating the amount of stone required, minimizing waste, and ensuring a seamless finish. Consider the style of the home and the desired aesthetic when choosing the stone veneer. Options range from natural stone to manufactured stone, each offering unique textures, colors, and price points. Natural stone provides an authentic, timeless look, while manufactured stone is generally lighter, more cost-effective, and available in a wider variety of styles.
Budgetary considerations are also essential during the planning phase. The cost of the stone veneer itself will likely be the most significant expense, but factors such as mortar, sealant, tools, and potential rental equipment must also be factored into the overall budget. Obtain quotes from multiple suppliers to ensure competitive pricing. Once the stone type and budget are finalized, create a detailed materials list. This list should include the stone veneer, mortar, sealant, backer board (if required), lath (if required), fasteners, and any specialized tools needed for cutting or shaping the stone.
Preparation of the existing fireplace surround is equally critical. This involves cleaning the surface thoroughly to remove any dirt, dust, grease, or loose paint. A pressure washer or a wire brush can be used to clean brick or concrete surfaces. For painted surfaces, the paint should be removed or roughened to ensure proper adhesion of the mortar. Depending on the existing surface material, a backer board may be necessary to provide a suitable substrate for the stone veneer. Cement board is a common choice for backer board due to its durability and resistance to moisture. Install the backer board according to the manufacturer's instructions, using appropriate fasteners to secure it to the existing surface. On some surfaces, metal lath is required to provide a mechanical key for the mortar. Attach the lath using staples or screws, ensuring it is securely fastened and overlapping the edges by at least one inch.
Installation Techniques: Applying Stone Veneer with Precision and Care
The installation phase requires patience, precision, and adherence to best practices. Begin by mixing the mortar according to the manufacturer's instructions. Use a mortar mixer or a mixing drill for larger projects to ensure a consistent and workable consistency. Apply a layer of mortar to the back of each stone veneer piece, ensuring complete coverage. The thickness of the mortar bed will vary depending on the size and type of stone, but typically a layer of about ½ inch to ¾ inch is sufficient. Press the stone firmly against the prepared surface, ensuring it is level and plumb. Use a rubber mallet to gently tap the stone into place, if necessary, to achieve a secure bond.
When laying the stone, consider the desired pattern and aesthetic. Stagger the joints between the stones to create a more natural and visually appealing look. Use spacers to maintain consistent joint widths, if desired. For corners, use corner stones specifically designed for creating a seamless transition. If corner stones are not available, the stones can be mitered using a wet saw or angle grinder equipped with a diamond blade. This process involves cutting the stones at a 45-degree angle to create a clean, professional-looking corner. As you work, frequently check the overall alignment and levelness of the stone veneer. Use a level to ensure that each row is straight and plumb. Adjust the position of the stones as needed to maintain a consistent and aesthetically pleasing appearance.
After completing the stone veneer installation, allow the mortar to cure according to the manufacturer's instructions. This typically takes 24 to 48 hours, depending on the ambient temperature and humidity. Once the mortar is fully cured, the joints between the stones can be filled with grout. Use a grout bag or a small trowel to apply the grout, ensuring that all voids are filled. Allow the grout to set slightly, then use a damp sponge to remove any excess grout from the surface of the stone. This process, known as "grouting," enhances the overall appearance of the stone veneer and provides a weather-resistant seal.
Safety Considerations: Protecting Yourself and Your Surroundings
Safety should be a primary concern throughout the entire DIY fireplace stone project. Always wear appropriate personal protective equipment (PPE), including safety glasses, gloves, and a dust mask. Safety glasses protect the eyes from flying debris during cutting and installation. Gloves protect the hands from abrasion and irritation caused by mortar and stone. A dust mask protects the respiratory system from airborne particles generated during mixing mortar and cutting stone. When cutting stone, use a wet saw or angle grinder equipped with a dust collection system to minimize dust exposure. These tools significantly reduce the amount of airborne silica dust, which can be harmful to the lungs.
Proper ventilation is also crucial, especially when working indoors. Open windows and doors to allow for adequate airflow. Use a fan to circulate air and remove dust and fumes. If working in a confined space, consider using a respirator to provide additional respiratory protection. When handling heavy stone veneer pieces, lift with your legs and not your back. Use a hand truck or dolly to move large quantities of stone to minimize strain and prevent injuries. Be aware of the potential for slips and falls, especially when working on ladders or scaffolding. Ensure that ladders are stable and placed on a level surface. Wear non-slip shoes and keep the work area clean and free of debris.
Fire safety is a paramount concern when modifying a fireplace. Ensure that the stone veneer is installed in accordance with local building codes and fire safety regulations. Maintain adequate clearance between the stone veneer and any combustible materials, such as wood trim or mantels. Consult with a qualified building inspector or fire safety professional if you have any questions or concerns about fire safety. Before using the fireplace after installing the stone veneer, inspect the installation to ensure there are no gaps or cracks that could allow hot embers or sparks to escape. Test the fireplace in a controlled environment to ensure that it is functioning properly and safely.

How To Build A Diy Stone Fireplace Boxwood Design Co

Diy Painted Stone Fireplace Refresh Live Edge Mantle Lemon Thistle

How To Build An Outdoor Stacked Stone Fireplace

Faux Stone Fireplace Entertainment Center Genstone

Diy Overgrouted Stone Fireplace Shoe Makes New

Thin Stone Veneers Make A Fireplace Update Easy Swenson Granite 100 Natural Stones

How To Build And Hang A Mantel On Stone Fireplace Shanty 2 Chic

Diy Outdoor Stone Fireplace Jc Huffman

Diy Faux Cast Stone Fireplace Part 1 Demo And Tiling The Hearth Top Shelf

Easy L And Stick Stone Fireplace Surround Sondra Lyn At Home