How To Tile A Fireplace Surround
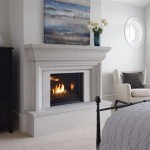
Tiling a fireplace surround can significantly enhance the aesthetic appeal of a living space. A well-tiled surround provides a focal point, complementing both the fireplace itself and the overall room decor. This process, while manageable for experienced DIY enthusiasts, demands careful planning, precise execution, and adherence to safety protocols. The following provides a comprehensive guide to tiling a fireplace surround, covering everything from preparation to the final grout application.
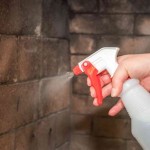
Before commencing the tiling process, it is crucial to assess the existing fireplace surround. This assessment includes inspecting the substrate for structural integrity and flatness. Any loose or damaged material must be removed and repaired before proceeding. The substrate should be clean, dry, and free of any contaminants like dust, grease, or old adhesive. A thorough cleaning with a suitable degreaser and a wire brush is often necessary. Uneven surfaces can be leveled using a self-leveling compound or patching material, ensuring a smooth and even base for the tiles.
Preparing the Surface and Gathering Materials
Proper preparation is paramount for a successful tiling project. After assessing and repairing the existing surround, the next step involves gathering the necessary materials. This includes the tiles themselves, which should be chosen based on aesthetic preference and their suitability for fireplace surroundings. Ceramic, porcelain, and natural stone tiles are common choices, each possessing varying levels of heat resistance and durability. Ensure that the chosen tile is rated for use near heat sources.
In addition to the tiles, you will require thin-set mortar, grout, tile spacers, a notched trowel, a wet saw or tile cutter, a level, a rubber mallet, a measuring tape, a pencil, safety glasses, gloves, and a sponge. The thin-set mortar acts as the adhesive, bonding the tiles to the substrate. Select a mortar specifically designed for fireplace surrounds, often labeled as heat-resistant or modified with polymers for enhanced adhesion. Grout fills the spaces between the tiles, providing structural stability and preventing water penetration. Tile spacers ensure consistent grout lines, contributing to a professional finish. A wet saw or tile cutter allows for precise tile cutting, accommodating the specific dimensions of the surround.
Before applying any adhesive, it is advisable to lay out the tiles on a dry surface. This "dry run" allows you to visualize the final design, identify any potential fitting issues, and determine the optimal tile arrangement. Pay close attention to any cuts that may be required, ensuring that they are strategically placed for aesthetic appeal and structural integrity. Mark the cut lines accurately and use the wet saw or tile cutter to make the necessary cuts. It is recommended to wear safety glasses during the cutting process to protect your eyes from debris.
Applying the Thin-Set Mortar and Setting the Tiles
Once the surface is prepared, and the tiles are cut and arranged, the application of thin-set mortar can commence. Mix the mortar according to the manufacturer's instructions, achieving a consistency similar to peanut butter. Apply the mortar to the substrate using the notched trowel, holding the trowel at a 45-degree angle to create ridges in the mortar bed. These ridges enhance adhesion by increasing the surface area of contact between the mortar and the tile. Apply the mortar in small sections to prevent it from drying out before the tiles are set.
Press each tile firmly into the mortar bed, using a slight twisting motion to ensure full contact. Use tile spacers to maintain consistent grout lines. Periodically check the level of the tiles with a level, making adjustments as needed by gently tapping the tiles with a rubber mallet. Remove any excess mortar from the tile surfaces with a damp sponge. Continue this process until all the tiles are set, allowing the mortar to cure for the time recommended by the manufacturer, typically 24 to 48 hours.
After the mortar has cured completely, remove the tile spacers. Inspect the tile surface for any imperfections or unevenness. If necessary, use a grout removal tool to scrape away any excess mortar that may be protruding into the grout lines. The goal is to create clean, even spaces for the grout to fill. Clean the tile surfaces thoroughly to remove any dust or debris accumulated during the setting process.
Grouting and Finishing the Tile Surround
The final stage involves grouting the tile surround. Select a grout color that complements the tiles and the overall aesthetic of the fireplace. Mix the grout according to the manufacturer's instructions, achieving a smooth and consistent texture. Apply the grout to the tile surface using a grout float, spreading it diagonally across the grout lines to ensure they are completely filled. Work in small sections, removing excess grout with the grout float as you proceed.
After applying the grout, allow it to set for a specified period, typically 15 to 30 minutes, depending on the grout type and ambient conditions. Use a damp sponge to clean the remaining grout haze from the tile surfaces. Rinse the sponge frequently to prevent the haze from reapplying to the tiles. Wipe the tile surfaces gently, avoiding excessive pressure that could damage the grout lines. It may be necessary to repeat this process several times to remove all traces of grout haze.
Once the grout has completely dried and hardened, typically after 24 to 72 hours, apply a grout sealer to protect the grout from staining and moisture penetration. Follow the manufacturer's instructions for application. The sealer will help maintain the appearance of the grout and prolong its lifespan. After the sealer has dried, inspect the tile surround for any remaining imperfections or areas that require touch-up. A final cleaning with a mild detergent will leave the tile surround looking pristine and ready for use.

How To Tile A Fireplace My Uncommon Slice Of Suburbia
/102661017-6a23c040b71843379188b96b21ac1a08.jpg?strip=all "How To Tile A Fireplace")
How To Tile A Fireplace

Diy Tiling A Fireplace Surround What We Learned Along The Way

How To Tile A Fireplace Surround And Hearth Build Basic

Trend Watch Tile Fireplace Surrounds

Remodeling A Fireplace With Tile

How To Tile Over A Brick Hearth Shine Your Light

Diy Tiling A Fireplace Surround What We Learned Along The Way

14 Fresh Designs For Tiled Fireplaces Bob Vila

7 Tips I Wish Knew Before Our Diy Tile Fireplace Makeover The Homeblondy