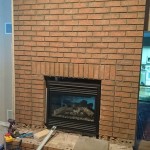
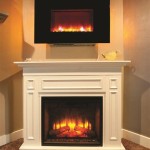
Removing a Fireplace Surround: A Step-by-Step Guide
Fireplace surrounds are a common feature in many homes, adding a touch of elegance and warmth to the living space. However, over time, these surrounds may become outdated, damaged, or simply no longer match your desired aesthetic. Removing a fireplace surround can be a daunting task, but with the right approach and tools, it is manageable for most DIY enthusiasts. This article outlines the steps involved in removing a fireplace surround safely and efficiently.
Step 1: Preparation and Safety
Before starting the removal process, it's essential to prioritize safety and prepare the workspace. This includes:
- Clear the area: Remove any furniture, rugs, or other items from the immediate vicinity of the fireplace to prevent damage or obstruction.
- Protect the floor: Lay down drop cloths or plastic sheeting to catch any debris that may fall during removal.
- Wear protective gear: Use safety glasses, gloves, and a dust mask to protect your eyes, hands, and respiratory system from dust and potential debris.
- Turn off gas or electricity: If the fireplace has any gas or electrical components, disconnect them from the power source before proceeding.
- Inspect the surround: Carefully examine the surround for any loose or damaged pieces. Note the type of material, the fastening method, and any potential hazards.
Step 2: Disassembling the Surround
The process of disassembling the surround will vary depending on the type of material and construction. Common types of fireplace surrounds include:
- Stone or brick: These are typically mortared together and may require using a chisel and hammer to separate the pieces.
- Wood: Wooden surrounds are often secured with nails, screws, or glue. Removing them may involve carefully prying them off the wall or using a screwdriver to remove fasteners.
- Metal: Metal surrounds are generally attached with screws or brackets. Locate and remove these fasteners before detaching the surround.
When disassembling the surround, follow these general guidelines:
- Start from the top: Begin by removing any decorative elements or moldings at the top of the surround. This may involve careful prying or unscrewing them.
- Work your way down: Gradually remove the surround pieces section by section, starting from the top and working your way down. This approach ensures a controlled and safe removal process.
- Take note of the assembly: As you dismantle the surround, carefully document the order of the pieces and how they fit together. This will be helpful during the installation of a new surround.
Step 3: Removing the Mantel
If the surround includes a mantel, it will need to be removed separately. This is often the most challenging part of the process, as it may be heavy and securely attached to the wall. Ensure the mantel is supported throughout the removal process to prevent damage or injury.
To remove the mantel, follow these steps:
- Locate fasteners: Examine the mantel for any visible screws, nails, or brackets that hold it in place. These are typically found on the underside or at the sides of the mantel.
- Unscrew or remove fasteners: Carefully unscrew or remove any exposed fasteners. If they are hidden, you may need to pry the mantel slightly to expose them.
- Support the mantel: Once the fasteners are removed, carefully support the mantel with a helper or a sturdy piece of wood to prevent it from falling.
- Detach the mantel: Gently lift the mantel away from the wall, taking care not to damage the surrounding area or the mantel itself.
Step 4: Cleaning Up
After removing the fireplace surround, it's crucial to clean up the area thoroughly. This involves:
- Remove debris: Sweep or vacuum up any loose debris, dust, or remnants of the surround.
- Inspect the wall: Examine the wall where the surround was attached for any damage or remaining fasteners. Fill any holes with spackle or patching compound.
- Clean the surrounding area: Wipe down the walls, floor, and any nearby surfaces with a damp cloth to remove dust and grime.
Remember to dispose of the removed surround materials responsibly. Many local recycling centers accept building materials, including wood, metal, and stone.
Step 5: Installing a New Surround (Optional)
If you plan to install a new fireplace surround, follow these steps:
- Prepare the wall: Ensure the wall is clean, smooth, and ready for the new surround. This may involve patching any holes, sanding rough surfaces, and priming the wall if necessary.
- Measure and mark: Carefully measure the dimensions of the new surround and mark the wall for installation. Use a level to ensure that the surround is installed straight and even.
- Install the surround: Follow the manufacturer's instructions for installing the new surround. This may involve using adhesives, screws, or other fastening methods.
- Secure the mantel: If the new surround includes a mantel, carefully attach it to the wall according to the instructions.
Remember to consult the manufacturer's guidelines for specific instructions and safety recommendations for installing the new fireplace surround.
By following these steps, you can safely and effectively remove a fireplace surround and prepare the space for a new one. With proper planning, safety precautions, and patience, you can transform your fireplace into a stylish focal point for your home.

How To Fit And Replace A Fire Surround Homebase

How To Remove An Old Fireplace Surround Merrypad

How To Remove A Fireplace Surround Direct Fireplaces

How To Remove A Fireplace Hearth All You Need Know Checkatrade

Fireplace Demolition Day The Handyman S Daughter

How To Remove A Builder Grade Fireplace Surround And Mantel

Remove Fireplace Rebuild With Slate Hearth Ready For Electric Fire Cosy Stoves

How To Remove A Fireplace Insert With S Wikihow

How To Remove A Builder Grade Fireplace Surround And Mantle

How To Remove Fireplace Tiles Chaotically Creative
Related Posts


