How to Install Stone Around a Fireplace: A Comprehensive Guide
Installing stone around a fireplace can significantly enhance its aesthetics and create a warm and inviting ambiance in your living space. While it may seem like a daunting task, with proper preparation and attention to detail, you can achieve professional-looking results. This guide will provide you with step-by-step instructions to ensure a successful stone installation around your fireplace.
Materials and Tools Required:
- Stone tiles or veneer
- Thin-set mortar
- Grout
- Trowel (notched and flat)
- Leveling system (optional)
- Grinder with diamond blade (for cutting and shaping stones)
- Caulk gun
- Safety glasses and gloves
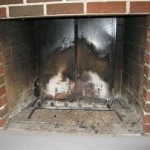
Step 1: Prepare the Fireplace Surround
Begin by removing any existing materials or trim around the fireplace. Clean the surface thoroughly using a wire brush or sandpaper to remove any dust, dirt, or debris. Ensure the surface is smooth, even, and free of any protrusions.
Step 2: Lay Out the Stone
Place the stone tiles or veneer around the fireplace to determine the best layout. Consider the size, shape, and texture of the stones to create a visually appealing design. Number the stones to keep track of their original position for easier installation.
Step 3: Mix and Apply Thin-Set Mortar
Mix the thin-set mortar according to the manufacturer's instructions. Using a notched trowel, spread the mortar on the back of the stone tiles or veneer. Ensure an even distribution of mortar to provide a strong bond.
Step 4: Install the Stone
Carefully place the stone tiles or veneer onto the fireplace surround, starting from the center and working outwards. Press the stones firmly into the mortar bed. If desired, use a leveling system to ensure the stones are perfectly level and aligned.
Step 5: Allow the Mortar to Set
Let the thin-set mortar cure for the time specified by the manufacturer. Do not disturb the stones during this time. Allow the mortar to fully set to prevent the stones from shifting.
Step 6: Grout the Stone
Once the mortar has set, mix the grout according to the manufacturer's instructions. Using a flat trowel, apply the grout between the stone joints. Press the grout into the joints firmly and remove any excess with a damp sponge.
Step 7: Seal the Stone
After the grout has dried, apply a stone sealant to protect the stone from moisture and stains. Use a soft cloth or brush to spread the sealant over the entire surface of the stone. Allow the sealant to cure as per the manufacturer's recommendations.
Step 8: Caulk the Edges
Apply a bead of caulk around the edges of the stone installation, where it meets the fireplace surround or other surfaces. Use a caulk gun to apply the caulk and smooth it out with your finger or a damp tool.
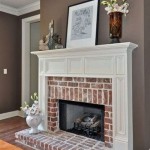
Step 9: Enjoy Your Stone Fireplace Surround
Congratulations! You have successfully installed stone around your fireplace. Allow the caulk to dry completely before using the fireplace. Sit back, relax, and enjoy the ambiance and beauty of your newly transformed fireplace.

Thin Stone Veneers Make A Fireplace Update Easy

Thin Stone Veneers Make A Fireplace Update Easy

How To Build A Diy Stone Fireplace Boxwood Design Co
.jpg?strip=all "Tips And Tools For Professional Stacked Stone Fireplaces")
Tips And Tools For Professional Stacked Stone Fireplaces

How To Install A Stone Veneer Fireplace Shoe Makes New

Stacked Stone Fireplace How To Diy

How To Build And Hang A Mantel On Stone Fireplace Shanty 2 Chic

How To Install A Stone Veneer Fireplace Shoe Makes New

Tips And Tools For Professional Stacked Stone Fireplaces

Diy Stone Fireplace With Airstone Binkies And Briefcases
Related Posts