Painting Tile Around a Fireplace: A Comprehensive Guide
Painting the tile surrounding a fireplace can be a relatively inexpensive way to update the look of a living space. It offers a chance to dramatically alter the aesthetic without the significant expense and disruption associated with a full tile replacement. However, preparing the tile properly and selecting the right paint are crucial for achieving a durable and aesthetically pleasing result. This article details the steps involved in painting fireplace tile, focusing on preparation, material selection, and application techniques.
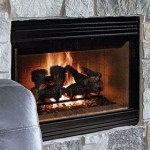
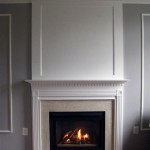
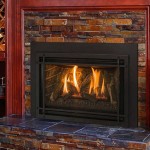
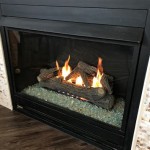
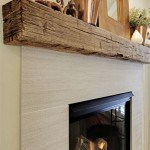
Before beginning, it’s essential to determine the type of tile that surrounds the fireplace. Common materials include ceramic, porcelain, natural stone (such as marble or granite), and even brick. Each material may require slightly different preparation and paint types. Ceramic and porcelain, being non-porous, require thorough cleaning and priming to ensure proper paint adhesion. Natural stone, particularly porous varieties, may need sealing before painting to prevent uneven absorption of the paint. Brick, with its rough texture, will require a different painting approach altogether, often involving specialized masonry paints and techniques.
Preparation: A Foundation for Success
Proper preparation is the most critical step in ensuring a successful paint job. The goal is to create a clean, smooth surface that allows the paint to adhere properly and resist chipping or peeling over time. Neglecting this step can lead to a short-lived result and ultimately require more work to correct.
The first step is to thoroughly clean the tile. Remove any dust, soot, grease, or other contaminants. Use a degreasing cleaner appropriate for the type of tile. For ceramic and porcelain, a strong alkaline cleaner may be suitable. For natural stone, use a pH-neutral cleaner to avoid damaging the surface. Scrub the tile thoroughly with a stiff brush or sponge, paying particular attention to grout lines where dirt tends to accumulate. Rinse the tile completely with clean water and allow it to dry thoroughly. The drying time may vary depending on the humidity and the porosity of the tile, but allowing at least 24 hours is recommended.
Once the tile is dry, inspect it for any cracks, chips, or loose grout. Repair any damage before proceeding with painting. Fill cracks and chips with an appropriate epoxy-based filler or patching compound designed for tile. Replace loose or crumbling grout with new grout, ensuring it matches the existing grout lines as closely as possible. Allow the filler and grout to cure completely according to the manufacturer's instructions. Once cured, sand the repaired areas smooth with fine-grit sandpaper to blend them seamlessly with the surrounding tile.
After repairing any imperfections, apply painter's tape to protect surrounding surfaces, such as the fireplace surround, wall, or mantel. Use a high-quality painter's tape that will provide a clean, crisp line and prevent paint from bleeding onto unwanted areas. Press the tape firmly onto the surface to ensure a good seal. Consider using a drop cloth or plastic sheeting to protect the floor and furniture from paint splatters.
Selecting the Right Paint: Durability and Aesthetics
Choosing the appropriate paint is crucial for achieving a durable and aesthetically pleasing finish. Not all paints are suitable for tile surfaces, and using the wrong type of paint can lead to peeling, chipping, or fading over time. The ideal paint should be durable, water-resistant, and able to withstand the heat generated by the fireplace.
For most tile surfaces, an epoxy-based paint or a specialized tile paint is recommended. Epoxy paints are known for their exceptional durability and resistance to chemicals and abrasion. They create a hard, glossy finish that is ideal for high-traffic areas. Specialized tile paints are specifically formulated to adhere to smooth, non-porous surfaces and provide excellent coverage and durability. These paints often come in a variety of colors and finishes, allowing for greater design flexibility.
Before applying the paint, it is usually necessary to apply a primer. A primer helps to improve paint adhesion, seal porous surfaces, and create a uniform base for the paint. Choose a primer that is specifically designed for tile or smooth surfaces. Apply the primer evenly, following the manufacturer's instructions, and allow it to dry completely before proceeding with painting.
Consider the aesthetic goals when selecting the paint color and finish. Lighter colors can brighten up a room and make the fireplace appear larger, while darker colors can create a more dramatic and intimate atmosphere. A glossy finish will reflect light and make the tile appear more vibrant, while a matte finish will provide a more subtle and understated look.
Application Techniques: Achieving a Flawless Finish
Proper application techniques are essential for achieving a smooth, even, and durable finish. Using the right tools and techniques will minimize brushstrokes, prevent drips and runs, and ensure that the paint adheres properly to the tile surface.
Apply the paint in thin, even coats, using a high-quality brush or roller designed for smooth surfaces. Avoid applying too much paint at once, as this can lead to drips and runs. Work in small sections, overlapping each stroke slightly to ensure complete coverage. Allow each coat to dry completely before applying the next coat. Multiple thin coats are always better than one thick coat.
For intricate areas or grout lines, use a small brush to carefully apply the paint. Avoid getting paint on the grout if intending to keep it its original color, or apply a grout stain or paint after the main tile color has dried. Wipe away any excess paint immediately with a damp cloth. If the grout is also being painted, ensure consistent coverage and even application.
After applying the final coat of paint, allow it to dry completely according to the manufacturer's instructions. This may take several days, depending on the paint type and humidity levels. Avoid using the fireplace during this time to prevent any heat-related damage to the freshly painted surface.
Once the paint is fully cured, carefully remove the painter's tape, pulling it away from the painted surface at a 45-degree angle. Inspect the finished surface for any imperfections, such as drips, runs, or areas with insufficient coverage. Touch up any imperfections as needed, using a small brush and the same paint used for the original coats. Allow the touch-up paint to dry completely before using the fireplace.

Painting Fireplace Tile The Ultimate Guide Jessica Welling Interiors

How To Paint Tile Easy Fireplace Makeover Setting For Four Interiors

How To Paint A Tile Fireplace Amber Simmons

How To Paint Fireplace Tile Diy Makeover A Blossoming Life

How To Paint A Tile Fireplace Des And Sses

Painting Fireplace Tile Ridiculously Easy Diy Makeover Tiny Hands Tidy Home

How To Paint Fireplace Tile Diy Makeover A Blossoming Life

110 Diy Fireplace Makeover How To Paint Tile Jessica Welling Interiors

How To Paint Fireplace Tile Easy Home Update Allisa Jacobs

How To Paint A Tile Fireplace Amber Simmons
Related Posts