Removing Brick From a Fireplace: A Comprehensive Guide
Removing brick from a fireplace is a significant undertaking that can drastically alter the aesthetic of a room. This process is often considered during remodeling projects, either to modernize the space, repair damaged brickwork, or reconfigure the fireplace entirely. However, it's crucial to understand the complexities involved, including structural considerations, safety precautions, and the potential for hidden challenges. This article provides a comprehensive guide to removing brick from a fireplace, covering essential preparatory steps, necessary tools and materials, detailed removal techniques, and post-removal considerations.
Assesing the Project and Planning
Before commencing any demolition work, a thorough assessment of the fireplace and surrounding area is paramount. This involves evaluating the structural integrity of the fireplace, identifying the type of brick and mortar used, and determining the extent of the removal required. A cursory visual inspection is insufficient; a more in-depth analysis is necessary to anticipate potential problems and ensure a safe and efficient process. This initial assessment will inform the subsequent planning stages and resource allocation.
Firstly, the structural stability of the fireplace must be verified. This includes examining the firebox, the chimney breast, and any supporting structures. Look for cracks, crumbling mortar, or any signs of shifting. If there are concerns about the structural integrity, consulting a qualified structural engineer is strongly recommended. Instability can lead to collapse during the removal process, posing a significant safety risk. A structural engineer can assess the load-bearing capacity and identify any necessary reinforcements before demolition begins.
Secondly, identifying the type of brick and mortar is important for selecting the appropriate tools and techniques. Mortar composition varies, with some being significantly harder and more resistant than others. Understanding the mortar type will influence the choice of chisels, hammers, and other demolition equipment. Similarly, the type of brick (e.g., clay brick, firebrick) will determine the required force and precision during removal. In some cases, sampling the mortar and even a brick for professional analysis might be worthwhile, especially if the age or composition is unknown. Knowing the material composition facilitates a more controlled and predictable removal process.
Thirdly, define the scope of the project. Are you removing the entire fireplace facade, or just a portion of it? Precise boundaries must be set and clearly marked. This prevents accidental damage to adjacent walls or architectural features. Create a detailed plan outlining the removal sequence and any necessary bracing or shoring. A well-defined plan minimizes errors and ensures that the project stays on track. Furthermore, consider the impact on surrounding areas. Dust and debris are inevitable, so protecting furniture, flooring, and other sensitive surfaces is crucial. Cover these areas with drop cloths or plastic sheeting secured with painter's tape.
Finally, check local building codes and regulations. Many jurisdictions require permits for fireplace modifications, especially if structural changes are involved. Failing to obtain the necessary permits can result in fines and delays. Contact the local building department to inquire about specific requirements and ensure compliance. Documenting the existing conditions with photographs and videos is also beneficial. This provides a reference point for restoring the area later and can be helpful for insurance purposes in case of unforeseen damage.
Essential Tools, Materials, and Safety Gear
Equipping oneself with the correct tools, materials, and safety gear is critical for a safe and successful brick removal project. Using the right tools not only increases efficiency but also reduces the risk of injury and damage to the surrounding structure. Prioritizing safety is paramount, as demolition work can be inherently hazardous.
The following tools are typically required for brick removal: a cold chisel set (various sizes and shapes), a brick hammer, a sledgehammer (optional, for particularly stubborn brick), a masonry saw (with a diamond blade), a drill with masonry drill bits, a pry bar, a wire brush, a shop vacuum, and a wheelbarrow or large containers for debris removal. The cold chisel set is essential for breaking the mortar joints, while the brick hammer is used for more precise chiseling. The masonry saw is useful for cutting through stubborn bricks or creating clean edges. The drill with masonry drill bits can assist in weakening the mortar joints. The pry bar is helpful for prying loose bricks, and the wire brush is used for cleaning up the mortar. The shop vacuum is essential for controlling dust, and the wheelbarrow or containers are needed for disposing of the debris.
The necessary materials include: safety glasses, a dust mask or respirator, work gloves, hearing protection, drop cloths or plastic sheeting, painter's tape, and optionally, a mortar rake for further mortar removal after the bricks are removed. Safety glasses are essential to protect the eyes from flying debris. A dust mask or respirator is crucial for preventing the inhalation of silica dust, which can be harmful to the lungs. Work gloves protect the hands from cuts and abrasions. Hearing protection is advisable when using power tools. Drop cloths or plastic sheeting protect surrounding surfaces from dust and debris. Painter's tape secures the drop cloths and prevents them from shifting.
Selecting high-quality tools is a worthwhile investment. Cheap tools are more likely to break or wear out quickly, increasing the risk of injury and slowing down the project. Opt for tools made from durable materials such as hardened steel. Ensure that the tools are in good working condition before starting the project. Sharpen chisels and replace worn saw blades as needed. Regularly inspect the tools for any signs of damage and repair or replace them as necessary. Proper tool maintenance is crucial for both safety and efficiency.
Before starting any demolition work, ensure the work area is well-lit and ventilated. Adequate lighting improves visibility and reduces the risk of accidents. Ventilation helps to dissipate dust and fumes. If working indoors, open windows and doors to create a cross breeze. Consider using a fan to improve air circulation. If ventilation is inadequate, consider using a respirator with an appropriate filter to protect against dust and fumes. A thorough preparation of the work area minimizes the risk of accidents and ensures a more comfortable and productive work environment.
Step-by-Step Brick Removal Techniques
The actual process of removing brick from a fireplace requires a systematic approach, focusing on controlled demolition techniques to minimize damage and ensure safety. There are several methods for removing brick, and the best approach depends on the type of mortar, the composition of the brick, and the desired outcome. The key is to work carefully and methodically, avoiding excessive force that could compromise the surrounding structure.
Begin by preparing the mortar joints. Use a cold chisel and brick hammer to carefully chip away at the mortar surrounding each brick. The goal is to weaken the mortar joints without damaging the brick itself. Start with the vertical joints, then move to the horizontal joints. Work slowly and deliberately, using short, controlled strikes with the hammer. Avoid using excessive force, as this can cause the brick to crack or break. If the mortar is particularly hard, consider using a masonry saw with a diamond blade to cut along the mortar joints. This will make it easier to remove the brick without damaging it. Alternatively, a drill with a masonry drill bit can be used to create a series of holes along the mortar joints, further weakening the bond. A small diameter drill bit can be sufficient for pilot holes, followed by a larger diameter bit to remove more material.
Once the mortar joints have been weakened, use a pry bar to gently pry the brick loose. Insert the pry bar behind the brick and apply steady pressure. If the brick is still firmly attached, use the cold chisel and hammer to further weaken the mortar joints. Avoid using excessive force with the pry bar, as this can damage the surrounding structure. If the brick still does not come loose easily, try working on it from a different angle. Sometimes, a slight shift in the angle of attack can make a significant difference. A gentle rocking motion with the pry bar can also help to break the bond between the brick and the mortar.
As bricks are removed, carefully clean off any remaining mortar. Use a wire brush to scrub away loose mortar and a chisel to remove any stubborn pieces. This will ensure a clean surface for any subsequent repairs or modifications. Dispose of the bricks and mortar debris properly. Bricks can often be recycled or reused in other projects. Mortar debris should be disposed of according to local regulations. Consider renting a dumpster for large-scale projects. Sweep and vacuum the work area regularly to control dust and debris. This will help to maintain a clean and safe work environment. Use a shop vacuum with a HEPA filter to capture fine dust particles. Dampening the area slightly before sweeping can also help to reduce dust.
For particularly stubborn bricks, consider using a sledgehammer in conjunction with the cold chisel. However, exercise extreme caution when using a sledgehammer, as it can easily damage the surrounding structure. Use short, controlled strikes and avoid hitting the brick directly. Instead, aim for the mortar joints. Work in small sections and frequently assess the stability of the surrounding structure. If there is any sign of instability, stop immediately and consult a qualified structural engineer. Remember that patience and precision are key to a successful brick removal project. Rushing the process can lead to mistakes and potentially dangerous situations.
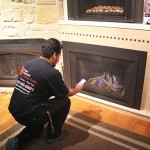
When removing brick from around a firebox, extra care must be taken to avoid damaging the firebox itself. Use hand tools exclusively in this area and avoid using excessive force. Consider covering the firebox with a protective layer of plywood or cardboard to prevent scratches and dents. If the firebox is damaged during the removal process, it may need to be repaired or replaced. Consult a qualified fireplace technician for assistance. Finally, remember to document the removal process with photographs or videos. This will be helpful for insurance purposes and for guiding any subsequent repairs or modifications.

Removing A Brick Fireplace

How To Remove Brick The Easy Way Project Allen Designs

Removing Fireplace S Brick Facade Not So Hard

Taking Paint Off A Brick Fireplace Pt 1 Salt Rook

Simple Ways To Remove A Brick Fireplace With S Wikihow

Remove Paint From Brick Part Ii The Reaganskopp Homestead

Fireplace Demolition Day The Handyman S Daughter

How To Create An Exposed Brick Feature Wall Or Fireplace And Clean Maintain It Like Expert Manchester Evening News

How To Remove My Too Big Hearth Help Com Forums Home

Latest Diy Project Fireplace Chimney Removal For A Nicer Living Room Jeff Geerling
Related Posts