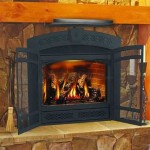
Ledgestone Fireplace Installation: A Comprehensive Guide
Ledgestone fireplaces have become increasingly popular due to their aesthetic appeal, adding a touch of rustic elegance and natural texture to any living space. This architectural detail transforms a standard fireplace into a focal point, enhancing the overall ambiance of a home. However, the installation of ledgestone requires careful planning, meticulous execution, and a thorough understanding of the materials and processes involved.
This article will provide a comprehensive guide to ledgestone fireplace installation, covering essential aspects such as preparation, material selection, installation techniques, and troubleshooting common issues. A successful installation ensures a visually stunning and structurally sound fireplace that will provide enjoyment for years to come.
Planning and Preparation for Ledgestone Installation
Before commencing the physical installation, a detailed planning phase is crucial. This phase encompasses assessing the existing fireplace structure, selecting the appropriate ledgestone, and preparing the surface for adhesion. Neglecting proper preparation can lead to adhesion failures, potentially compromising the integrity and appearance of the finished fireplace.
The first step involves a thorough inspection of the existing fireplace. The substrate, which is the surface to which the ledgestone will be applied, must be structurally sound, clean, and properly prepared. Common fireplace substrates include brick, concrete, and drywall. If the existing substrate is unstable or damaged, it must be repaired or replaced before proceeding. Loose bricks should be re-mortared, cracked concrete should be patched, and damaged drywall should be replaced with cement board, which is a more durable and moisture-resistant material suitable for fireplace surroundings. Cement board is highly recommended as a substrate, particularly in areas exposed to potential moisture. Cement board is more dimensionally stable than gypsum products when exposed to humidity, therefore provides a more stable base for stone veneers.
Next, the surface must be cleaned to remove any dirt, dust, grease, or loose particles that could interfere with adhesion. This can be achieved using a wire brush, scraper, and a suitable cleaning solution. For greasy surfaces, a degreasing agent may be necessary. After cleaning, the surface should be rinsed thoroughly with clean water and allowed to dry completely. Moisture can significantly impact the bonding process, leading to premature failure of the ledgestone installation.
Once the substrate is prepared, the selection of ledgestone becomes a critical decision. Ledgestone is available in a variety of materials, including natural stone and manufactured stone veneer. Natural stone offers a unique, authentic look, with variations in color, texture, and pattern. Manufactured stone veneer, on the other hand, provides a more consistent appearance and is typically lighter and easier to install. The best choice depends on the desired aesthetic, budget, and installation skill level. Considerations regarding the weight of the ledgestone are also important; heavier stones may require additional structural support. If using natural stone, ensure proper sealing after installation to protect it from staining and moisture damage.
Acquire all the necessary tools and materials before starting the installation. This includes the ledgestone itself, thin-set mortar specifically designed for stone veneer, a notched trowel, a level, a rubber mallet, a wet saw or angle grinder with a masonry blade for cutting the stones, safety glasses, gloves, and a mixing bucket. Having all the required items readily available streamlines the installation process and minimizes potential delays.
Ledgestone Installation Techniques
The actual installation of ledgestone requires precision and attention to detail. The proper application of mortar and careful placement of each stone are essential for a durable and visually appealing result. The installation process involves several key steps, each requiring careful execution.
Begin by mixing the thin-set mortar according to the manufacturer's instructions. It is crucial to use a mortar specifically formulated for stone veneer, as standard mortar may not provide adequate adhesion. The consistency of the mortar should be similar to that of peanut butter—smooth and spreadable, but not too runny. Over-mixing or under-mixing the mortar can compromise its bonding properties.
Apply a layer of mortar to the back of each ledgestone unit using a notched trowel. The notches create ridges in the mortar, which increase the surface area for adhesion and allow air to escape, preventing air pockets. Ensure that the entire back surface of the stone is covered with mortar, paying particular attention to the edges. Using a V-notched trowel is adequate for most applications. When working with larger, heavier veneer products, a deeper notch may be necessary.
Press the ledgestone firmly onto the prepared substrate, ensuring good contact with the mortar. Use a level to ensure that each stone is installed horizontally and vertically. Maintain consistent spacing between the stones; this is especially important if you are using grouted ledgestone. This creates a professional appearance. The spacing can be achieved using spacers or by carefully eyeballing the alignment. Use a rubber mallet to gently tap the stones into place, ensuring they are firmly seated in the mortar. Avoid excessive force, as this could damage the stones.
Work from the bottom up, starting with the bottom row of stones. This prevents the weight of the upper rows from putting undue pressure on the freshly installed lower rows. Stagger the joints between the stones to create a more natural and visually appealing pattern. Avoid creating long, continuous vertical joints, as these can weaken the overall structure.
Use a wet saw or angle grinder with a masonry blade to cut the stones as needed to fit around corners, edges, and other obstructions. Accurate cutting is essential for a professional-looking installation. Measure accurately and cut carefully, wearing safety glasses to protect your eyes from flying debris. Clean cuts are essential for seamlessly integrated terminations.
Allow the mortar to cure completely according to the manufacturer's instructions before applying grout, if applicable. The curing time can vary depending on the type of mortar and the ambient temperature and humidity. Rushing the curing process can lead to cracking and loosening of the stones.
Grouting and Finishing Touches
If the ledgestone is designed to be grouted, apply grout to the spaces between the stones using a grout bag or a trowel. Pack the grout firmly into the joints, ensuring that they are completely filled. The choice of grout color can significantly impact the overall appearance of the fireplace, so select a color that complements the ledgestone.
Allow the grout to set for the recommended time, and then use a damp sponge to clean off any excess grout from the surface of the stones. Be careful not to remove too much grout from the joints. The goal is to create a smooth, consistent grout line that enhances the aesthetic appeal of the fireplace. Rinsing and changing the water in the bucket reduces the risk of depositing a grout film onto the stone.
After the grout has fully cured, apply a sealer to the ledgestone and grout to protect them from staining and moisture damage. This is particularly important for natural stone, which is more porous and susceptible to staining. The sealer should be applied evenly and allowed to dry completely before the fireplace is used.
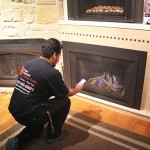
Inspect the completed installation for any imperfections or areas that need touch-up. Address any issues promptly to ensure a long-lasting and visually appealing ledgestone fireplace. Common issues include cracked grout, loose stones, or uneven surfaces. These issues can be addressed by re-grouting, re-mortaring, or adjusting the stones as needed.
Troubleshooting Common Issues
Despite careful planning and execution, problems can arise during ledgestone fireplace installation. Understanding common issues and their solutions can help prevent costly mistakes and ensure a successful outcome. Addressing common issues proactively can minimize project delays and reduce the overall cost of the installation.
One common problem is adhesion failure, where the ledgestone does not adhere properly to the substrate. This can be caused by a variety of factors, including inadequate surface preparation, using the wrong type of mortar, or applying the mortar improperly. To prevent adhesion failure, ensure that the substrate is clean, structurally sound, and properly prepared. Use a thin-set mortar specifically designed for stone veneer and apply it according to the manufacturer's instructions. Proper surface preparation is paramount.
Another common issue is cracking grout. This can be caused by excessive movement in the substrate, improper grout mixing, or rapid drying. To prevent cracking grout, ensure that the substrate is stable and that the grout is mixed and applied according to the manufacturer's instructions. Protect the grout from rapid drying by keeping it damp during the curing process. Using a flexible grout caulk at the transition between the stone veneer and adjacent material, such as drywall, will help prevent cracking.
Uneven surfaces can also be a problem, particularly when working with natural stone, which can vary in thickness and texture. To minimize uneven surfaces, carefully select the stones and arrange them to create a visually balanced appearance. Use shims or additional mortar to adjust the height of individual stones as needed. When using natural stone, be prepared for more variation and adjust installation techniques accordingly.
Staining can occur if the ledgestone is not properly sealed or if spills are not cleaned up promptly. To prevent staining, apply a sealer to the ledgestone and grout after the installation is complete. Clean up any spills immediately using a mild detergent and water. Regular cleaning and maintenance can help to preserve the appearance of the ledgestone for years to come. A pH-neutral cleaner is safe to use for routine cleaning of natural stone surfaces.
By carefully following these guidelines and addressing any issues promptly, a durable and visually stunning ledgestone fireplace can be achieved. This investment in your home will provide years of warmth, beauty, and enjoyment.

Ledgestone Fireplaces Everything You Need To Know Realstone

Ledgestone The Fireplace Professionals

A Few Things About Ledgestone
.jpg?strip=all "Tips And Tools For Professional Stacked Stone Fireplaces")
Tips And Tools For Professional Stacked Stone Fireplaces

Fireplace Makeover Featuring Ledgestone The Cultured Stoners

Fireplace Makeover Featuring Ledgestone The Cultured Stoners

Copper Ledgestone Fireplace B Fond Du Lac Natural Stone

Hudson Ledgestone Fireplace Residential Fond Du Lac Natural Stone

Indoor Installation Of Ledgestone Ceramic Tile Advice Forums John Bridge

Broe Ledgestone Residential Fireplace Fond Du Lac Natural Stone