DIY Stacked Stone Fireplace: A Comprehensive Guide
A fireplace serves as a focal point in many homes, providing warmth and aesthetic appeal. A stacked stone fireplace offers a visually striking design element, lending a rustic or contemporary feel depending on the type of stone and installation method. While professional installation can be costly, a do-it-yourself (DIY) approach offers a cost-effective alternative for homeowners with basic construction skills and a willingness to invest time and effort. This article provides a detailed guide to constructing a stacked stone fireplace, covering planning, materials, installation, and essential considerations.
Planning and Preparation
Before embarking on a DIY stacked stone fireplace project, meticulous planning is crucial. This phase involves assessing the existing fireplace structure, determining the desired aesthetic, selecting materials, and obtaining necessary permits. A well-thought-out plan minimizes potential complications and ensures a successful outcome.
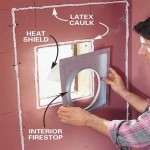
Assessing the Existing Fireplace: The initial step involves a thorough inspection of the existing fireplace and surrounding area. Determine the structural integrity of the firebox, chimney, and hearth. If the existing structure exhibits signs of damage or deterioration, such as cracks, crumbling mortar, or water damage, address these issues before proceeding. Consult with a qualified mason or contractor if you are unsure about the structural soundness of the existing fireplace. Most stacked stone installations are decorative veneers applied over an existing structure, rather than a complete fireplace rebuild. Ensure the existing firebox is properly lined and meets local building codes.
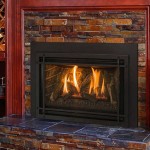
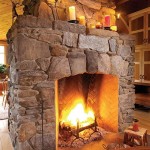
Determining the Desired Aesthetic: The choice of stacked stone significantly impacts the overall aesthetic of the fireplace. Consider factors such as the color, texture, size, and shape of the stones. Natural stone options include slate, granite, limestone, and river rock, each offering a unique visual appeal. Manufactured stone, also known as cultured stone, provides a more consistent and affordable alternative. It is available in a wide range of colors and textures, mimicking the appearance of natural stone. Consider the existing décor of the room and select a stone that complements the overall style. Collect images of fireplaces with stacked stone that appeal to you for reference.
Selecting Materials: In addition to the stacked stone itself, several other materials are required for the project. These include: mortar (specifically formulated for stone veneer), a notched trowel, a level, a measuring tape, a wet saw (for cutting stones), safety glasses, work gloves, a sponge, a bucket, and a sealant (optional, for added protection). The quantity of materials required will depend on the size of the fireplace and the type of stone used. Calculate the surface area to be covered and purchase approximately 10% more stone than needed to account for cuts and waste. Select a mortar appropriate for the type of stone you've chosen. Some manufactured stones require specific mortar types for proper adhesion.
Obtaining Necessary Permits: Before commencing any construction work, check with your local building department to determine if permits are required. Most jurisdictions require permits for fireplace modifications or installations. Obtaining the necessary permits ensures that the project complies with local building codes and safety regulations. Failure to obtain permits can result in fines and delays. Be prepared to submit detailed plans and specifications for your project.
Installation Process
The installation process involves preparing the surface, applying the mortar, setting the stones, and finishing the joints. Proper technique and attention to detail are essential for achieving a visually appealing and structurally sound stacked stone fireplace.
Preparing the Surface: The surface to which the stacked stone will be applied must be clean, dry, and structurally sound. Remove any loose paint, wallpaper, or debris. If the existing surface is smooth, such as concrete or tile, roughen it up with a grinder or chisel to create a better bond for the mortar. Apply a scratch coat of mortar to the surface and allow it to dry for at least 24 hours. The scratch coat provides a textured surface for the stacked stone to adhere to. In some cases, installing a metal lath over the existing surface is recommended, especially if the surface is uneven or unstable. Secure the lath with nails or screws, ensuring it is firmly attached to the wall.
Applying the Mortar: Mix the mortar according to the manufacturer's instructions. Use the notched trowel to apply a layer of mortar to the back of each stone. The thickness of the mortar layer should be sufficient to create a strong bond, but not so thick that it oozes out excessively when the stone is pressed against the wall. It's best to work in small sections, applying mortar to a few stones at a time, to prevent the mortar from drying out before you have a chance to set the stones.
Setting the Stones: Carefully position each stone on the prepared surface, pressing it firmly into the mortar. Use a level to ensure that the stones are aligned correctly. Maintain a consistent joint spacing between the stones. This can be achieved using spacers or by carefully eyeballing the spacing. Alternate the size, shape, and color of the stones to create a natural and visually appealing pattern. Start at the bottom of the fireplace and work your way up, ensuring that each row of stones is level and aligned with the previous row. Use the wet saw to cut stones as needed to fit around corners, edges, and other obstacles. Wear safety glasses and follow the manufacturer's instructions when using the wet saw. Periodically step back and assess the overall appearance of the fireplace, making adjustments as needed to achieve the desired aesthetic.
Finishing the Joints: Once the mortar has partially dried (typically after 24-48 hours), use a damp sponge to clean any excess mortar from the surface of the stones. This will help to reveal the natural beauty of the stone and create a clean, finished look. The type of joint finish can vary depending on the desired aesthetic. Options include a flush joint, a recessed joint, and a tooled joint. A flush joint involves filling the joints completely with mortar, while a recessed joint leaves the mortar slightly recessed from the surface of the stones. A tooled joint uses a special tool to create a decorative finish on the mortar. Choose a joint finish that complements the style of the stone and the overall design of the fireplace. Allow the mortar to fully cure according to the manufacturer's instructions before using the fireplace.
Essential Considerations
Several factors can influence the success of a DIY stacked stone fireplace project. These considerations include safety precautions, proper ventilation, and long-term maintenance.
Safety Precautions: Safety should be a top priority throughout the project. Wear safety glasses and work gloves when handling stones and mortar. Use a dust mask when cutting stones to avoid inhaling harmful particles. Ensure that the work area is well-ventilated. Disconnect the power to any electrical outlets near the fireplace before commencing work. Use caution when working at heights, especially when installing stones near the top of the fireplace. Use scaffolding or a sturdy ladder to reach high areas safely.
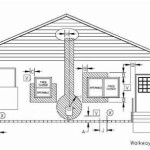
Proper Ventilation: Proper ventilation is essential for the safe and efficient operation of a fireplace. Ensure that the chimney is properly lined and free of obstructions. Have the chimney inspected and cleaned annually by a qualified professional. Install a carbon monoxide detector in the room where the fireplace is located. Carbon monoxide is a colorless, odorless gas that can be deadly. Ensure that the fireplace damper is functioning properly. The damper should be opened fully before lighting a fire and closed completely when the fireplace is not in use. Avoid burning excessive amounts of wood or burning materials that release harmful fumes. Only burn seasoned firewood that has been properly dried.
Long-Term Maintenance: Regular maintenance is essential for preserving the appearance and functionality of a stacked stone fireplace. Clean the stones regularly with a soft brush and mild detergent. Avoid using harsh chemicals or abrasive cleaners, as these can damage the stone. Inspect the mortar joints periodically for cracks or deterioration. Repair any damaged joints promptly to prevent water damage. Apply a sealant to the stones to protect them from moisture and staining. The type of sealant will depend on the type of stone used. Reapply the sealant every few years as needed. Avoid overloading the firebox with wood or building excessively large fires. This can damage the firebox and chimney. Properly store firewood in a dry, covered area to prevent it from becoming damp or infested with insects.
By following these guidelines and taking the necessary precautions, homeowners can successfully construct a beautiful and functional stacked stone fireplace that will enhance the aesthetic appeal and value of their homes.
.jpg?strip=all "Tips And Tools For Professional Stacked Stone Fireplaces")
Tips And Tools For Professional Stacked Stone Fireplaces

How To Build An Outdoor Stacked Stone Fireplace

Diy Stacked Stone Fireplaces On A Budget Msi Blog

12 Stacked Stone Fireplace Ideas For Optimal Coziness

Transform Your Space With A Diy Stacked Stone Fireplace

Tips And Tools For Professional Stacked Stone Fireplaces

Diy This Stacked Stone Fireplace To Make Your Home Cozy And Lovely Find The Tutorial Here Thriftydeco Fireplaces

How To Whitewash A Stone Fireplace Super Easy Project Designs By Karan

Stacked Stone Fireplace How To Diy

Diy Fireplace Design Using Stacked Stone Genstone