Painting Fireplace Brick: Before and After Transformation
The visual impact of a fireplace is undeniable. It often serves as a focal point within a living space, drawing the eye and radiating warmth, both literally and figuratively. However, the aesthetic appeal of a fireplace can diminish over time. Brick, in particular, can become dated, stained, or simply clash with a new design scheme. Painting fireplace brick offers a cost-effective and relatively straightforward method to revitalize this central feature, resulting in a dramatic "before and after" transformation. This article details the considerations, preparation, painting process, and potential pitfalls involved in painting fireplace brick, enabling homeowners to achieve a professional-looking result.
Before embarking on this project, it's crucial to assess the condition of the brick. Examine the surface for cracks, crumbling mortar, or efflorescence (a white, powdery substance indicating moisture issues). Addressing these problems before painting is paramount. Ignoring them will not only compromise the aesthetic outcome but also potentially exacerbate underlying structural concerns. Repair any damaged areas with appropriate materials, ensuring a stable and sound surface for the paint application.
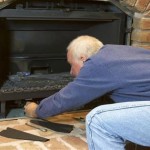
Cleaning the brick thoroughly is another essential pre-painting step. Years of soot, grime, and dust can accumulate on the surface, hindering paint adhesion. Use a wire brush and a solution of trisodium phosphate (TSP) or a similar heavy-duty cleaner to scrub the brick. Rinse thoroughly with clean water and allow the brick to dry completely before proceeding.
Key Point 1: Preparation Is Paramount
The success of any painting project hinges on meticulous preparation. Failing to properly prepare the surface will inevitably lead to problems with paint adhesion, uneven coverage, and an ultimately unsatisfactory outcome. This is especially true for porous surfaces like brick, which require careful attention to detail.
Protecting the surrounding areas is another crucial aspect of preparation. Cover the floor, walls, and any nearby furniture with drop cloths and painter's tape. This will prevent paint splatters and ensure crisp, clean lines. Investing in quality painter's tape is worthwhile, as it will provide a secure seal and minimize the risk of paint bleeding underneath.
Choosing the right primer is equally important. A high-quality masonry primer will seal the brick, improve paint adhesion, and prevent moisture from seeping through the surface. Apply the primer evenly, ensuring that all nooks and crannies are covered. Allow the primer to dry completely according to the manufacturer's instructions before proceeding to the painting stage.
Consider the type of brick and its intended use. If the fireplace is a working fireplace, use a high-heat paint specifically designed for fireplaces. This paint can withstand the high temperatures generated by the fire without blistering, cracking, or emitting harmful fumes. The paint must also be moisture-resistant, which will help it hold up against spills and cleanings.
Allow for proper ventilation when painting indoors. Open windows and run fans to help circulate the air and remove any fumes. Wear a respirator mask to protect yourself from inhaling paint fumes and other particles.
Key Point 2: Selecting the Right Paint
The choice of paint is crucial for both aesthetic appeal and longevity. Not all paints are created equal, and selecting the wrong type can lead to premature peeling, cracking, or discoloration. For fireplace brick, the best options are typically latex or acrylic latex paints formulated for masonry surfaces. These paints are breathable, allowing moisture to escape from the brick, which prevents blistering and peeling. They are also durable and easy to clean.
Consider the desired finish. Matte finishes tend to conceal imperfections and create a more subtle look, while semi-gloss or gloss finishes offer greater durability and are easier to clean. However, glossier finishes may also highlight imperfections in the brick. Select a finish that complements the overall design of the room and suits your personal preferences.
Before committing to a particular paint color, test it in a small, inconspicuous area of the brick. This will allow you to see how the color looks in different lighting conditions and ensure that it complements the surrounding décor. It's also a good idea to apply a sample of the primer to the test area to see how it affects the paint color.
Ensure the paint is heat resistant. Latex paints typically have a heat resistance up to 200 degrees Fahrenheit, which is not sufficient for direct exposure to flames. Some acrylic paints can withstand temperatures of up to 300 degrees Fahrenheit, which might be more suitable for fireplace surrounds, but not the firebox.
High-heat resistance ceramic paints may also include a pigment that mimics the look of brick, ensuring fireboxes can be returned to their original aesthetic when the fireplaces are not in use. The high-heat resistance ensures the paint does not burn, flake, or peel.
Consider the brick's surface. Rough or textured brick may require heavier coats of paint for complete coverage. Alternatively, a paint sprayer can provide more even coverage on textured surfaces, but this will require additional masking to protect the surrounding areas.
Key Point 3: The Painting Process
Once the brick is properly prepared and the appropriate paint has been selected, the painting process can begin. Start by applying the paint to the mortar joints, using a brush to work the paint into the crevices. This will ensure that the entire surface is evenly coated.
Next, use a roller or brush to apply the paint to the face of the brick. Work in small sections, overlapping each stroke to prevent streaks and ensure uniform coverage. Apply multiple thin coats of paint, allowing each coat to dry completely before applying the next. This will result in a more durable and professional-looking finish.
Pay attention to edges and corners, using a brush to carefully cut in along the trim and surrounding walls. This will create crisp, clean lines and prevent paint from bleeding onto adjacent surfaces.
Allow the paint to dry completely before removing the painter's tape. Score the edge of the tape with a utility knife before peeling it away to prevent the paint from chipping or flaking. Once the tape is removed, inspect the painted surface for any imperfections and touch up as needed.
Consider using a paint additive or sealant to protect the painted brick from moisture and stains. This is especially important for fireplaces that are used frequently or are located in damp environments. Follow the manufacturer's instructions for applying the additive or sealant.
The "before and after" transformation can be remarkable. A dated, drab brick fireplace can be transformed into a stylish and contemporary focal point with just a few coats of paint. The key is to take your time, pay attention to detail, and follow the steps outlined above.
The selection of painting tools is another critical component. A high-quality brush with synthetic bristles is ideal for applying paint to brick, as it will hold its shape and provide even coverage. A roller can be used to cover larger areas quickly, but be sure to choose a roller with a nap that is appropriate for the texture of the brick. A paint tray is necessary for holding the paint and loading the brush or roller. Clean your painting tools thoroughly after each use to extend their lifespan.
Proper disposal of paint and cleaning supplies is also crucial. Always dispose of paint cans and brushes according to local regulations. Never pour paint down the drain or into the ground. Consult your local waste management authority for guidance on proper disposal methods.
Ultimately, painting fireplace brick is a satisfying and rewarding project that can dramatically enhance the look and feel of a living space. By carefully considering the factors outlined above and following the recommended procedures, homeowners can achieve a professional-looking result and enjoy the beauty of their newly painted fireplace for years to come. The transformation from a tired, outdated fireplace to a fresh, modern focal point is a testament to the power of paint and careful planning.

Before After Brick Anew Fireplace Paint

Brick Fireplace Makeover Before And After Decorating Painting Id Painted Fireplaces Paint

How To Paint Your Fireplace Brick Surround

How To Paint Your Brick Fireplace Katie Lamb

Painting Brick Fireplace White A Renovation Story

Home Fireplace Remodel Remodeling

Brick Anew Fireplace Painting The Stunning Natural Look

Paint Fireplace Brick

How To Paint A Brick Fireplace

Whitewash Your Brick Fireplace With Limewash Paint Romabio
Related Posts