Do It Yourself Fireplace Mantel: A Comprehensive Guide
The fireplace mantel serves as a focal point within a room, acting as a decorative shelf and architectural accent that enhances the fireplace's overall aesthetic. While professionally installed mantels offer a polished finish, creating a do-it-yourself (DIY) fireplace mantel presents a cost-effective and customizable alternative for homeowners. This article provides a comprehensive guide to constructing a DIY fireplace mantel, covering planning, material selection, construction techniques, and finishing touches.
Planning and Design Considerations
Before commencing any construction, meticulous planning is paramount. This stage involves assessing the existing fireplace setup, establishing design parameters, and adhering to relevant building codes. A poorly planned mantel can diminish the fireplace's visual appeal and, more importantly, pose safety hazards. Therefore, careful consideration of the following aspects is crucial:
Measuring and Assessing the Existing Fireplace: Accurate measurements of the fireplace opening, hearth, and surrounding wall are essential. Document the width, height, and depth of the firebox, as well as the dimensions of any existing surrounds or facing materials. These measurements will dictate the mantel's overall size and proportions, ensuring it complements the fireplace without appearing disproportionate.
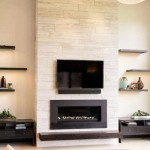
Determining Style and Proportions: The mantel's style should harmonize with the room's existing décor and the fireplace's architectural style. Popular mantel styles include traditional, contemporary, rustic, and minimalist designs. Consider the mantel's proportions in relation to the fireplace opening and the surrounding wall space. A mantel that is too large can overwhelm the fireplace, while one that is too small may appear insignificant. Utilize design software or simple sketches to visualize different mantel styles and proportions before committing to a specific design.
Understanding Building Codes and Clearances: It is imperative to adhere to local building codes regarding fireplace mantel installations. These codes typically specify minimum clearances between the mantel and the firebox opening to prevent combustible materials from igniting. Consult with local building officials or review relevant building codes to ensure compliance. Failure to adhere to these regulations can result in safety hazards and potential fines.
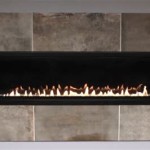
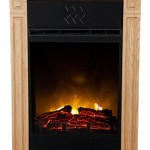
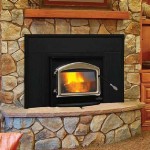
Choosing Materials: Material selection significantly impacts the mantel's appearance, durability, and fire resistance. Common materials for DIY fireplace mantels include wood, reclaimed wood, concrete, and stone veneer. Wood offers versatility in design but requires proper sealing and fireproofing. Reclaimed wood adds character and a rustic aesthetic. Concrete provides a modern and durable option, while stone veneer creates a classic and elegant look. The selection of materials should align with the desired style and budget.
Construction Techniques and Assembly
Once the planning phase is completed, the construction process can commence. This involves cutting, shaping, and assembling the chosen materials to create the mantel. Precision and attention to detail are essential to ensure a structurally sound and aesthetically pleasing result. The following techniques are fundamental to successful mantel construction:
Cutting and Preparing the Materials: Accurately cut the chosen materials according to the established design specifications. Use appropriate power tools, such as circular saws, miter saws, and jigsaws, to achieve precise cuts. Sand and smooth the edges of the materials to eliminate splinters and imperfections. If using wood, consider applying a wood conditioner to ensure even stain absorption.
Constructing the Mantel Box: The mantel box typically consists of a top shelf, a front face, and side supports. These components are joined together using wood glue, screws, or nails. Ensure that the joints are tight and secure. For added strength, consider using pocket hole joinery or mortise and tenon joints. The dimensions of the mantel box should be carefully calculated to accommodate the desired depth and height.
Attaching the Mantel Supports: Mantel supports are essential for providing structural stability and preventing the mantel from sagging or collapsing. These supports can be constructed from wood, metal, or concrete. The supports should be securely attached to the wall studs using lag bolts or screws. The number and placement of the supports will depend on the mantel's size and weight. Concealed supports can be used to create a floating mantel effect.
Integrating Decorative Elements: Decorative elements, such as corbels, moldings, and trim, can be added to enhance the mantel's aesthetic appeal. These elements can be attached using wood glue and finishing nails. Ensure that the decorative elements are aligned and symmetrical. Consider using contrasting colors or textures to highlight the decorative details.
Securing the Mantel to the Wall: The final step in the construction process is securing the assembled mantel to the wall. This is a critical step that requires careful attention to detail. Locate the wall studs using a stud finder and mark their positions. Pre-drill pilot holes through the mantel supports and into the wall studs. Use lag bolts or screws to securely attach the mantel to the wall. Ensure that the mantel is level and plumb.
Finishing and Installation
The finishing stage involves applying coatings or treatments to protect the mantel from damage and enhance its appearance. Proper finishing techniques can significantly prolong the mantel's lifespan and improve its overall aesthetic appeal. Installation requires a careful approach to ensure the mantel is securely and safely in place.
Sanding and Preparing the Surface: Before applying any finishes, thoroughly sand the mantel surface to create a smooth and even texture. Use progressively finer grits of sandpaper to remove any imperfections or blemishes. Remove all dust and debris from the surface using a tack cloth or vacuum cleaner.
Applying Finishes: Choose a finish that complements the chosen material and the desired aesthetic. For wood mantels, options include stain, paint, varnish, and polyurethane. Stain enhances the wood's natural grain, while paint provides a solid color finish. Varnish and polyurethane offer protection against moisture and scratches. For concrete mantels, consider using a concrete sealer to protect against staining and water damage. Apply the finish according to the manufacturer's instructions, ensuring even coverage and proper drying time.
Installing the Mantel: The final installation step requires careful attention to detail and adherence to safety guidelines. Enlist the assistance of another person to help lift and position the mantel. Ensure that the mantel is level and plumb before securing it to the wall. Double-check all connections and fasteners to ensure that they are tight and secure. After installation, inspect the mantel for any signs of damage or instability.
Caulking and Sealing: Apply caulk along the edges of the mantel where it meets the wall or fireplace surround. This will create a seamless and professional finish. Choose a caulk that matches the color of the mantel or the surrounding surfaces. Seal any gaps or cracks to prevent drafts and moisture from entering the fireplace.
Addressing Fire Safety: Ensure that all building codes regarding clearances and fire safety are strictly adhered to. The space between the firebox and the mantel should be assessed to ensure adequate protection from heat. Fire-resistant materials should be used to line the inside of the mantel, especially when dealing with wood. Smoke detectors should be fitted and tested to ensure they are working.
Adding Decorative Elements: Once the mantel is installed and finished, add decorative elements to personalize the space. Display artwork, photographs, candles, or other decorative items on the mantel shelf. Arrange the items in a visually appealing manner, creating a focal point that complements the fireplace. Consider adding seasonal decorations to enhance the ambiance of the room.
By following these guidelines and adhering to safety precautions, homeowners can successfully construct a DIY fireplace mantel that enhances the beauty and functionality of their living space. The resulting mantel will not only serve as a decorative focal point but also as a testament to the homeowner's craftsmanship and creativity.
:max_bytes(150000):strip_icc()/sandandsisal-bdc76ad938a44d28ae9e23ef6c9fa331.jpg?strip=all "17 Diy Fireplace Mantel Plans")
17 Diy Fireplace Mantel Plans

Diy Rustic Fireplace Mantel The Cure For A Boring

Diy Fireplace Mantel And Surround Jenna Kate At Home

How To Make A Diy Fireplace Mantel The Idea Room

Easy Diy Fireplace Mantel Tutorial Jessica Welling Interiors

Diy Wood Mantel Simple To Make Artsy Rule

Diy Mantel Tutorial Taryn Whiteaker Designs

15 Homey Diy Fireplace Mantels

Diy Mantel Tutorial Taryn Whiteaker Designs

19 Amazing Diy Fireplace Mantel Ideas To Inspire You
Related Posts