Stacked Stone Fireplace Veneer: Aesthetics and Installation
Stacked stone fireplace veneer offers a visually appealing and relatively cost-effective way to enhance the focal point of a living space. This decorative facing provides the rugged texture and natural beauty of natural stone without the weight and structural considerations often associated with full stone masonry. It is comprised of thin slices of stone adhered to a backing, creating panels that can be applied to existing fireplace surfaces.
The versatility of stacked stone veneer allows for diverse design applications, ranging from rustic cabin aesthetics to modern, minimalist spaces. The material is available in a wide array of colors, shapes, and textures, enabling homeowners and designers to tailor the look to specific preferences and architectural styles. Popular choices include quartzite, slate, and travertine, each offering unique visual characteristics.
The installation process, while generally less complex than traditional stonework, still requires careful planning and execution to ensure a durable and aesthetically pleasing result. Proper surface preparation, adhesive selection, and cutting techniques are essential for achieving a professional finish. This article will explore key aspects of stacked stone fireplace veneer, encompassing design considerations, installation prerequisites, and best practices.
Design and Aesthetic Considerations
The selection of a stacked stone veneer style should align with the overall design theme of the room. Consider the existing color palette, furniture, and architectural elements when choosing the stone's color, texture, and pattern. A darker, more rugged stone might complement a rustic or traditional setting, while a lighter, smoother stone could enhance a modern or contemporary space. The size and shape of the stone panels also play a role in the overall appearance; larger panels create a bolder statement, while smaller, more irregular pieces offer a more textured, natural look.
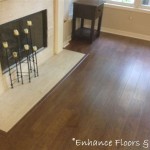
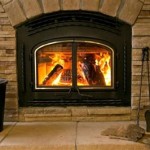
The placement of the stacked stone veneer can also influence the design. Some homeowners opt to cover the entire fireplace structure, from floor to ceiling, creating a dramatic focal point. Others choose to apply the veneer only to the firebox surround, accentuating the fireplace opening without overwhelming the room. Accenting the wall behind the fireplace with stacked stone can add depth and dimension.
Lighting is another critical element to consider. Strategically placed lighting can highlight the texture and color variations of the stone, enhancing its visual appeal. Recessed lighting, sconces, or track lighting can be used to create different effects, such as highlighting the stone's texture or creating a warm, inviting ambiance.
Installation Prerequisites and Preparation
Prior to installation, careful preparation of the existing fireplace surface is crucial for ensuring proper adhesion and a long-lasting result. The surface must be clean, dry, and structurally sound. Remove any loose or flaking paint, wallpaper, or other coatings. If the existing surface is smooth, such as painted drywall, it is necessary to roughen the surface to provide a better bonding surface for the adhesive. This can be achieved by scoring the surface with a utility knife or using a wire brush.
In some cases, especially with porous surfaces like brick or concrete block, applying a sealant or primer may be necessary to prevent the adhesive from being absorbed into the substrate. The sealant or primer should be compatible with both the existing surface and the chosen adhesive. The manufacturer's instructions for the sealant or primer should be followed carefully.
Proper planning is also essential. Measure the area to be covered and calculate the amount of stacked stone veneer needed. It is generally advisable to purchase slightly more material than calculated to account for cuts and waste. Lay out the stone panels on the floor to visualize the pattern and plan the layout. Consider the placement of electrical outlets, switches, or other fixtures that may require cutting or adjusting the stone panels.
Adhesive Selection and Application Techniques
Selecting the appropriate adhesive is critical for ensuring a strong and durable bond between the stacked stone veneer and the substrate. A high-quality thin-set mortar specifically designed for stone veneer is generally recommended. This type of mortar is formulated to provide excellent adhesion, flexibility, and water resistance. It is important to choose a mortar that is compatible with the type of stone being used and the existing surface. Refer to the manufacturer's recommendations for specific adhesive choices.
The thin-set mortar should be mixed according to the manufacturer's instructions. Typically, the mortar is mixed with water to achieve a consistency similar to peanut butter. The mortar should be applied to the back of the stone panels using a notched trowel. The notch size should be appropriate for the size and thickness of the stone panels. The mortar should be applied evenly, ensuring that the entire back of the panel is covered. Avoid applying excessive mortar, as this can ooze out from the joints and create a messy appearance.
Once the mortar is applied, the stone panel should be pressed firmly against the prepared surface. Apply even pressure to ensure good contact between the stone and the substrate. Use a level to ensure that the panels are aligned properly. Maintain consistent spacing between the panels to achieve the desired aesthetic. Spacers can be used to ensure consistent joint widths. Remove any excess mortar that squeezes out from the joints immediately. The mortar should be allowed to cure fully according to the manufacturer's instructions before applying any grout or sealant.
Cutting stacked stone veneer often requires specialized tools. A wet saw with a diamond blade is the most effective tool for achieving clean, accurate cuts. For smaller, more intricate cuts, a handheld angle grinder with a diamond blade can be used. Eye protection and a dust mask are essential when cutting stone veneer to protect against flying debris and dust inhalation. When dry-cutting, ensure adequate ventilation to minimize dust exposure. Always follow the manufacturer's safety guidelines when operating power tools.

Natural Stacked Stone Veneer Fireplace Ideas
.jpg?strip=all "Tips And Tools For Professional Stacked Stone Fireplaces")
Tips And Tools For Professional Stacked Stone Fireplaces

Ledgestone Stacked Stone Veneer Style Trending Buechel

Ochre Rock Panel Natural Stacked Stone Veneer For Wall Cladding

Is A Cozy Stacked Stone Fireplace Your Next Dream Project

12 Stacked Stone Fireplace Ideas For Optimal Coziness

Stone Veneer Stack Midnight Mountain View

Thin Stone Veneers Make A Fireplace Update Easy

12 Stacked Stone Fireplace Ideas For Optimal Coziness

Diy Stacked Stone Fireplaces On A Budget Msi Blog
Related Posts