How to Redo a Fireplace With Stone
A fireplace is the heart of a home. It provides warmth, ambiance, and a focal point for gathering. A fireplace can also be a statement piece, reflecting your personal style. If you're looking to give your fireplace a makeover, consider redoing it with stone. Stone is a durable, versatile, and aesthetically pleasing material that can transform your fireplace from bland to breathtaking.
Redoing a fireplace with stone is a project that requires some skill and effort. It's a rewarding process that can greatly enhance the beauty and value of your home. This article will guide you through the essential steps involved in transforming your fireplace with the enduring beauty of stone.
Step 1: Planning and Preparation
Before you begin, meticulous planning is crucial. This includes determining the type of stone you want, the style of the fireplace, and the overall budget for the project. Consider consulting with a professional for expert advice and guidance.
Start by gathering the necessary tools and materials. This may include a hammer, chisel, level, trowel, mortar mix, grout, sealant, and safety gear. Ensure you have adequate workspace and ventilation for proper airflow during the project.
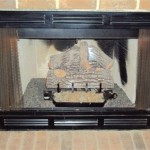
Next, carefully remove the existing fireplace surround or hearth. This may involve removing old mortar, tiles, or other materials. Once the old structure is removed, carefully assess the condition of the underlying masonry. If necessary, repair any cracks or damage before proceeding to the next step.
Step 2: Laying the Stone
With the fireplace prepared, it's time to begin laying the stone. This step requires careful attention to detail and patience. Begin by laying out the stone patterns on the floor to visualize the final arrangement.
Apply a layer of mortar to the prepared surface of the fireplace. Carefully position the first course of stone, ensuring they are level and aligned. Use a rubber mallet to tap the stones into place and create a tight bond. Continue laying subsequent courses of stone, ensuring staggered joints for stability and aesthetic appeal.
As you lay the stone, maintain consistent mortar joints and use a level to ensure the surface is plumb and straight. Allow the mortar to cure before proceeding to the next step.
Step 3: Grouting and Finishing
Once the mortar has cured, it's time to grout the joints between the stones. Apply a thin layer of grout using a grout bag or a rubber trowel. Use a damp sponge to remove excess grout and ensure smooth, even joints.
After the grout has dried, apply a sealant to protect the stone from stains and water damage. Sealant also enhances the stone's natural beauty and protects its color. Allow the sealant to dry completely before using the fireplace.
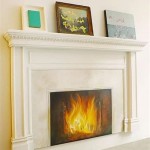
Consider adding finishing touches, such as a mantelpiece, a decorative hearth, or a fireplace screen. These details can enhance the overall aesthetic appeal of your stone-clad fireplace.

Read This Before Your Stone Fireplace Makeover Understanding Undertones

Limewash Stone Fireplace Makeover Bye Orange O Neutral Beauty Average But Inspired

Stone Fireplace Makeover Part 1 Plans Prep Organized Ish

Limewash Stone Fireplace Makeover Bye Orange O Neutral Beauty Average But Inspired

Brick Fireplace Makeover Pine And Prospect Home

Stacked Stone Fireplace Before After A Thoughtful Place

A White Washed Stone Fireplace Tutorial Life On Virginia Street Makeover Stacked Fireplaces Design

Hirondelle Rustique Diy Stacked Stone Fireplace First Remodeling Project Part 2 Fireplaces Brick Makeover Surround

I Can T Stand My Ugly Stone Fireplace What Do Laurel Home

How To Update Your Fireplace With Stone Evolution Of Style