Building a Fireplace Mantel: A Comprehensive Guide
A fireplace mantel serves as more than just a decorative element; it's a focal point in a room, offering a space for displaying cherished items, holiday decorations, and artwork. Constructing a fireplace mantel can transform the entire aesthetic of a living space, adding character and warmth. This article provides a detailed guide on how to build a fireplace mantel, covering planning, material selection, construction techniques, and installation considerations.
Planning and Design Considerations
Before commencing the build, meticulous planning is crucial. The design should complement the existing architectural style of the room and the fireplace itself. Consider the dimensions of the fireplace opening and the overall scale of the room to ensure the mantel is appropriately sized and proportioned. A mantel that is too large can overwhelm the space, while one that is too small might appear insignificant.
First, accurately measure the fireplace opening, including the height and width. Then, determine the desired height and depth of the mantel. Standard mantel heights typically range from 42 to 54 inches from the floor, but this can be adjusted to suit individual preferences and room characteristics. The depth of the mantel shelf can vary from 6 to 12 inches, depending on the intended use and aesthetic preference.
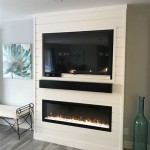
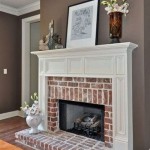
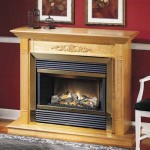
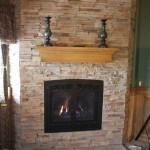
Next, consider the style of the mantel. Common styles include traditional, modern, rustic, and contemporary. Traditional mantels often feature intricate moldings, corbels, and a substantial shelf. Modern mantels tend to be more minimalist, with clean lines and a simple design. Rustic mantels often incorporate reclaimed wood or rough-hewn timbers, lending a natural and weathered appearance. Contemporary mantels may incorporate non-traditional materials like metal or glass.
Once the style and dimensions are determined, create a detailed sketch or blueprint of the mantel. This will serve as a guide throughout the construction process. The plan should include precise measurements for all components, including the mantel shelf, legs or supports, and any decorative elements. This step is essential to ensure accuracy and prevent costly mistakes later on.
Finally, check local building codes and regulations regarding fireplace mantel installations. There may be specific requirements regarding clearances from the firebox and the use of non-combustible materials. Adhering to these regulations is crucial for ensuring safety and compliance.
Material Selection and Preparation
The choice of materials significantly impacts the appearance, durability, and cost of the fireplace mantel. Common materials include wood, stone, and metal, each offering unique characteristics and aesthetic qualities.
Wood is a popular choice due to its versatility, affordability, and ease of workability. Common wood species used for mantels include pine, poplar, oak, maple, and cherry. Pine and poplar are relatively inexpensive and easy to work with, making them suitable for painted mantels. Oak, maple, and cherry offer greater durability and a richer appearance, making them ideal for stained or varnished mantels. Reclaimed wood is also a popular option for rustic mantels, adding character and a sense of history.
When selecting wood, choose kiln-dried lumber that is free from knots, cracks, and warping. Kiln-dried lumber is less prone to shrinking or expanding, ensuring greater stability and longevity. Inspect each piece of lumber carefully before purchasing to ensure it meets your quality standards.
Stone, such as marble, granite, or limestone, offers a luxurious and durable option for fireplace mantels. Stone mantels are typically more expensive than wood mantels but can add significant value and visual appeal to a room. Stone is non-combustible, making it a safe choice for fireplace surrounds. However, stone is also heavy and requires specialized tools and techniques for cutting and installation.
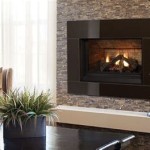
Metal, such as steel or wrought iron, is often used for modern or industrial-style mantels. Metal mantels can be fabricated in a variety of shapes and sizes and can be powder-coated or painted to match the existing decor. Metal is also non-combustible and relatively easy to maintain. However, metal can be expensive and may require welding or other specialized fabrication techniques.
Once the materials have been selected, prepare them according to the design specifications. This may involve cutting the lumber to size, shaping the edges, and sanding the surfaces. If using stone, hire a professional stone fabricator to cut and shape the stone according to your design. If using metal, consider having a metalworker fabricate the mantel to your specifications.
Construction Techniques and Assembly
The construction of the fireplace mantel will depend on the chosen design and materials. However, several common techniques can be applied to most mantel builds.
For wooden mantels, begin by building the mantel shelf. This typically involves joining several pieces of lumber together using glue and screws or nails. Ensure the joints are tight and flush to create a seamless surface. Consider using a biscuit joiner or pocket-hole screws to strengthen the joints and prevent warping.
Next, construct the legs or supports for the mantel shelf. These can be simple vertical posts or more elaborate designs incorporating moldings and corbels. Attach the legs to the mantel shelf using screws, nails, or wood glue. Ensure the legs are plumb and securely attached to the shelf to provide adequate support.
If the design includes a mantel surround, construct this separately and then attach it to the fireplace wall. The surround can be made from wood, stone, or metal, depending on the overall design. Use construction adhesive and screws to secure the surround to the wall. Ensure the surround is level and plumb before permanently attaching it.
For stone mantels, the assembly process typically involves dry-fitting the stone pieces together to ensure a proper fit. Once the fit is satisfactory, apply a thin-set mortar to the back of each stone piece and carefully position it on the fireplace wall. Use shims to level and plumb the stone pieces. Allow the mortar to cure completely before removing the shims.
For metal mantels, the assembly process typically involves welding or bolting the metal pieces together. Ensure all welds are strong and properly finished. If bolting the pieces together, use stainless steel hardware to prevent corrosion. Grind any sharp edges or burrs to create a smooth and safe surface.
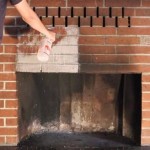
Once the mantel is assembled, apply a finish to protect the materials and enhance their appearance. For wooden mantels, consider staining, painting, or varnishing the wood. For stone mantels, apply a sealant to protect the stone from staining and moisture. For metal mantels, apply a powder coating or paint to prevent rust and corrosion.
Throughout the construction process, use safety equipment such as safety glasses, gloves, and a dust mask. Work in a well-ventilated area and follow all manufacturer's instructions for the tools and materials being used.
Installation and Finishing Touches
The final step in building a fireplace mantel is the installation. This requires careful planning and execution to ensure the mantel is securely attached to the fireplace wall and meets all safety requirements.
Before installing the mantel, locate the wall studs behind the fireplace. These studs will provide the necessary support to hold the weight of the mantel. Use a stud finder to locate the studs and mark their location on the wall.
If there are no studs in the desired location, consider using wall anchors or mounting boards to provide additional support. Wall anchors can be used to attach the mantel to drywall or masonry walls. Mounting boards can be attached to the studs and then used to support the mantel.
Position the mantel against the fireplace wall, ensuring it is level and plumb. Use shims if necessary to correct any imperfections in the wall. Attach the mantel to the wall studs or mounting boards using screws or bolts. Ensure the screws or bolts are long enough to penetrate the studs or mounting boards securely.
Once the mantel is securely attached to the wall, conceal the fasteners with wood filler or decorative caps. Apply a final coat of finish to the mantel to blend the fasteners seamlessly with the surrounding surface.
Finally, add any decorative elements, such as moldings, corbels, or trim. These elements can enhance the appearance of the mantel and complement the overall design of the room. Attach the decorative elements using construction adhesive and small nails or screws.
Inspect the completed mantel to ensure it is securely attached to the wall and meets all safety requirements. Clean the surrounding area and remove any debris. The newly built fireplace mantel is now ready to enhance the beauty and warmth of the living space.

How To Make An Easy Diy Fireplace Mantel Sprucing Up Mamahood

Diy Fireplace Mantel Designatedspacedesign Com

Diy Rustic Fireplace Mantel The Cure For A Boring
:max_bytes(150000):strip_icc()/sandandsisal-bdc76ad938a44d28ae9e23ef6c9fa331.jpg?strip=all "17 Diy Fireplace Mantel Plans")
17 Diy Fireplace Mantel Plans

Easy Fireplace Mantel Diy

Diy Fireplace Mantel And Surround Jenna Kate At Home

How To Make A Diy Fireplace Mantel The Idea Room

How To Build A Fireplace Mantel Easy Diy Blossoming Life

Build A Fireplace Mantel

19 Amazing Diy Fireplace Mantel Ideas To Inspire You Home Mantle Decor
Related Posts