How To Attach Fireplace Mantel Brick
Adding a brick mantel to a fireplace provides a classic, aesthetically pleasing feature that enhances the overall ambiance of a room. However, successfully attaching a brick mantel requires careful planning, precise execution, and the correct materials. This article details a comprehensive guide to attaching a fireplace mantel brick, covering essential preparation steps, installation techniques, and crucial considerations for a durable and visually appealing result.
Preparing for Installation: Assessment and Material Selection
Prior to commencing the installation, a thorough assessment of the existing fireplace structure and the desired mantel dimensions is crucial. The structural integrity of the fireplace is paramount. If the fireplace shows signs of cracking, crumbling, or other deterioration, consulting a professional mason is mandatory before proceeding. A compromised fireplace structure can lead to instability and potential safety hazards.
Accurate measurements are essential for ensuring a proper fit. Measure the width and height of the fireplace where the mantel will be positioned. A template, created from cardboard or plywood, can be useful for visualizing the mantel's placement and identifying any potential obstructions. This template serves as a guide for cutting and fitting the brick.
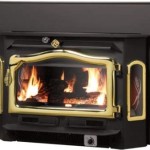
Selecting the right brick is another critical step. Consider matching the new brick to the existing fireplace brick in terms of color, texture, and size. If a contrasting look is desired, carefully consider the overall aesthetic of the room to ensure a harmonious design. Ensure the chosen brick is suitable for fireplace applications, meaning it is fire-rated and can withstand high temperatures. Refractory brick is often used for the firebox itself, and while not strictly necessary for the mantel, it is a durable and heat-resistant option.
The type of mortar used to attach the brick is also crucial. Type S mortar is generally recommended for fireplace installations due to its high compressive strength and bonding properties. Additionally, consider using a bonding agent, also known as a concrete adhesive or primer, to improve the adhesion between the brick and the fireplace surface. These agents create a stronger, more reliable bond, reducing the risk of the mantel detaching over time.
In addition to brick, mortar, and a bonding agent, other essential materials and tools include: a masonry saw (wet saw preferred), a level, a trowel, a margin trowel, a pointing trowel, a brick hammer, a chisel, safety glasses, gloves, a dust mask, a bucket for mixing mortar, a sponge, and a stiff brush.
Installation Process: Step-by-Step Guide
Before applying any mortar, the surface where the brick will be attached must be thoroughly prepared. Remove any loose debris, paint, or existing mortar. A wire brush and a chisel can be used to clean the surface. Once cleaned, dampen the surface with water. This helps the mortar bond more effectively to the existing structure. Apply the bonding agent to the fireplace surface following the manufacturer's instructions. Allow the bonding agent to dry completely before proceeding with the mortar.
Mix the mortar according to the manufacturer’s instructions. It should have a thick, yet workable consistency, similar to peanut butter. Add water gradually while mixing to achieve the desired consistency. Avoid adding too much water, as this can weaken the mortar. A mechanical mixer can be used for larger projects to ensure a consistent mix.
Apply a generous layer of mortar to the back of the first brick. The mortar should be thick enough to create a strong bond, but not so thick that it oozes out excessively when the brick is pressed into place. Position the brick on the prepared surface, pressing firmly to ensure good contact. Use a level to ensure the brick is perfectly aligned. Remove any excess mortar with a trowel.
Repeat the process for each subsequent brick, maintaining consistent joint spacing. Mortar joints typically range from 3/8 inch to 1/2 inch, but this can be adjusted based on the desired aesthetic. Use brick spacers to ensure consistent joint width. Regularly check the level and alignment of each brick as you progress. Make any necessary adjustments before the mortar sets.
For brick that needs to be cut to fit around corners or edges, use a masonry saw. A wet saw is recommended as it minimizes dust and provides cleaner cuts. Mark the desired cut line on the brick and carefully guide it through the saw. Wear safety glasses and a dust mask during this process. After cutting, smooth any rough edges with a rubbing stone.
Once all the brick are in place, allow the mortar to cure for at least 24 hours before proceeding to the next step. The curing time may vary depending on the type of mortar and the ambient temperature. Protect the freshly laid brick from rain or extreme temperatures during the curing process.
After the mortar has cured, the joints need to be finished, a process known as pointing. Remove any excess mortar from the joints with a pointing trowel. Fill the joints with fresh mortar, pressing firmly to ensure they are completely filled. Smooth the mortar joints with the pointing trowel to create a consistent and professional finish. The style of the joint finish can vary, including concave, flush, or raked. Choose a style that complements the overall aesthetic of the fireplace.
After pointing, clean the brick surface with a damp sponge to remove any remaining mortar residue. Be careful not to disturb the fresh mortar joints. A stiff brush can be used to remove stubborn mortar stains. Allow the mortar to fully cure for the recommended time period before applying any sealants or finishes.
Key Considerations for Long-Term Durability
The type of mortar used has significant impact on long-term durability. Type S mortar is generally preferred due to its superior strength and bonding properties, making it well-suited for applications exposed to the elements and temperature fluctuations. Consider using a mortar specifically formulated for masonry applications to ensure compatibility with the brick and to minimize the risk of cracking or crumbling over time.
Proper drainage is essential for preventing water damage, especially for mantels exposed to outdoor elements. Ensure that water can drain away from the brick and mortar joints. If necessary, install weep holes to allow water to escape. Avoid designs that trap water, as this can lead to freeze-thaw damage in colder climates.
Regular maintenance is crucial for extending the life of the brick mantel. Inspect the mantel periodically for cracks, loose mortar, or other signs of damage. Address any issues promptly to prevent them from worsening. Clean the brick regularly to remove dirt, dust, and other debris. A mild detergent and water can be used for cleaning. Avoid using harsh chemicals or abrasive cleaners, as these can damage the brick and mortar.
Sealing the brick and mortar joints can provide added protection against water damage and staining. Use a breathable masonry sealer specifically designed for use on brick. Apply the sealer according to the manufacturer's instructions. Reapply the sealer periodically to maintain its effectiveness. A sealant should not be used if it prevents the brick from breathing, which can trap moisture and cause damage from the inside out.
If the fireplace is frequently used, consider using a high-heat sealant or refractory mortar in areas exposed to direct flames. These materials are designed to withstand high temperatures and prevent damage to the brick and mortar. Proper selection of materials can extend structural integrity and aesthetic appearance of the mantel.
By carefully following these instructions and considerations, a brick mantel can be successfully attached to a fireplace, resulting in a beautiful and durable feature that enhances the home for many years.

How To Install A Mantel On Brick Fireplace 1905 Farmhouse

How To Install A Floating Mantle The Easy Way In Just One Afternoon

How To Install A Mantel On Brick Fireplace 1905 Farmhouse

Build A Mantel Over Brick Fireplace

How To Install A Floating Mantle The Easy Way In Just One Afternoon

How To Install A Floating Mantle The Easy Way In Just One Afternoon

How To Install A Mantel On Brick Fireplace 1905 Farmhouse

Step By Installing A Wood Mantel Over Brick Fireplace

Easy Fireplace Mantel Diy

Diy Rustic Fireplace Mantel The Cure For A Boring
Related Posts