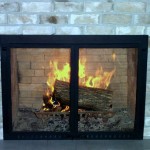
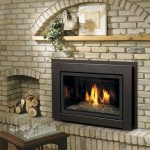
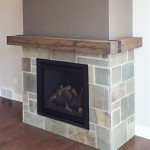
How To Tile Around a Fireplace Insert Wall
Installing a fireplace insert can significantly enhance the heating efficiency and aesthetic appeal of a living space. Complementing a new or existing fireplace insert with strategically placed tiling can further elevate its visual impact and provide a durable, fire-resistant surround. This article provides a comprehensive guide on how to tile around a fireplace insert wall, covering essential preparation, installation, and finishing steps.
Preparation: Evaluating the Existing Structure and Selecting Appropriate Materials
Before commencing any tiling work, a thorough assessment of the existing fireplace structure is critical. This evaluation involves examining the wall’s structural integrity, verifying compliance with local building codes, and determining its suitability for tiling. The wall must be capable of supporting the added weight of the tile and mortar without compromising safety or stability.
Existing wall surfaces, such as drywall or brick, must be properly prepared for tiling. Drywall typically requires a cement backer board to provide a moisture-resistant and stable substrate. Brick surfaces should be cleaned and any loose mortar or debris removed. A primer may be necessary to enhance adhesion between the existing surface and the mortar.
Selecting the appropriate tile is paramount. Fire-rated tiles, such as porcelain, ceramic, or natural stone tiles, are recommended due to their inherent resistance to high temperatures. Glass tiles, while aesthetically pleasing, may not be suitable for direct contact with high heat sources and should be used cautiously, adhering to manufacturer guidelines and local building codes. The tile thickness and size should also be considered based on the overall design and the wall's load-bearing capacity.
Mortar selection is equally important. A modified thin-set mortar specifically formulated for use with the chosen tile type and substrate is essential. This type of mortar provides superior adhesion, flexibility, and heat resistance compared to standard mortars. Grout, used to fill the spaces between the tiles, should also be selected for its durability, moisture resistance, and color compatibility with the tiles.
In addition to the tiling materials, necessary tools and safety equipment include a tile saw (wet saw recommended), a notched trowel (sized according to the tile dimensions), a grout float, a sponge, measuring tape, a level, a pencil, safety glasses, gloves, and a dust mask.
Installation: Tiling Process Around the Fireplace Insert
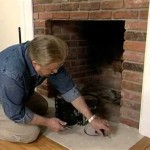
The initial phase of installation involves accurate measurement and layout. Determine the center point of the fireplace insert wall and establish a vertical and horizontal reference line. This process ensures that the tile pattern is symmetrical and visually balanced. Use a level to confirm that the reference lines are perfectly straight. Dry-lay the tiles along these reference lines to visualize the pattern and identify any necessary cuts or adjustments.
Mixing the mortar according to the manufacturer's instructions is crucial. Adhere to the recommended water-to-mortar ratio to achieve the correct consistency. Overly wet mortar can weaken the bond, while excessively dry mortar can be difficult to work with. Mix the mortar thoroughly until it is smooth and free of lumps.
Apply the mortar to the wall using the notched trowel. Hold the trowel at a 45-degree angle and create ridges in the mortar to provide maximum surface area for tile adhesion. Apply the mortar in small sections to prevent it from drying out before the tiles are placed. The size of the notched trowel should correspond to the size and type of tile being used. Consult the tile manufacturer's recommendations for specific trowel size guidelines.
Carefully position each tile onto the mortar, pressing firmly and twisting slightly to ensure full contact with the mortar bed. Use tile spacers to maintain consistent spacing between the tiles. This spacing allows for grout application and accommodates thermal expansion and contraction. Regularly check the tile alignment with a level to ensure a uniform and even surface. Immediately remove any excess mortar that squeezes out between the tiles with a damp sponge.
Cutting tiles to fit around the fireplace insert and along the edges of the wall requires precision and accuracy. Use a wet saw to cut the tiles to the required dimensions. A wet saw provides clean, accurate cuts and minimizes dust generation. Take careful measurements and mark the cutting lines on the tiles using a pencil. When cutting tiles around the fireplace insert, leave a small expansion gap to accommodate for thermal movement. This gap can be filled with a flexible sealant.
After all the tiles have been installed, allow the mortar to cure according to the manufacturer's instructions. This curing process typically takes 24 to 72 hours. During this time, avoid disturbing the tiles or applying any weight to the surface.
Finishing: Grouting, Sealing, and Maintenance
Once the mortar has fully cured, it is time to apply the grout. Remove the tile spacers and ensure that the grout lines are clean and free of debris. Mix the grout according to the manufacturer's instructions, following the recommended water-to-grout ratio. A well-mixed grout should have a smooth, creamy consistency.
Apply the grout to the tile surface using a grout float. Hold the float at a 45-degree angle and work the grout into the grout lines, ensuring that they are completely filled. Remove excess grout from the tile surface with the grout float. Use a damp sponge to clean the tile surface, rinsing frequently to prevent grout haze from forming. Allow the grout to dry slightly before polishing the tile surface with a clean, dry cloth.
After the grout has cured completely, apply a grout sealer to protect it from stains and moisture. The grout sealer penetrates the grout pores, creating a barrier that repels water and other liquids. Apply the grout sealer according to the manufacturer's instructions, using a brush or applicator pad. Allow the sealer to dry completely before using the fireplace insert.
Regular maintenance is essential to keep the tiled fireplace surround looking its best. Clean the tile surface regularly with a mild detergent and water. Avoid using abrasive cleaners or harsh chemicals, as these can damage the tile and grout. Inspect the grout lines periodically for cracks or damage and repair them as needed. Reapply the grout sealer every one to two years, or as recommended by the manufacturer.
Proper ventilation around the fireplace insert is crucial for safety and efficiency. Ensure that the fireplace insert is installed according to the manufacturer's instructions and that there is adequate airflow around the unit. Avoid blocking the ventilation openings with furniture or other objects.
In conclusion, tiling around a fireplace insert wall requires careful planning, meticulous execution, and the use of appropriate materials. By following these guidelines, homeowners can create a visually stunning and fire-resistant surround that enhances the beauty and functionality of their fireplace.

How To Tile A Fireplace My Uncommon Slice Of Suburbia

How To Tile Over A Brick Fireplace The Handyman S Daughter

How To Tile A Fireplace House One

Mosaic Tile Fireplace Surround Art Renovation

How To Install A Gas Fireplace With Tile Surround And Wood Mantel Sima Spaces

110 Diy Fireplace Makeover How To Paint Tile Jessica Welling Interiors

Tiled Fireplace Ideas To Cozy Up Your Space Arizona Tile

How To Install A Marble Herringbone Fireplace Surround And Hearth

Can I Put Tile On The Fireplace Daltile

How To Tile A Brick Fireplace Jenna Kate At Home
Related Posts