How To Replace Tile Around Gas Fireplace Surrounds In Singapore
Replacing tiles around a gas fireplace surround in Singapore presents a unique set of challenges and considerations. The combination of heat exposure from the fireplace and the humid climate necessitates careful planning and attention to detail. This article provides a comprehensive guide to safely and effectively replacing tiles in this specific environment.
Before commencing any work, it is crucial to understand the local regulations pertaining to gas appliances and home renovations. In Singapore, modifications to gas appliances must be carried out by licensed professionals. While replacing the tiles themselves may not require a license, it is imperative to ensure that the gas fireplace is disconnected and reconnected safely by a qualified technician. Neglecting this step could lead to gas leaks or other hazardous situations.
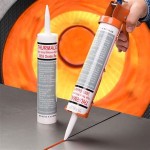
Another important consideration is the selection of appropriate materials. The tiles must be heat-resistant and durable enough to withstand the high temperatures generated by the fireplace. Furthermore, the adhesive and grout should also be heat-resistant and waterproof to prevent cracking and water damage, especially considering Singapore's humid environment. Ignoring these factors will lead to premature failure of the tile installation and potentially costly repairs.
The entire process necessitates a methodical approach, starting with the safe disconnection of the gas supply and the removal of the old tiles. Proper surface preparation is paramount to ensure a strong bond between the new tiles and the substrate. The installation process requires precision to achieve a professional finish. Finally, the re-connection of the gas supply must be handled by a licensed professional to guarantee safety and compliance with regulations. The following sections will provide a detailed breakdown of each step.
Key Point 1: Preparation and Safety
The first and arguably most critical step in replacing tiles around a gas fireplace surround is preparation. This includes ensuring the safety of yourself and your property, as well as preparing the work area and gathering the necessary tools and materials.
Begin by disconnecting the gas supply to the fireplace. This should ideally be performed by a licensed gas technician. Do not attempt to disconnect the gas line yourself unless you are properly qualified and possess the necessary expertise. Once the gas supply is shut off and verified, allow the fireplace to cool completely before proceeding.
Protect the surrounding area by covering furniture and flooring with drop cloths to prevent damage from dust, debris, and adhesive. Wear appropriate personal protective equipment (PPE), including safety glasses, gloves, and a dust mask. This will protect you from sharp tile fragments, dust inhalation, and potential skin irritation from cleaning solutions or adhesives.
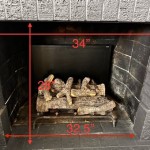
Gather all the necessary tools and materials before starting the demolition. This includes a chisel, hammer, grout removal tool, putty knife, sponge, bucket, measuring tape, level, tile cutter (if necessary), notched trowel, heat-resistant tile adhesive, heat-resistant grout, sealant, and cleaning supplies. Having everything readily available will streamline the process and minimize interruptions.
Inspect the existing tile installation to identify any areas of damage or loose tiles. This will help you understand the extent of the work required and identify potential problems that may need to be addressed. Thoroughly clean the surface to be tiled, removing any dust, grease, or debris. A clean surface is essential for proper adhesion.
Assess the substrate beneath the existing tiles. If the substrate is damaged or unstable, it must be repaired or replaced before installing the new tiles. This may involve patching cracks, filling holes, or applying a leveling compound to create a smooth, even surface. A stable and level substrate is crucial for a successful tile installation.
Key Point 2: Tile Removal and Surface Preparation
The next step involves removing the old tiles and preparing the surface for the new tiles. This process requires patience and careful execution to avoid damaging the surrounding structure and ensure a solid foundation for the new installation.
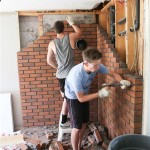
Using a chisel and hammer, carefully remove the old tiles. Start by gently tapping the chisel along the grout lines to loosen the tiles. Avoid applying excessive force, as this could damage the substrate beneath the tiles. Work systematically, removing one tile at a time.
If the grout is particularly stubborn, use a grout removal tool to carefully scrape it away. Grout removal tools are designed to remove grout without damaging the surrounding tiles. Take your time and avoid gouging the surface of the tiles or the substrate.
Once all the tiles have been removed, thoroughly clean the surface to remove any remaining adhesive, grout, or debris. Use a scraper or putty knife to remove any stubborn adhesive residue. A solvent-based cleaner may be necessary to dissolve particularly stubborn adhesive.
Inspect the surface for any cracks, holes, or unevenness. If necessary, patch any cracks or holes with a suitable patching compound. Allow the patching compound to dry completely according to the manufacturer's instructions. If the surface is uneven, apply a leveling compound to create a smooth, even surface.
Ensure the surface is clean, dry, and free of any loose particles before proceeding. This is essential for proper adhesion of the new tiles. A clean and properly prepared surface will ensure a long-lasting and aesthetically pleasing tile installation.
Consider applying a primer to the substrate before installing the new tiles. A primer will improve adhesion and help to prevent moisture from penetrating the substrate. Choose a primer that is compatible with the adhesive you will be using. Allow the primer to dry completely before proceeding.
Key Point 3: Tile Installation and Finishing
The final step involves installing the new tiles and applying the finishing touches. This requires precision and attention to detail to achieve a professional and aesthetically pleasing result.
Before starting the installation, dry-fit the tiles to ensure they fit properly and that the layout is visually appealing. This will allow you to make any necessary adjustments before applying the adhesive. Use tile spacers to maintain consistent grout lines. Ensure the spacers are the correct size for the desired grout line width.
Apply the heat-resistant tile adhesive to the substrate using a notched trowel. The notched trowel creates ridges in the adhesive that help to ensure proper adhesion. Follow the manufacturer's instructions for the correct trowel size and adhesive application technique. Apply the adhesive in small sections to prevent it from drying out before you can set the tiles.
Carefully place the tiles onto the adhesive, pressing them firmly into place. Use a level to ensure the tiles are aligned properly. Gently tap the tiles with a rubber mallet to ensure they are fully seated in the adhesive. Remove any excess adhesive from the tile surfaces with a damp sponge.
Allow the adhesive to dry completely according to the manufacturer's instructions before proceeding with grouting. This is crucial for preventing the tiles from shifting or becoming dislodged. Once the adhesive is dry, remove the tile spacers.
Mix the heat-resistant grout according to the manufacturer's instructions. Apply the grout to the grout lines using a grout float. Work the grout into the grout lines, filling them completely. Remove any excess grout from the tile surfaces with a damp sponge.
Allow the grout to dry partially, then use a damp sponge to clean the tile surfaces again. This will remove any remaining grout haze. Once the grout is completely dry, apply a grout sealant to protect the grout from staining and moisture penetration. Allow the sealant to dry according to the manufacturer's instructions.
Finally, inspect the tile installation for any imperfections. Touch up any areas as needed. Clean the tile surfaces thoroughly to remove any remaining grout haze or sealant residue. Once the fireplace is clean and dry, contact a licensed gas technician to reconnect the gas supply and inspect the fireplace for safe operation.

Fireplace Tile Ideas Designs To Inspire You

Fireplace Tile Ideas Designs To Inspire You

Top Tiles For Fireplace Surround Tile Visualizer

8 Best Fireplace Hearth Materials With Latest Designs

Fireplace Tile Ideas Designs To Inspire You

Geometric Tile Stickers For Fireplace Mosaic Tiles Sticker Wall Backsplash Stikers Pack Of 9

8 Best Fireplace Hearth Materials With Latest Designs

1930s Bedroom Fireplace Advice Needed Houzz

Fireplace Tiles Best 253 Ideas Designs 2024 Ramirro

Custom Fireplace Design Ottawa Millwork Mantels
Related Posts