Installing a Fireplace Insert: A Comprehensive Guide
A fireplace insert is a self-contained heating appliance designed to be installed within an existing masonry or factory-built fireplace. It offers a more efficient and environmentally friendly alternative to traditional open fireplaces, providing targeted heat and reducing energy waste. This article provides a comprehensive guide on installing a fireplace insert, covering essential considerations, necessary tools, the installation process itself, and crucial safety precautions.
Before embarking on the installation process, a thorough assessment of the existing fireplace and the selection of an appropriate insert are crucial. Improper installation can result in safety hazards, reduced efficiency, and potential damage to the appliance and the home.
Key Point 1: Pre-Installation Assessment and Planning
The initial step involves a comprehensive assessment of the existing fireplace. This includes inspecting the chimney for structural integrity, cleanliness, and proper drafting. A qualified chimney sweep should inspect and clean the chimney prior to insert installation. This ensures the removal of creosote buildup, which is a highly flammable byproduct of wood-burning and a significant fire hazard.
Chimney liners play a crucial role in ensuring safe and efficient operation. Many modern fireplace inserts require a dedicated chimney liner, typically made of stainless steel, that extends from the insert's flue collar to the top of the chimney. This liner prevents combustion gases from leaking into the home and protects the existing chimney masonry from corrosive byproducts. The diameter of the liner must match the insert manufacturer's specifications. Failure to install or properly size the liner can lead to carbon monoxide poisoning or chimney fires.
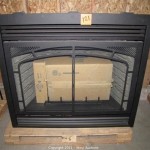
Next, the dimensions of the fireplace opening must be accurately measured to ensure the chosen insert will fit. Measure the height, width, and depth of the firebox. Also, consider any obstructions within the firebox that might interfere with the insert's installation. Clearance requirements surrounding the insert must be strictly adhered to, as specified by the manufacturer. These clearances dictate the minimum distance required between the insert and combustible materials such as drywall, wood framing, and flooring. Failure to maintain proper clearances can lead to overheating and potential fire hazards.
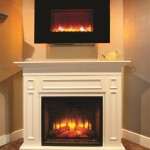
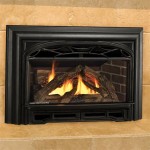
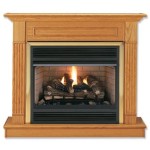
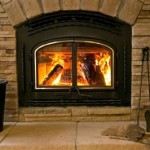
Selecting the right fireplace insert is paramount. Factors to consider include the desired heat output (measured in BTUs), the size of the area to be heated, fuel type (wood, gas, or electric), and efficiency ratings. Fuel type is a significant consideration, as each type requires specific venting requirements and fuel sources. Wood-burning inserts offer a traditional aesthetic and high heat output, but require a readily available wood supply and regular maintenance. Gas inserts provide convenience and ease of use but require a gas line connection. Electric inserts are the easiest to install and operate but generally offer lower heat output than wood or gas models.
Obtaining the necessary permits and approvals is a crucial step that should not be overlooked. Local building codes often require permits for fireplace insert installations to ensure compliance with safety standards and regulations. Contacting the local building department prior to installation is essential to determine permit requirements and inspection procedures. Failure to obtain the required permits can result in fines, delays, and even the removal of the installed insert.
Key Point 2: Tools and Materials
Preparing the necessary tools and materials before starting the installation process will ensure a smooth and efficient workflow. The specific tools required will vary depending on the type of insert and the complexity of the installation, but some common tools include:
• Measuring tape: For accurate measurement of the fireplace opening and clearances.
• Level: To ensure the insert is installed level and plumb.
• Drill with various bits: For drilling pilot holes and securing fasteners.
• Screwdrivers (Phillips and flathead): For tightening screws and bolts.
• Wrenches: For tightening nuts and bolts.
• Pliers: For gripping and manipulating components.
• Hammer: For light hammering tasks.
• Safety glasses: To protect eyes from debris.
• Gloves: To protect hands from injury.
• Chimney liner installation kit: Including stainless steel chimney liner, connecting hardware, and insulation (if required).
• High-temperature sealant: For sealing connections and preventing gas leaks.
• Fire-resistant caulk: For sealing gaps and cracks around the insert.
• Masonry drill bits (if necessary): For drilling into brick or concrete.
• Drop cloths: To protect flooring and furniture from dust and debris.
• Moving dolly: For safely moving the heavy insert.
In addition to tools, the following materials are typically required:
• Fireplace insert: The selected insert model.
• Chimney liner: Stainless steel liner of the correct diameter and length.
• Insulation: To wrap the chimney liner (if required by the manufacturer).
• Connector pipes: To connect the insert to the chimney liner.
• Hardware: Screws, bolts, nuts, and washers for securing the insert and liner.
• Fire-resistant backing material: To protect combustible walls from heat.
• Fuel source: Wood, gas, or electricity, depending on the insert type.
Thoroughly reviewing the insert manufacturer's installation manual is crucial to identify any specific tools and materials required for that particular model.
Key Point 3: The Installation Process
The installation process should be undertaken with careful attention to detail, following the manufacturer's instructions closely. The general steps involved in installing a fireplace insert are outlined below, but variations may exist depending on the specific model and fuel type.
First, preparation of the fireplace opening is necessary. This involves cleaning the firebox thoroughly, removing any debris, ash, or loose mortar. Inspect the firebox for cracks or damage and repair as needed. If required, install fire-resistant backing material on the walls surrounding the firebox to protect combustible materials from heat. Ensure the area is well-ventilated during this process to minimize dust inhalation.
Next, install the chimney liner. Carefully feed the stainless steel chimney liner down the chimney flue, ensuring it reaches the bottom and connects to the insert's flue collar. If the liner is insulated, wrap it with insulation material before installation. Secure the liner to the chimney cap at the top and to the insert's flue collar at the bottom using the appropriate connecting hardware. Use high-temperature sealant to create airtight and watertight seals at all connections. Proper liner installation is imperative for safe and efficient operation.
Then, position the fireplace insert. Carefully move the insert into position in front of the fireplace opening, using a moving dolly if necessary. Ensure the insert is level and plumb using a level. Connect the insert's flue collar to the chimney liner using connector pipes and secure with screws or bolts. Seal all connections with high-temperature sealant to prevent gas leaks. Ensure the insert is properly aligned and positioned within the firebox.
Wiring and gas line connections (if applicable) need specialized attention. For gas inserts, a qualified gas technician must connect the gas line to the insert, ensuring proper gas pressure and leak-free connections. Follow all local codes and regulations for gas line installations. For electric inserts, connect the insert to a dedicated electrical circuit with the appropriate amperage rating. Consult a qualified electrician if unsure about electrical requirements. All wiring connections must be performed by a qualified electrician, adhering to all safety codes and regulations.
Finally, perform a test run and safety check. After completing the installation, perform a test run to ensure the insert is operating correctly. Check for any gas leaks (if applicable) using a gas leak detector. Monitor the insert's temperature and ensure it is not overheating. Verify that the chimney is drafting properly by observing the smoke or exhaust exiting the chimney. Carbon monoxide detectors should be installed and tested to ensure proper functionality. Consult the manufacturer's troubleshooting guide for any issues that arise.
Following the test run, seal gaps and finishing touches are implemented. Seal any gaps or cracks around the insert with fire-resistant caulk to prevent air leaks. Install any trim or decorative panels according to the manufacturer's instructions. Clean up any dust or debris from the installation process. Before using the insert regularly, allow the sealant and caulk to fully cure according to the manufacturer's recommendations.
Proper professional installation is strongly recommended. While this guide provides detailed instructions, fireplace insert installation can be complex and potentially hazardous. Hiring a qualified professional installer ensures the job is done safely, correctly, and in compliance with all local codes and regulations. A professional installer will have the necessary expertise, experience, and tools to handle any unforeseen challenges that may arise during the installation process. Furthermore, professional installation often comes with a warranty, providing added peace of mind. Even with this guide, consulting with a professional is always a prudent decision.

How To Install A Fireplace Insert Diy Save Money

Wood Fireplace Insert Installation Overview By Rockford Chimney Supply

Wood Fireplace S Installation Chimney Sweeps Of America

Wood Stoves And Fireplaces How To Install A Burning Fireplace Insert Hearth Com Forums Home

Best Fireplace Insert Repair Installs Ton Service

How To Install An Electric Fireplace Insert Fireplaces Direct Learning Center

Lodi Wi Installing Fireplace Insert Remodel

Why Get A Fireplace Insert Wood Gas Inserts In Tn Al

Custom Installation Of Fireplace Inserts Insert Installations Sierra Hearth And Home

Convert To Gas Installing Fireplace Inserts Doctor Flue