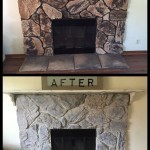
How To Remove a Marble Fireplace Surround
Removing a marble fireplace surround is a project that requires careful planning, the right tools, and a methodical approach. Marble, while beautiful, is a heavy and brittle material, making its removal potentially hazardous if not handled correctly. Improper techniques can lead to damage to the marble itself, the surrounding wall, or even personal injury. This article provides a comprehensive guide to safely and effectively removing a marble fireplace surround.
Before undertaking this project, it's crucial to assess the fireplace surround's construction and how it is attached to the wall. Marble surrounds are typically secured using a combination of methods, including adhesive (mortar or construction adhesive), mechanical fasteners (screws or nails), and friction. Understanding these attachment points is the first step in planning the removal process.
Furthermore, consider the age of the fireplace and the potential for asbestos. Older homes, particularly those built before the 1980s, may contain asbestos in the mortar or other building materials around the fireplace. If asbestos is suspected, it is essential to have the materials tested by a qualified professional before proceeding with any demolition work. Handling asbestos requires specialized equipment and training to prevent the release of harmful fibers into the air.
Key Point 1: Preparation and Safety Precautions
The foundation for a successful and safe removal lies in thorough preparation. This includes gathering the necessary tools, protecting the surrounding area, and taking appropriate safety precautions. Failing to adequately prepare can result in damage to the fireplace, the surrounding structure, or, most importantly, injury to the individual performing the removal.
The following tools are typically required for removing a marble fireplace surround:
*Safety Glasses: Essential for protecting eyes from dust and debris.
*Work Gloves: Provide grip and protect hands from sharp edges.
*Dust Mask or Respirator: Protects lungs from dust and potentially harmful particles.
*Hammer: Used in conjunction with chisels to break mortar or adhesive bonds.
*Chisels (various sizes): Essential for carefully separating the marble from the wall.
*Putty Knife or Scraper: Used to remove loose mortar and adhesive.
*Pry Bar: May be necessary to gently pry larger sections of marble away from the wall.
*Utility Knife: Useful for scoring along caulk lines or cutting through paint.
*Drill with various drill bits: May be needed to remove screws or weaken stubborn adhesive.
*Reciprocating Saw (optional): Can be used to cut through the framing behind the surround, but use with extreme caution to avoid damaging the marble or wall.
*Screwdriver (various sizes): For removing screws securing the surround.
*Stud Finder: Helps locate studs within the wall for anchoring supports.
*Level: Used to ensure supports are level.
*Shims: Help create small gaps for leverage.
*Buckets or Trash Bags: For debris removal.
*Drop Cloths or Plastic Sheeting: To protect the floor and surrounding walls from dust and debris.
*Moving Blankets or Padding: To protect the marble pieces once removed.
Before starting the removal process, thoroughly cover the floor and surrounding walls with drop cloths or plastic sheeting. This will protect these surfaces from scratches, dust, and falling debris. Secure the sheeting with painter's tape to prevent it from shifting during the work. Also, ensure adequate ventilation in the work area by opening windows or using a fan. Dust can be significant, and a well-ventilated space minimizes the risk of respiratory irritation.
Safety should always be the top priority. Wear safety glasses, work gloves, and a dust mask or respirator throughout the entire process. The dust generated during the removal can contain irritants, and the risk of flying debris is significant. If the marble surround is particularly heavy, consider enlisting the help of another person to assist with the removal and prevent accidental drops or injuries.
Key Point 2: Detaching the Marble Surround
Once all necessary preparations have been completed, the process of detaching the marble surround from the wall can begin. This requires a careful and methodical approach to minimize the risk of damage to the marble or the surrounding wall. Start by identifying any visible fasteners, such as screws or nails, and remove them using the appropriate screwdriver or nail puller.
Next, use a utility knife to score along any caulk lines where the surround meets the wall or the firebox. This will help to separate the caulk and prevent it from tearing the paint or wallpaper on the wall when the surround is removed. Run the knife along both sides of the caulk line, applying firm and even pressure.
With the visible fasteners removed and the caulk lines scored, the next step is to begin gently separating the marble from the wall. Start with a small chisel and hammer, carefully tapping along the edges of the marble pieces to break the adhesive bond. Work slowly and methodically, applying gentle pressure rather than forceful blows. The goal is to gradually loosen the marble without cracking or chipping it.
If the marble is adhered with mortar, the process may be more challenging. Use a larger chisel and hammer to gradually chip away at the mortar joint between the marble and the wall. Again, work slowly and carefully, applying gentle pressure to avoid damaging the marble. If the mortar is particularly stubborn, a reciprocating saw with a metal-cutting blade can be used to carefully cut through the mortar joint. However, this should be done with extreme caution to avoid damaging the marble or the surrounding wall.
As the marble pieces begin to loosen, use a pry bar to gently pry them away from the wall. Insert the pry bar between the marble and the wall, and apply gentle, even pressure to avoid cracking or breaking the marble. Use shims to create small gaps for leverage as you work your way around the surround. If a section is proving difficult to remove, re-evaluate the situation and try a different approach. Avoid using excessive force, as this can easily damage the marble.
For larger, heavier sections of marble, it may be necessary to provide temporary support to prevent them from falling and causing damage or injury. Use lumber to create a simple support structure that can hold the weight of the marble while it is being detached from the wall. Ensure the support is level and securely anchored before proceeding with the removal.
Key Point 3: Handling and Storage of Removed Marble
Once the marble pieces have been detached from the wall, proper handling and storage are crucial to prevent damage. Marble is a relatively soft and porous material, making it susceptible to scratches, stains, and chips. Therefore, it's important to handle the removed pieces with care and store them in a safe and protected environment.
Before moving the marble pieces, clean them thoroughly with a soft cloth and mild detergent. This will remove any dust, debris, or mortar residue that may have accumulated during the removal process. Avoid using harsh chemicals or abrasive cleaners, as these can damage the surface of the marble.
Wrap each marble piece individually in moving blankets or padding to protect them from scratches and impacts. Secure the blankets with tape to prevent them from unraveling during transport. For larger pieces, consider using cardboard or plywood to provide additional support and protection.
When moving the marble pieces, lift them carefully and avoid dragging them across the floor. Use a hand truck or dolly for heavier pieces to minimize the risk of strains or injuries. Ensure the path is clear of obstacles, and take extra care when navigating stairs or doorways.
Store the wrapped marble pieces in a dry and secure location, away from direct sunlight and extreme temperatures. Avoid stacking the pieces on top of each other, as this can cause scratches or cracks. If stacking is unavoidable, place a layer of padding between each piece to provide cushioning and prevent damage.
If the marble pieces are being stored for an extended period, inspect them periodically for signs of damage or deterioration. Re-wrap the pieces as needed to ensure they remain protected from the elements. With proper handling and storage, the removed marble surround can be preserved for future use or repurposing.
Ultimately, the successful removal of a marble fireplace surround depends on careful planning, meticulous execution, and a commitment to safety. By following the steps outlined in this article, individuals can minimize the risk of damage and injury, ensuring a positive outcome for this challenging project.

Removing Marble Hearth Mumsnet

How To Fit And Replace A Fire Surround Homebase

How To Remove A Fireplace Surround Direct Fireplaces

Repairing And Restoring Marble Fireplaces Www Stone Repairs Com

Fireplace Demolition Day The Handyman S Daughter

How To Remove A Builder Grade Fireplace Surround And Mantle

How To Demo A Marble Fireplace Danielle Connor

How Can I Replace Marble With Subway Tile On A Fireplace Surround Hometalk

Repairing And Restoring Marble Fireplaces Www Stone Repairs Com

How To Remove Fireplace Tiles Chaotically Creative
Related Posts