How To Refinish A Fireplace Mantel: A Step-By-step Guide
The fireplace mantel is often a focal point in a living room, serving as an architectural accent and a display area for decorative items. Over time, a mantel can become worn, scratched, or stained, detracting from the overall aesthetic of the space. Refinishing a fireplace mantel can restore its original beauty and complement the room's design. This article provides a comprehensive guide to refinishing a fireplace mantel, outlining essential steps and techniques.
Preparation is Key
Proper preparation is crucial for achieving a professional-looking finish. This stage involves protecting the surrounding area, removing the mantel (if possible), and thoroughly cleaning the surface. Careful preparation ensures that the refinishing process is efficient and effective, minimizing the risk of damage to the surrounding area and producing a smooth, even finish.
The first step is to protect the area surrounding the fireplace. Cover the hearth, floor, and any nearby walls with drop cloths or plastic sheeting. Secure the protective coverings with painter's tape to prevent them from shifting during the project. If the mantel is removable, carefully detach it from the wall. This allows for easier access to all surfaces and makes the refinishing process more manageable. If the mantel is permanently attached, ensure sufficient space to work around it.
Next, thoroughly clean the mantel. Use a mild detergent and water to remove any dirt, dust, grease, or grime. For stubborn stains, a specialized wood cleaner may be necessary. Rinse the surface with clean water and allow it to dry completely before proceeding to the next step.
Stripping the Old Finish
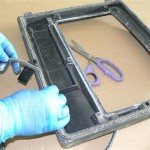
Removing the existing finish is an essential step in the refinishing process, especially if the old finish is cracked, peeling, or uneven. There are several methods for removing the old finish, including chemical stripping, sanding, and using a heat gun. The best method depends on the type of finish and the condition of the wood.
Chemical stripping involves applying a chemical stripper to the surface of the mantel. Follow the manufacturer's instructions carefully, wearing appropriate safety gear, such as gloves and eye protection. Allow the stripper to sit for the recommended time, then use a scraper to remove the softened finish. Be careful not to gouge or damage the wood. Multiple applications may be needed to remove all traces of the old finish. Once the old finish is removed, neutralize the surface with a solvent recommended by the stripper manufacturer before sanding.
Sanding is another option for removing the old finish. Start with coarse-grit sandpaper (e.g., 80-grit) to remove the bulk of the finish, then gradually move to finer grits (e.g., 120-grit, 180-grit, and 220-grit) to smooth the surface. Use a sanding block or an orbital sander for even pressure and to avoid creating swirl marks. For intricate details or hard-to-reach areas, use sandpaper folded or wrapped around a shaped object. After sanding, thoroughly remove all sanding dust with a tack cloth.
Using a heat gun can soften the old finish, making it easier to scrape off. Hold the heat gun at a safe distance from the mantel and move it slowly and evenly across the surface. As the finish softens, use a scraper to remove it. Be careful not to overheat the wood, as this can cause scorching or warping. This method is particularly effective for thick or multiple layers of paint or varnish.
Refinishing and Protection
Once the old finish is removed and the surface is smooth, the mantel is ready for refinishing. This involves applying a stain, paint, or clear coat to protect the wood and enhance its appearance. The choice of finish depends on the desired look and the style of the room.
Staining allows the natural grain of the wood to show through, adding warmth and character. Select a stain color that complements the existing décor. Before applying the stain, test it on an inconspicuous area to ensure the desired color. Apply the stain evenly with a brush, cloth, or foam applicator, following the grain of the wood. Allow the stain to penetrate for the recommended time, then wipe off any excess with a clean cloth. Apply multiple coats for a darker, richer color.
Painting provides a solid color finish, which can be customized to match any color scheme. Use a primer to prepare the surface for paint, ensuring better adhesion and a more uniform color. Apply the primer evenly and allow it to dry completely before applying the paint. Choose a paint that is suitable for wood and provides a durable, washable finish. Apply multiple thin coats of paint, allowing each coat to dry completely before applying the next. Lightly sand between coats with fine-grit sandpaper to remove any imperfections and create a smooth surface.
A clear coat, such as varnish, lacquer, or polyurethane, protects the wood from moisture, scratches, and stains. Apply the clear coat evenly with a brush, following the manufacturer's instructions. Allow each coat to dry completely before applying the next. Lightly sand between coats with fine-grit sandpaper to remove any imperfections and create a smooth, durable finish. Polyurethane is generally recommended for its durability and resistance to heat and moisture, making it a suitable choice for a fireplace mantel.

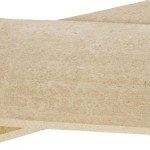
How To Re A Fireplace Mantel True Value

5 Amazing Inexpensive Easy Fireplace Remodel Transformations Designed

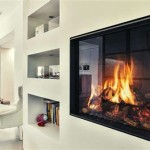
30 Fireplace Remodel Ideas For Any Budget

Kylie M Interiors How To Update Your Fireplace 5 Easy Ideas

30 Fireplace Remodel Ideas For Any Budget

Diy Fireplace Makeover Wood Slat

Diy Marble Fireplace And Mantel Makeover Top Shelf

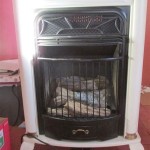
How To Refinish A Fireplace

How To Antique A Mantle For Diy Beginners Happily Ever Adventures

Diy Rustic Fireplace Mantel The Cure For A Boring