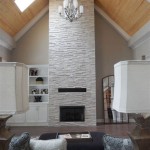
How To Put Stone Veneer Over a Brick Fireplace
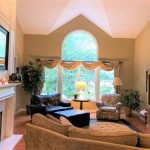
Updating a brick fireplace with stone veneer is a popular home improvement project. It can dramatically alter the aesthetic appeal of a room, giving it a more modern, rustic, or sophisticated look. This project involves adhering manufactured or natural stone veneer directly onto the existing brick surface. To ensure a successful and long-lasting result, careful preparation, proper material selection, and adherence to the appropriate installation techniques are essential.
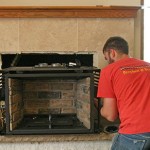
Before beginning, it's important to assess the existing brick fireplace to determine its structural integrity and suitability for the veneer application. Inspect the brick for any signs of damage, such as cracks, crumbling, or loose bricks. Repair any existing issues before proceeding with the veneer installation. A stable and sound brick surface is critical for the successful adhesion of the stone veneer.
Preparing the Brick Surface
Proper preparation of the brick surface is paramount to ensuring a strong bond between the veneer and the substrate. The following steps are crucial:
Cleaning: Thoroughly clean the brick surface to remove any dirt, dust, grease, soot, or loose debris. Use a wire brush and a solution of water and trisodium phosphate (TSP) or a similar degreasing cleaner. Rinse the surface thoroughly with clean water and allow it to dry completely. This step is vital, as any contaminants can impede the adhesion of the mortar.
Scarifying: If the brick surface is exceptionally smooth, scarifying it can improve the mechanical bond. This involves roughening the surface using a chisel or a grinder with a masonry grinding wheel. This process creates a more textured surface for the mortar to grip onto.
Applying a Scratch Coat: A scratch coat provides an even and textured surface for the veneer to adhere to. Mix a batch of Type S mortar according to the manufacturer's instructions. Apply a thin coat of mortar to the brick surface using a notched trowel, creating grooves or ridges. This increases the surface area for the veneer to bond to. Allow the scratch coat to cure for at least 24 to 48 hours before applying the stone veneer. The scratch coat should be firm, but not completely hardened.
Installing Metal Lath (Optional but Recommended): In some cases, particularly when the brick surface is excessively smooth or has existing coatings, installing metal lath is recommended. The metal lath provides a mechanical key for the mortar to grip onto, further enhancing the bond strength. Secure the metal lath to the brick using masonry nails or screws. Overlap the lath sections by at least 2 inches and ensure that it is firmly attached to the surface. The scratch coat is then applied over the metal lath.
Selecting and Preparing the Stone Veneer
Choosing the right stone veneer is important for achieving the desired aesthetic and ensuring compatibility with the fireplace. Stone veneer comes in various styles, colors, and textures. Consider the overall design of the room and the desired look when selecting the veneer.
Material Selection: Manufactured stone veneer is a popular choice due to its affordability, lightweight nature, and consistent dimensions. Natural stone veneer offers a more authentic look but is generally heavier and more expensive. Ensure that the chosen veneer is suitable for fireplace applications, as it needs to withstand heat exposure.
Layout and Planning: Before installing the veneer, dry-fit the stones on the floor to determine the desired layout and pattern. This allows for adjustments and ensures that the stones fit together seamlessly. Consider the placement of corner stones, if applicable, and any special features or patterns. Cut the stones as needed using a wet saw with a diamond blade, or a masonry chisel and hammer, to achieve the desired shapes and sizes. Wearing appropriate personal protective equipment, including safety glasses and gloves, is essential when cutting stone veneer.
Back Buttering: Before applying each stone to the fireplace, back-butter the stone with mortar. This involves applying a layer of mortar to the back of the stone using a trowel. Ensure that the mortar covers the entire back surface and is about ½ to ¾ inch thick. Back-buttering creates a strong bond between the stone and the scratch coat.
Installing the Stone Veneer
With the brick surface prepared and the stone veneer selected and planned, the installation process can begin. Precision and attention to detail are crucial for a professional-looking result.
Mortar Application: Using a trowel, apply a generous layer of mortar to the prepared scratch coat. Work in small sections to prevent the mortar from drying out before the veneer is applied. The mortar should be thick enough to provide a solid bed for the stone but not so thick that it oozes out excessively when the stone is pressed into place. Ensure that the mortar is properly mixed and has a workable consistency.
Stone Placement: Carefully press each stone veneer piece into the mortar bed, applying firm and even pressure. Wiggle the stone slightly to ensure good contact with the mortar. Maintain consistent spacing between the stones to create a uniform appearance. Use shims, if necessary, to maintain consistent joint widths. Follow the layout plan established during the dry-fitting process.
Corner Stones: If using corner stones, install them first to establish a clean and professional edge. Ensure that the corner stones are properly aligned and level. The remaining stones can then be installed around the corner stones.
Jointing: After the mortar has partially set, typically after 30 minutes to an hour, carefully remove any excess mortar from the joints between the stones. Use a pointing tool or a small trowel to create a smooth and consistent joint profile. Choose a joint profile that complements the style of the stone veneer and the overall design of the fireplace. Be careful not to smear mortar onto the face of the stones. Allow the mortar to cure completely according to the manufacturer's instructions. This usually takes 24 to 72 hours.
Sealing (Optional): In some cases, sealing the stone veneer is recommended to protect it from staining and moisture damage. Use a breathable stone sealer specifically designed for fireplaces or stone veneers. Apply the sealer according to the manufacturer's instructions. Sealing can enhance the appearance of the stone and prolong its lifespan.
Following these steps will help ensure a successful installation of stone veneer over a brick fireplace, resulting in a beautiful and durable new focal point for the room. Remember to always prioritize safety by wearing appropriate personal protective equipment and following all manufacturer's instructions.

Installing Stone Veneer Over A Brick Fireplace Grand River

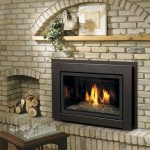
Stone Veneer Over A Brick Fireplace Updates The Look

Stone Veneer Over A Brick Fireplace Updates The Look

Stone Veneer Over A Brick Fireplace Updates The Look

Can You Put Stone Veneer Over Brick

Can You Put Stone Veneer Over Brick

Transform Your Home Stone Veneer Over Brick Fireplace Guide

Thin Stone Veneers Make A Fireplace Update Easy Swenson Granite 100 Natural Stones

How To Diy A Stacked Stone Feature Over Existing Brick

Walter S Diy Chimney Remodel Stone Over Brick Genstone
Related Posts