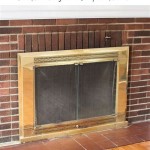
How To Tile Over Existing Stone Fireplace
Updating a fireplace can dramatically transform the aesthetic of a living space. While complete fireplace removal and reconstruction are options, tiling over an existing stone fireplace presents a less disruptive and often more cost-effective alternative. This process requires careful preparation, appropriate material selection, and precise execution to ensure a durable and visually appealing result. This article provides a comprehensive guide on how to tile over an existing stone fireplace.
The decision to tile over an existing stone fireplace should be carefully considered. The condition of the underlying stone, the desired aesthetic outcome, and the functional requirements of the fireplace all play crucial roles in determining the suitability of this approach. The weight of the new tile and the suitability of the existing stone to support the weight need to be taken into consideration. It's also important to verify that tiling over the stone complies with local building codes and regulations regarding fireplace construction and safety.
Assessing the Existing Stone Fireplace
Before commencing any tiling work, thoroughly assess the condition of the existing stone fireplace. This assessment involves a meticulous inspection to identify any structural weaknesses, loose stones, or surface irregularities. Neglecting this step can lead to premature tile failure and compromise the overall integrity of the fireplace.
Begin by visually inspecting each stone for cracks, chips, or signs of deterioration. Small cracks may be filled with patching compound, but larger cracks, especially those affecting the structural integrity of the stone, require more extensive repairs or even stone replacement. Loose stones must be firmly reattached using appropriate masonry adhesive. Mortar joints should be inspected for crumbling or missing mortar, which must be repointed to provide a stable base for the tile.
Next, evaluate the surface of the stone for any existing coatings, such as paint, sealant, or soot accumulation. These coatings can interfere with the adhesion of the tile mortar and must be removed. Depending on the type of coating, removal can be achieved through methods such as sandblasting, chemical stripping, or mechanical scraping. Ensure the removal method is appropriate for the type of stone to avoid damage. Sandblasting, for example, can be too abrasive for certain soft stones.
Finally, check the overall alignment and levelness of the stone surface. Significant variations in level can complicate the tiling process and may require the application of a leveling compound to create a smooth and even substrate. Minor imperfections can be addressed during the tile-setting process using adjustments in mortar thickness.
Preparing the Stone Surface for Tile
Proper surface preparation is paramount for achieving a strong and durable bond between the existing stone and the new tile. This preparation process involves cleaning, roughening, and priming the stone surface to enhance adhesion.
Begin by thoroughly cleaning the stone surface to remove any dirt, dust, grease, or other contaminants that could impede adhesion. Use a stiff brush and a suitable cleaning solution, such as a mixture of water and trisodium phosphate (TSP), to scrub the surface vigorously. Rinse the surface thoroughly with clean water to remove all traces of the cleaning solution. Allow the surface to dry completely before proceeding to the next step.
Next, roughen the surface of the stone to create a mechanical key for the tile mortar. This can be achieved using a variety of methods, such as sandblasting, etching with a masonry acid, or scoring with a chisel or diamond grinder. The chosen method should be appropriate for the type of stone and the desired level of roughness. Acid etching, for instance, is suitable for harder stones, while scoring may be preferable for softer stones. Exercise caution when using power tools to avoid damaging the stone.
After roughening the surface, apply a bonding primer specifically designed for use with tile mortar on stone surfaces. This primer will further enhance adhesion and create a uniform surface for the mortar to bond to. Choose a primer that is compatible with both the stone and the tile mortar. Follow the manufacturer's instructions for application, ensuring that the primer is applied evenly and allowed to dry completely before proceeding to the next step.
Selecting Tile and Mortar
The choice of tile and mortar is critical to the success of the tiling project. The tile must be compatible with the fireplace environment, and the mortar must be able to adhere strongly to both the stone and the tile. Consider factors such as heat resistance, moisture resistance, and aesthetic appeal when making these selections.
For fireplace surrounds, tiles made of porcelain, ceramic, or natural stone, such as slate or granite, are generally suitable. Porcelain tiles are known for their durability, water resistance, and wide range of styles. Ceramic tiles are less expensive than porcelain tiles but may be less durable. Natural stone tiles offer a unique aesthetic but require more maintenance and can be more porous. The tile weight needs to be considered to ensure the existing stone can support the added load.
When selecting mortar, choose a modified thin-set mortar specifically designed for use with tile and stone. Modified thin-set mortars contain polymers that enhance adhesion, flexibility, and water resistance. Ensure that the mortar is also compatible with the type of stone and tile being used. For example, some natural stones require a non-staining mortar to prevent discoloration. Follow the manufacturer's instructions for mixing the mortar, paying close attention to the water-to-powder ratio to achieve the correct consistency.
Grout is also an important consideration. Select a grout that is appropriate for the type of tile and the width of the grout joints. Sanded grout is typically used for wider grout joints, while unsanded grout is used for narrower grout joints. Choose a grout color that complements the tile and the overall aesthetic of the fireplace. Seal the grout after installation to protect it from staining and moisture penetration.
Tiling the Fireplace
The tiling process requires careful planning and execution to ensure a professional-looking result. Start by dry-fitting the tiles to determine the layout and make any necessary adjustments. This step will help to avoid awkward cuts or uneven spacing during the actual tiling process.
Begin by applying a thin, even layer of mortar to the prepared stone surface using a notched trowel. The size of the notches on the trowel should be appropriate for the size and type of tile being used. Press each tile firmly into the mortar, using a slight twisting motion to ensure good contact. Use tile spacers to maintain consistent grout joint widths. Periodically check the levelness of the tiles using a level and make any necessary adjustments before the mortar sets.
Cutting tiles to fit around the firebox opening, corners, and other features may be required. Use a wet saw or tile nippers to make precise cuts. Wear safety glasses when cutting tiles to protect your eyes from flying debris. Apply the cut tiles in the same manner as the full tiles, ensuring that the cut edges are aligned properly.
After all the tiles have been installed, allow the mortar to cure for the manufacturer's recommended time, typically 24 to 48 hours. Remove the tile spacers and clean any excess mortar from the tile surfaces using a damp sponge. Prepare the grout according to the manufacturer's instructions and apply it to the grout joints using a grout float. Work the grout into the joints thoroughly, making sure to fill them completely. Remove excess grout from the tile surfaces using a damp sponge, rinsing the sponge frequently. After the grout has partially dried, use a clean, dry cloth to polish the tile surfaces and remove any remaining grout haze.
Sealing and Finishing Touches
Sealing and finishing touches are essential for protecting the tile and grout and enhancing the overall appearance of the fireplace. These steps will help to ensure the longevity and beauty of the tiled fireplace.
After the grout has fully cured, apply a grout sealer to protect it from staining and moisture penetration. Choose a sealer that is appropriate for the type of grout used. Apply the sealer according to the manufacturer's instructions, typically using a brush or applicator pad. Allow the sealer to dry completely before using the fireplace.
If using natural stone tiles, consider applying a stone sealer to protect them from staining and moisture damage. Choose a sealer that is specifically designed for the type of stone being used. Apply the sealer according to the manufacturer's instructions, ensuring that the stone is clean and dry before application.
Finally, inspect the tiled fireplace for any imperfections or areas that need touch-up. Repair any cracked or chipped tiles, and reapply grout to any joints that are missing grout. Clean the tile surfaces with a mild detergent and water to remove any remaining dirt or grime. Once all the finishing touches have been completed, the tiled stone fireplace is ready to be enjoyed.

How To Tile A Fireplace Even If It S Brick The Handyman Daughter

How To Tile A Fireplace Even If It S Brick The Handyman Daughter

How To Tile A Fireplace House One

Read This Before Your Stone Fireplace Makeover Understanding Undertones

How To Prep A Fireplace For New Tile House One

How To Install Stacked Stone Tile On A Fireplace Thrifty Decor Diy And Organizing

How To Tile Over A Marble Fireplace Surround Porch Daydreamer

Over Grouted Fireplace Project Love Living Here

Thin Stone Veneers Make A Fireplace Update Easy Swenson Granite 100 Natural Stones

12 Stacked Stone Fireplace Ideas For Optimal Coziness


