Installing a Wood Stove Insert in a Fireplace: A Comprehensive Guide
Installing a wood stove insert into an existing fireplace offers a practical and efficient method for enhancing home heating. This conversion transforms a traditionally inefficient open fireplace into a more effective heat source. The installation process, while manageable for experienced DIYers, demands meticulous planning, adherence to safety guidelines, and a thorough understanding of local building codes. This article provides a comprehensive guide to the installation process, outlining the necessary steps, safety precautions, and considerations for a successful conversion.
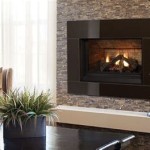
A wood stove insert is specifically designed to fit inside an existing fireplace opening. Unlike open fireplaces, which lose a significant amount of heat up the chimney, inserts are designed to radiate heat into the room. They are typically constructed of cast iron or steel and feature a closed combustion chamber, allowing for more controlled and efficient burning. Furthermore, many models include a blower system to circulate warm air into the living space, maximizing heat distribution.
Before beginning the installation, it is crucial to determine the suitability of the existing fireplace for conversion. This involves assessing the structural integrity of the fireplace, the dimensions of the firebox, and the condition of the chimney. A thorough inspection by a qualified professional is highly recommended to ensure the fireplace meets the necessary requirements for safe and efficient operation of a wood stove insert.
Key Point 1: Pre-Installation Assessment and Preparation
This phase is critical for a successful and safe installation. A careful evaluation of the existing fireplace and chimney is essential before proceeding with the installation of a wood stove insert. Failure to properly assess the existing structure can lead to safety hazards and operational inefficiencies.
The first step involves a thorough inspection of the fireplace and chimney. This inspection should include checking for cracks, loose bricks, or any signs of structural damage. A chimney sweep should be hired to clean the chimney flue and remove any creosote buildup. Creosote is a highly flammable byproduct of wood burning and poses a significant fire risk if allowed to accumulate.
Next, the dimensions of the fireplace opening and firebox must be accurately measured. These measurements are crucial for selecting a wood stove insert that will fit properly and operate efficiently. The manufacturer's specifications for the insert should be carefully reviewed to ensure it is compatible with the existing fireplace dimensions. Consider the depth, width, and height of the fireplace opening, as well as the depth of the firebox.
Local building codes and regulations pertaining to wood stove installations must be thoroughly researched and understood. These codes often specify requirements for chimney liners, clearances to combustible materials, and permitting procedures. Contacting the local building department is advisable to obtain the necessary permits and ensure compliance with all applicable regulations. This might involve providing detailed plans of the installation.
The area surrounding the fireplace should be prepared for the installation process. This includes removing any flammable materials, such as curtains or furniture, and protecting the flooring with drop cloths or other protective coverings. It is also advisable to gather all the necessary tools and materials before starting the installation. This will help to streamline the process and minimize delays.
Essential tools for the installation typically include: safety glasses, work gloves, a measuring tape, a level, a drill with various bits, a masonry drill bit (if required), a hammer, a screwdriver set, a chimney liner installation kit, a high-temperature sealant, and a metal cutting tool (such as a grinder or reciprocating saw, if modifications are needed).
The selected wood stove insert should be carefully reviewed to ensure all components are present and undamaged. Consult the manufacturer's instructions for a complete list of parts and any specific installation recommendations. Familiarizing oneself with the insert's features and operation before installation will contribute to a smoother process.
Finally, proper ventilation is essential during the installation process. Ensure the area is well-ventilated to minimize exposure to dust and fumes. Wearing a dust mask or respirator is recommended, especially when working with masonry or cutting metal.
Key Point 2: Chimney Liner Installation
The installation of a properly sized and installed chimney liner is paramount for the safe and efficient operation of a wood stove insert. An improperly installed or undersized liner can lead to dangerous conditions, including chimney fires and carbon monoxide poisoning. The chimney liner serves to contain the exhaust gases and direct them safely out of the home.
Typically, a flexible stainless steel chimney liner is recommended for wood stove insert installations. The size of the liner should match the outlet size of the wood stove insert, as specified by the manufacturer. Insufficient liner diameter will restrict airflow and cause the stove to burn inefficiently, creating excessive smoke and creosote buildup.
The chimney liner installation kit typically includes the flexible stainless steel liner, a top plate with a rain cap, and a connector to attach the liner to the wood stove insert. The installation process involves carefully feeding the liner down the chimney flue, ensuring it is properly aligned and free of obstructions. This process often requires two people, one to guide the liner from above and another to assist from below.
Before feeding the liner down the chimney, it's often best practice to insulate the liner. This helps maintain flue gas temperatures, preventing condensation and creosote formation. There are various insulation methods, including wrapping the liner with insulation blankets or using a poured insulation mix designed for chimney liners.
Once the liner is fully inserted, the top plate with the rain cap should be securely attached to the top of the chimney. The rain cap prevents rain and debris from entering the chimney flue. The connector should then be used to attach the liner to the wood stove insert's exhaust outlet. All connections should be airtight and secured with high-temperature sealant to prevent leaks.
Many installations will require a block off plate. This plate seals the area above the insert in the fireplace to prevent heat from escaping into the chimney and force the warmth into the room. An opening should be made in the block off plate to connect to the chimney liner, using the same high-temperature sealant.
It is crucial to regularly inspect the chimney liner for damage or deterioration. A qualified chimney sweep should inspect the liner annually to ensure it is in good condition and free of obstructions. Replacing the chimney liner may be necessary if it becomes damaged or corroded.
Improper chimney liner installation is a common cause of wood stove-related fires and carbon monoxide poisoning. If unsure about any aspect of the installation, it is strongly recommended to hire a qualified professional to perform the work. A professional installer will have the necessary experience and equipment to ensure the liner is installed correctly and safely.
Key Point 3: Insert Placement and Connection
Proper placement and secure connection of the wood stove insert within the fireplace are vital for both safety and optimal performance. This involves carefully positioning the insert within the firebox, ensuring proper clearances, and securely connecting it to the chimney liner.
Before moving the wood stove insert into the fireplace, prepare the firebox by removing any remaining debris. Ensure the firebox floor is level and stable. If necessary, add shims or leveling blocks to provide a solid, level base for the insert.
Carefully maneuver the wood stove insert into the fireplace opening. This may require the assistance of two or more people, as inserts can be heavy and cumbersome. Lift the insert into place, making sure not to damage the firebox or the insert itself. Refer to the manufacturer's instructions for specific lifting and handling recommendations.
Once the insert is positioned within the firebox, ensure it is properly aligned and centered. Check for adequate clearances to combustible materials, such as walls, mantels, and flooring. Many building codes require specific minimum clearances to ensure safety. Refer to the wood stove insert's installation manual and local building codes for the correct clearance requirements.
Connect the wood stove insert to the chimney liner using the appropriate connector. Ensure the connection is airtight and secure. Use high-temperature sealant to seal any gaps and prevent leaks. A secure and airtight connection is essential to prevent the escape of exhaust gases into the living space.
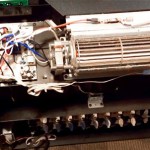
Many wood stove inserts have blowers to help circulate warm air. Ensure the blower is properly connected to a power source and that the wiring is safely secured. Test the blower to ensure it is functioning correctly. This testing should occur after the insert is completely installed.
Once the insert is fully installed, perform a test burn to check for proper operation and ventilation. Start with a small fire and gradually increase the size of the fire. Monitor the chimney for smoke and ensure the smoke is exiting the chimney correctly. Check for any unusual odors or signs of smoke entering the living space. If any problems are detected, immediately extinguish the fire and investigate the cause.
After the test burn, carefully inspect all connections for leaks or gaps. Check the surrounding area for any signs of overheating or damage. If everything appears to be in order, the wood stove insert is ready for use. However, it is still crucial to monitor the stove regularly during the initial period to ensure safe and efficient operation.
Familiarize oneself with the wood stove insert's operating instructions and safety guidelines before using it regularly. Use only seasoned, dry wood for optimal burning efficiency and to minimize creosote buildup. Never burn treated wood, painted wood, or other materials that can release harmful chemicals into the air.
Regular maintenance, including cleaning the chimney and inspecting the insert, is essential for safe and efficient operation. Schedule an annual chimney sweep to remove creosote and inspect the chimney liner. Regularly inspect the wood stove insert for signs of wear or damage and replace any worn or damaged parts promptly.

Wood Fireplace Insert Installation Overview By Rockford Chimney Supply

Wood Stoves And Fireplaces How To Install A Burning Fireplace Insert Hearth Com Forums Home

How To Install A Wood Burning Fireplace Insert Fireplaces Direct Learning Center

Wood Fireplace S Installation Chimney Sweeps Of America

How To Install A Fireplace Insert Diy Save Money

Fireplace Insert Installation Wood Burning Inserts

Wood Burning Fireplace Insert Frederick Md Repair Install

How To Install A Wood Burning Fireplace Insert This Old House

Why A Wood Burning Fireplace Insert Bethesda Md Service

Wood Burning Fireplace Inserts Insert Installation
Related Posts