How To Install a Wood Burning Stove Into a Fireplace
Installing a wood burning stove into an existing fireplace can be an efficient and cost-effective way to heat a home. This process involves more than simply placing the stove within the firebox; it requires careful planning, adherence to safety regulations, and the proper connection of venting systems. Understanding each step, from initial inspection to final inspection, is crucial for a safe and functional installation.
Before commencing any work, it is imperative to verify local building codes and regulations regarding wood burning stove installation. These regulations often dictate permissible stove models, clearance requirements, and venting specifications. Obtaining the necessary permits is not just a legal obligation; it also ensures that the installation meets safety standards that protect the homeowner and the property. Contacting the local building department is the first step in ensuring compliance.
This article provides a comprehensive guide to installing a wood-burning stove into a fireplace. It covers the essential steps involved, emphasizing safety and proper installation techniques to ensure optimal performance and minimize potential hazards.
1. Assessing the Fireplace and Choosing the Right Stove
The initial stage of the installation process involves thoroughly assessing the existing fireplace and selecting a compatible wood burning stove. This assessment determines the feasibility of the installation and guides the choice of appropriate materials and techniques.
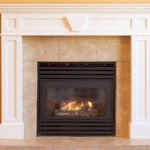
Begin by inspecting the fireplace structure, including the firebox, chimney, and hearth. Look for any signs of damage, such as cracks, crumbling mortar, or deterioration. These issues must be addressed before proceeding with the installation, as they can compromise the structural integrity of the fireplace and pose safety risks. A qualified professional should be consulted to repair any significant damage.
Measure the dimensions of the firebox opening and the interior space. These measurements will help determine the maximum size of the wood burning stove that can be safely and effectively installed. Consider the dimensions of the stove itself, allowing for adequate clearance around the appliance for proper airflow and heat dissipation.
The size of the firebox will influence the BTU (British Thermal Units) output required from the stove. A stove that is too large for the space can overheat the room, while a stove that is too small may not provide sufficient heat. Consult with a stove retailer or manufacturer to determine the appropriate BTU output for the space being heated. Factors such as the size of the room, insulation levels, and climate should be considered.
Examine the chimney flue to ensure it is in good condition and of adequate size for the chosen stove. The flue must be free of obstructions, such as bird nests or creosote buildup. A professional chimney sweep can inspect and clean the flue, ensuring proper draft and ventilation. The flue diameter must match the stove's exhaust outlet to prevent backdrafting and carbon monoxide buildup.
When selecting a wood burning stove, consider factors such as efficiency, emissions, and safety features. EPA-certified stoves are designed to burn cleaner and more efficiently than older models, reducing air pollution and fuel consumption. Look for stoves with features such as air wash systems, which help keep the glass door clean, and catalytic combustors, which further reduce emissions. Check the efficiency rating of the stoves being considered. Higher efficiency ratings translate to less wood consumption for the same heat output.
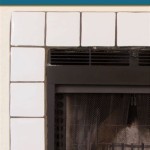
The hearth, the non-combustible floor area in front of the fireplace, must meet minimum size requirements to protect the surrounding flooring from sparks and embers. Building codes typically specify the minimum hearth extension in front of and to the sides of the stove opening. If the existing hearth does not meet these requirements, it must be extended or replaced with a non-combustible material.
Finally, evaluate the draft of the chimney. A good draft is essential for proper stove operation and to prevent smoke from entering the house. The draft can be tested by lighting a small fire in the fireplace and observing the smoke flow. If the smoke rises quickly and cleanly up the chimney, the draft is likely adequate. If the smoke lingers or enters the room, the draft may be insufficient. Draft issues can often be resolved by cleaning the chimney or installing a chimney liner.
2. Installing a Chimney Liner
Installing a chimney liner is a crucial step in ensuring the safe and efficient operation of a wood burning stove installed within a fireplace. A chimney liner provides a dedicated, properly sized flue for the stove, protecting the existing chimney masonry from corrosive byproducts of combustion and improving draft.
A chimney liner is essentially a metal pipe, typically made of stainless steel, that runs the entire length of the chimney flue. It provides a smooth, airtight passage for exhaust gases, preventing them from seeping through cracks or gaps in the masonry and potentially entering the living space. It also protects the chimney from the acidic compounds found in wood smoke, which can deteriorate the mortar and brick over time.
Before installing a chimney liner, thoroughly clean the chimney flue to remove any creosote buildup or debris. A professional chimney sweep can perform this task using specialized brushes and equipment. Removing creosote is essential to prevent chimney fires, as creosote is highly flammable.
Choose a chimney liner that is specifically designed for wood burning stoves and that meets the manufacturer's specifications for the chosen stove model. The liner diameter must match the stove's exhaust outlet to ensure proper draft. Common liner diameters are 6 inches and 8 inches. Consider the type of fuel to be burned. For stoves burning primarily seasoned firewood, a standard stainless steel liner is often sufficient. For stoves burning less seasoned wood or wood pellets, a heavier gauge stainless steel liner may be required.
The most common method for installing a chimney liner involves lowering it down the chimney flue from the top. This typically requires two people, one to feed the liner down the flue and the other to guide it from below. Attach a rope or cable to the top of the liner to help control its descent. Carefully lower the liner, avoiding any sharp bends or obstructions. Use chimney insulation wrap to improve the stove's efficiency. This wrap will keep the flue gases hot and moving upward in the chimney.
Once the liner is fully inserted, connect it to the stove's exhaust outlet using a stove pipe adapter. This adapter provides a secure, airtight connection between the liner and the stove. The connection should be sealed with high-temperature silicone sealant to prevent leaks. Check the connections and seals to make certain they are airtight and can withstand very high temperatures.
At the top of the chimney, install a chimney cap to prevent rain, snow, and debris from entering the flue. The chimney cap should also include a spark arrestor to prevent sparks from escaping and potentially igniting nearby vegetation. A chimney cap not only protects the liner but also improves the draft of the chimney.
Secure the chimney liner at the top of the chimney using a top plate or flashing. This plate seals the liner to the chimney crown, preventing water from entering the flue. The plate should be made of a durable, weather-resistant material, such as stainless steel or aluminum.
Inspect the entire length of the installed chimney liner to ensure it is free of kinks, bends, or obstructions. Any imperfections in the liner can restrict airflow and reduce the stove's efficiency. A smooth, unobstructed liner is essential for optimal performance and safety.
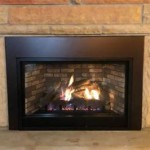
3. Installing the Stove and Making Final Connections
After the chimney liner is properly installed, the next step involves positioning the wood burning stove within the fireplace and making the final connections to the venting system. This stage requires careful attention to detail and adherence to safety guidelines to ensure a safe and functional installation.
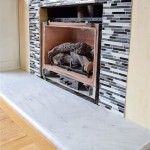
Position the wood burning stove on the hearth, ensuring it is level and stable. Use shims if necessary to correct any unevenness. The stove should be placed in a location that allows for adequate clearance around the appliance, as specified by the manufacturer. These clearances are crucial for preventing overheating and reducing the risk of fire. A fire-resistant underlayment can be placed before the stove for more safety.
Connect the stove's exhaust outlet to the chimney liner using a stove pipe. The stove pipe should be of the same diameter as the stove's outlet and the chimney liner. Use as few bends as possible in the stove pipe to minimize resistance to airflow. Each bend reduces the draft and can increase the risk of smoke spillage. If bends are necessary, use 45-degree elbows instead of 90-degree elbows.
Secure each section of the stove pipe with at least three screws to prevent them from separating. The screws should be made of stainless steel or another corrosion-resistant material. Ensure the stove pipe is properly sealed to prevent leaks. High-temperature silicone sealant can be used to seal the joints between the pipe sections.
Connect the stove pipe to the chimney liner adapter, ensuring a tight and secure connection. Seal the connection with high-temperature silicone sealant. This connection is critical for preventing exhaust gases from leaking into the room. Visually inspect all joints for leaks, and reinforce them if necessary.
Once the stove is connected to the venting system, perform a test burn to check for proper draft and ventilation. Start a small fire in the stove and observe the smoke flow. The smoke should rise quickly and cleanly up the chimney. If the smoke lingers or enters the room, there may be a draft issue that needs to be addressed. Possible causes of draft issues include a blocked chimney, an undersized flue, or negative pressure in the house.
Install a carbon monoxide detector in the room where the stove is located. Carbon monoxide is a colorless, odorless gas that can be deadly. A carbon monoxide detector will provide an early warning if carbon monoxide levels become dangerously high. The detector should be installed according to the manufacturer's instructions.
Check all clearances around the stove to ensure they meet the manufacturer's specifications and local building codes. Ensure that combustible materials, such as furniture, curtains, and wood framing, are kept a safe distance from the stove. Heat shields can be used to reduce clearance requirements in some cases. Make certain that everything is clear before turning on the stove.
After the installation is complete, schedule an inspection with the local building department to ensure the installation meets all applicable codes and regulations. This inspection is essential for ensuring the safety and legality of the installation. The inspector will check for proper clearances, venting, and other safety requirements.
Finally, familiarize yourself with the stove's operating instructions and safety precautions. Understanding how to properly operate and maintain the stove is essential for ensuring its safe and efficient performance. Always use seasoned firewood and avoid burning trash or other materials that can produce harmful emissions.

Converting A Fireplace To Wood Burning Stove Chesneys

Can You Install A Wood Stove In Fireplace Direct Stoves

How To Install A Wood Burning Fireplace Insert This Old House

How To Install A Wood Stove Step By Instructions

How To Install A Wood Burning Fireplace Insert Fireplaces Direct Learning Center

Wood Stove Inside Fireplace Hearth Com Forums Home

Converting A Fireplace To Wood Burning Stove Chesneys

How To Install A Fireplace Insert Ask This Old House

How To Install A Wood Burning Fireplace Insert This Old House

How To Install A Wood Burning Stove Into An Existing Chimney Www Pomoly Com
Related Posts