Replacing Your Fireplace Surround With Stone: A Guide to Enhance Your Home
A fireplace is often the focal point of a living room, creating a warm and inviting ambiance. However, an outdated or worn-out fireplace surround can detract from the overall aesthetic appeal of the space. Replacing your fireplace surround with stone can be a transformative project that revitalizes your home and enhances its character. Stone surrounds offer a classic and enduring look that blends seamlessly with various design styles, from rustic to contemporary.
Choosing the Right Stone for Your Fireplace Surround
The first step in replacing your fireplace surround with stone is selecting the right material. Several stone options are available, each with unique characteristics and aesthetic qualities. Here are some popular choices:
- Limestone: A soft, sedimentary stone known for its warm, earthy tones and subtle veining. It's a versatile option suitable for both traditional and modern fireplaces. However, limestone is porous and requires sealing to protect it from stains and moisture.
- Granite: A hard, durable stone with a wide range of colors, patterns, and finishes. It's resistant to scratches and heat, making it an ideal choice for fireplaces. Granite's natural beauty and durability contribute to its popularity in both traditional and contemporary applications.
- Marble: A luxurious and elegant stone with a distinctive veining pattern. Marble is known for its cool, understated elegance. While beautiful, it's more susceptible to etching from acidic substances, so it's essential to use coasters and cleaning products suited for marble.
- Slate: A natural stone with a distinctive, layered appearance. It's available in various colors and textures, offering a unique and rustic aesthetic. Slate is durable and heat-resistant, making it a suitable choice for fireplaces. Its non-slip surface also makes it an excellent option for hearth areas.
- Travertine: A porous stone with a distinctive, textured surface. It's known for its warm, earthy tones and is often used to create a classic, elegant look. Travertine requires regular sealing to protect it from stains and moisture.
Consider the overall style of your home, fireplace size, and personal preferences when selecting a stone. Factors like the stone's color, texture, and veining patterns will significantly impact the final look of your fireplace surround.
Preparing for Installation
Before installing a stone fireplace surround, it's essential to prepare the area adequately. This includes removing the existing surround, cleaning the surface, and ensuring that the walls are level and plumb.
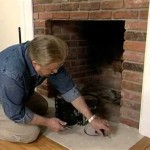
Remove the existing surround carefully, taking note of the dimensions and installation methods. Ensure that the area is free from debris and dust. You may need to repair any damaged areas of the wall before proceeding. If the existing surround is a non-combustible material, you may be able to install the new stone directly over it. However, if the existing surround is combustible, it is recommended to consult with a professional to ensure safe installation.
Installing the Stone Surround
Installing a stone surround can be a complex process, requiring specialized tools and knowledge. For intricate designs or complex installations, it's highly recommended to hire a professional stone mason. However, if you have experience with DIY projects and are comfortable working with stone, you can install a simple surround yourself, following these steps:
- Lay Out the Stone: Dry-fit the stone pieces before applying any mortar. This step helps ensure you achieve the desired pattern and determine the exact placement of each piece. Utilize spacers to maintain consistent grout lines.
- Apply Mortar: Use a mortar specifically designed for stone installation. Apply a thin layer of mortar to the back of each stone, ensuring even coverage. Avoid applying excessive mortar, as it may create an uneven surface.
- Position the Stones: Carefully position the stone pieces onto the prepared wall, following your dry-fit layout. Press firmly to ensure a secure bond.
- Grout the Joints: Once the mortar has cured, fill in the gaps between the stones with grout. Choose a grout color that complements the stone and your desired aesthetic.
- Clean and Seal: Clean the excess grout with a damp sponge and allow it to dry completely. For added protection and longevity, seal the stone with a stone sealant.
When dealing with stone, safety precautions are essential. Wear appropriate clothing, including gloves and eye protection, and work in a well-ventilated area.
Final Touches
Once the stone surround is installed, you can add the finishing touches to create a truly stunning fireplace. This may include adding a mantelpiece, lighting, or decorative accents to complement the stone. Consider the size and design of the fireplace when selecting these elements to achieve a balanced and cohesive look. Choosing a mantelpiece that complements the style of the stone can elevate the fireplace's elegance.
A well-lit fireplace creates a warm and inviting ambiance and showcases the stone surround's beauty. Adding sconces or other lighting fixtures on either side of the fireplace can highlight the stone and create a focal point in the room. Finally, decorative accents like vases, candles, or art pieces can enhance the fireplace's visual appeal and complete the overall style.

Masonry Fireplace Service Upgrade Hearth With A Surround

12 Stacked Stone Fireplace Ideas For Optimal Coziness

How To Build And Hang A Mantel On Stone Fireplace Shanty 2 Chic

Fireplace Mantels Stone Facing Chadds Ford Fireside

Cast Stone Fireplaces So Much Better With Age

Read This Before Your Stone Fireplace Makeover Understanding Undertones

Removing A Stone Fireplace In My Own Style
How To Remove A Granite Stone Mantel Our Fireplace Four Generations One Roof Blog

Fireplace Refacing So You Want To Bob Vila

12 Stacked Stone Fireplace Ideas For Optimal Coziness
Related Posts

