How To Make A Mini Cardboard Fireplace
Creating a miniature cardboard fireplace offers a delightful and engaging crafting project. It is a cost-effective and environmentally friendly way to add a touch of festive ambiance to any room, especially during the holiday season. The construction process is relatively simple, making it suitable for crafters of various skill levels. Proper planning and execution of each step can result in a charming decorative piece.
Before embarking on the project, gather the necessary materials. A sturdy cardboard box is the primary component, typically recovered from shipping containers or appliance packaging. The size of the box will dictate the overall dimensions of the finished fireplace. Additional materials include craft knives or scissors for cutting, a ruler or measuring tape for precision, hot glue or craft glue for assembly, paint or decorative paper for finishing, and embellishments like faux logs or electric candles for added realism. The use of safety glasses and a cutting mat is recommended during the cutting process.
Selecting and Preparing the Cardboard Box
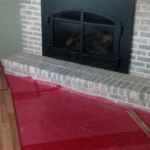
The selection of the appropriate cardboard box is critical for the stability and appearance of the mini fireplace. A box with thick, corrugated cardboard is preferable as it provides greater structural integrity. Begin by disassembling the box and laying it flat. This allows for easier manipulation and facilitates the creation of templates for the fireplace components. Carefully examine the cardboard for any significant damage or creases that could compromise the final structure. Clean the surface of the cardboard to remove any dirt or debris that might interfere with the adhesion of glue or paint.
Next, plan the dimensions of the fireplace. A typical mini fireplace might stand approximately 18-24 inches tall, 12-18 inches wide, and 6-8 inches deep. These dimensions can be adjusted based on the size of the cardboard box and personal preferences. Using a ruler and pencil, mark the outline of the fireplace structure on the flattened cardboard. It is beneficial to sketch out the design on paper first to visualize the final product before cutting the cardboard. Consider the desired shape of the fireplace opening, which can be rectangular, arched, or any other custom design. Remember to account for the depth of the mantelpiece, which will add a decorative element to the top of the fireplace.
Assembling the Fireplace Structure
After marking the outline, the next step involves precisely cutting the cardboard pieces. Employ a sharp craft knife or sturdy scissors to carefully follow the marked lines. For thicker cardboard, multiple passes with the craft knife may be necessary to achieve a clean cut. Exercise caution to avoid cutting oneself. Once the main pieces are cut, begin assembling the fireplace structure. Start by creating the front panel, which includes the fireplace opening. Reinforce the edges of the opening with additional strips of cardboard to provide added stability and prevent bending. Use hot glue or craft glue to adhere the pieces together, ensuring that the joints are secure and flush.
Construct the side panels of the fireplace, ensuring they are the correct dimensions to create a box-like structure when attached to the front panel. Apply glue to the edges of the side panels and carefully attach them to the sides of the front panel, forming the basic shape of the fireplace. Allow the glue to dry completely before proceeding. Create a back panel for the fireplace, which will provide additional support and enhance the overall stability. Attach the back panel to the structure using glue, ensuring a secure fit. The frame of the fireplace must be stable before moving on to the decorative elements.
The mantelpiece is a crucial decorative element of the fireplace. Cut a piece of cardboard that is slightly wider and deeper than the top of the fireplace. This will create an overhang that adds visual appeal. Attach the mantelpiece to the top of the fireplace using glue, ensuring it is centered and securely fastened. Reinforce the mantelpiece with additional cardboard supports if necessary to prevent sagging. The basic structure of the mini cardboard fireplace is now complete.
Decorating and Embellishing the Fireplace
With the basic structure assembled, the next phase involves decorating and embellishing the fireplace to achieve the desired aesthetic. Paint offers a versatile option for covering the cardboard surface. Acrylic paints are well-suited for this project, as they adhere well to cardboard and provide a durable finish. Apply a primer coat to the cardboard before painting to improve adhesion and prevent the paint from soaking into the cardboard. Choose a color scheme that complements the surrounding décor. Popular options include white, gray, brick red, or faux stone finishes.
Alternatively, decorative paper can be used to cover the cardboard surface. This can include patterned scrapbook paper, wrapping paper, or even printed images of bricks or stones. Cut the paper to fit the various surfaces of the fireplace and adhere it using glue or double-sided tape. Smooth out any wrinkles or bubbles to ensure a clean, professional finish. Faux brick paper adds a realistic touch to the fireplace.
Embellishments can further enhance the realism and charm of the mini fireplace. Faux logs, crafted from cardboard tubes or rolled paper, can be placed inside the fireplace opening to simulate firewood. These logs can be painted or stained to resemble real wood. Electric candles or battery-operated string lights can be added to create a warm, flickering glow. Consider adding decorative elements such as garlands, stockings, or miniature figurines to enhance the festive ambiance. The addition of glitter or other sparkly materials can add a touch of whimsy and elegance to the fireplace. The final touches are the addition of personal elements to tailor the fireplace to individual tastes.

Easy Diy Mini Faux Fireplace Cardboard Gina Tepper

Easy Diy Mini Faux Fireplace Cardboard Gina Tepper

Diy Mini Fireplace With Faux Fire Made Of Cardboard

Easy Diy Mini Faux Fireplace Cardboard Gina Tepper

Easy Diy Mini Faux Fireplace Cardboard Gina Tepper

Easy Diy Mini Faux Fireplace Cardboard Gina Tepper

Diy Dollhouse Fireplace From Ice Cream Sticks Miniature Craft Ideas

Diy Faux Cardboard Fireplace Easy Instructions

How To Make A Cardboard Holiday Fireplace

Diy Cardboard Fireplace For
Related Posts