How To Resurface Tile Fireplace
A fireplace can be a beautiful focal point of a room, but over time, the tile can become chipped, cracked, or discolored. Fortunately, resurfacing tile fireplace is a relatively straightforward project that can give your fireplace a fresh new look. This article will guide you through the process of resurfacing your tile fireplace, detailing the steps involved and the materials you'll need.
1. Preparing the Tile Fireplace for Resurfacing
Before you begin resurfacing, it's crucial to properly prepare the tile fireplace. This involves cleaning the existing tile, removing any loose or damaged tiles, and ensuring the surface is smooth and ready for the new finish. Here's a step-by-step guide:
Step 1: Protect the Surroundings
Cover the surrounding area with drop cloths or plastic sheeting to protect it from dust, debris, and paint splatters. This will make cleanup much easier later.
Step 2: Clean the Tile
Thoroughly clean the existing tile with a degreaser or a solution of warm water and dish soap. Use a stiff-bristled brush to remove any dirt, grime, or residue. Allow the tile to dry completely before proceeding.
Step 3: Remove Loose or Damaged Tiles
If any tiles are loose or damaged, they need to be removed. Carefully pry them off using a chisel and hammer, being careful not to damage the surrounding tiles. Ensure the mortar bed is clean and ready for new tiles if necessary.
Step 4: Fill Cracks and Gaps
Use a patching compound or epoxy putty to fill any cracks or gaps in the mortar joints. Smooth the compound with a putty knife, ensuring a seamless finish. Allow the patching compound to dry completely before proceeding.
Step 5: Sand the Surface
Once the patching compound is dry, use sandpaper to smooth out any rough edges or uneven surfaces. This prepares the tile for a smooth and uniform finish.
2. Applying a New Finish to the Resurfaced Fireplace
Once the preparation is complete, you can start applying the new finish. There are various options available, each with its own advantages and disadvantages. Here's a breakdown of some popular choices:
Option 1: Tile Paint
Tile paint is a cost-effective solution that can transform the look of your fireplace. It comes in various colors and finishes, allowing for customization. Apply the paint with a brush or roller using thin coats for optimal coverage. Allow each coat to dry completely before applying the next.
Option 2: Tile Glaze
Tile glaze provides a durable and glossy finish that protects the tiles from stains and wear. It's available in different colors and can add a touch of elegance to your fireplace. Apply the glaze with a brush or roller following the manufacturer's instructions. Allow the glaze to cure properly before using the fireplace.
Option 3: Tile Stickers
Tile stickers are a quick and easy way to resurface a tile fireplace. They come in various designs and styles, allowing you to match your decor. Apply the stickers according to the manufacturer's instructions, ensuring they are properly adhered to the tile. Avoid using the fireplace until the stickers are fully cured.
3. Finishing Touches and Maintenance
Once the new finish is applied, you can add finishing touches to enhance the appearance of your resurface tile fireplace. Consider these tips:
Step 1: Seal the Tile
To protect the new finish and make it easier to clean, seal the tiles with a sealant. This will create a barrier against stains and moisture. Follow the manufacturer's instructions for application and drying time.
Step 2: Clean and Maintain
Regular cleaning is essential for maintaining the appearance of your resurface tile fireplace. Use a mild detergent and water to clean the tile, avoiding abrasive cleaners that can damage the new finish. Avoid using harsh chemicals that can cause discoloration or fading.
Step 3: Enjoy the Updated Look
With the resurfacing process complete, enjoy the refreshed look of your tile fireplace. The new finish will add a touch of elegance and longevity to your home.

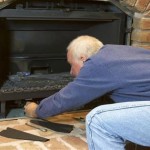
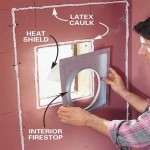
A Step By Guide To Fireplace Refacing Diy Family Handyman

A Step By Guide To Fireplace Refacing Diy Family Handyman

How To Paint Tile Easy Fireplace Makeover Setting For Four Interiors

How To Paint Tile Easy Fireplace Makeover Setting For Four Interiors

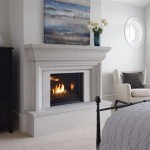
Diy Tile Fireplace Makeover The Home Depot

How To Paint Tile Easy Fireplace Makeover Setting For Four Interiors

110 Diy Fireplace Makeover How To Paint Tile Jessica Welling Interiors

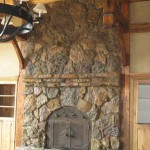
How To Tile Over A Brick Hearth Shine Your Light

Diy Tile Fireplace Makeover Replacement Fireplaace

A Step By Guide To Fireplace Refacing Diy Family Handyman