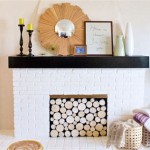
Replacing Fireplace Hearthstone: A Comprehensive Guide
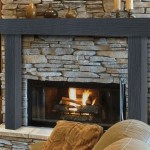
A fireplace hearthstone is an essential component of any fireplace, serving both practical and aesthetic purposes. It provides a protective surface for the floor, preventing damage from embers, sparks, and heat emanating from the fireplace. Additionally, the hearthstone contributes to the overall design and character of the fireplace surround. Over time, hearthstones can become damaged, cracked, or simply outdated, necessitating replacement. This guide provides a comprehensive overview of replacing fireplace hearthstone, covering key aspects from planning to installation.
1. Planning and Preparation
Before embarking on the replacement process, it is crucial to plan and prepare thoroughly. This includes gathering the necessary materials, tools, and safety equipment.
a. Materials: Choose a suitable hearthstone material. Common options include natural stone (granite, marble, slate), ceramic tile, and manufactured stone. Consider factors like durability, heat resistance, aesthetics, and budget.
b. Tools: Assemble the necessary tools for the job. These may include a pry bar, hammer, chisel, trowel, level, tape measure, safety glasses, gloves, and dust mask.
c. Safety: Prioritize safety by wearing appropriate clothing and protective gear. Ensure the fireplace is cold and free of any combustibles before working on it.
2. Removing the Existing Hearthstone
The first step in the replacement process is removing the old hearthstone. This can be done carefully using a pry bar and hammer.
a. Detachment: Start by identifying the edges of the hearthstone, where it meets the surrounding flooring. Use a pry bar to gently lift the edges, creating a small gap.
b. Chiseling: If the hearthstone is adhered firmly, a chisel can be used to break the bond between the stone and the floor. Chisel slowly and carefully, avoiding aggressive force that could damage the underlying floor.
c. Removal: Once the hearthstone is loosened, lift it carefully and remove it from the fireplace area. Be cautious of any sharp edges and wear gloves for protection.
3. Installing the New Hearthstone
After removing the old hearthstone, the new one can be installed. The installation process typically involves preparation, setting, and finishing steps.
a. Preparation: Clean the area where the new hearthstone will be installed. Remove any debris and ensure the floor is smooth and level.
b. Setting: Use a mortar or thin-set adhesive to secure the new hearthstone. Apply a layer of the adhesive to the floor, ensuring it is spread evenly. Carefully position the hearthstone onto the adhesive, ensuring it is level.
c. Finishing: Allow the adhesive to cure completely. If necessary, caulk the seams between the hearthstone and the surrounding floor to prevent moisture penetration.
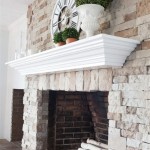
Replacing a fireplace hearthstone is a DIY project that can enhance the appearance and functionality of your fireplace. However, if you are unsure about any aspect of the process, it is best to consult a qualified professional. By following the guidance and considerations outlined in this guide, you can ensure a successful and safe fireplace hearthstone replacement project.

Hearthstone I Fireplace 8100 Hearthstonetech

How To Remove A Fireplace Hearth All You Need Know Checkatrade

Updating Fireplace Hearth No Demolition Required Single Girl S Diy

Wfp 100 Hearthstone Stoves

Chapter 2 Installing The Hearth Solus Concrete Fireplace Surround

Hearthstone Replacement Baffle Tribute 8040 90 76400

Diy Fireplace Makeover At Home With The Barkers

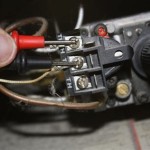
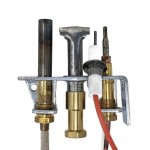
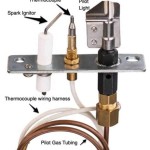
Proactive Replacement Of Pilots In Certain Hearthstone Gas Stoves

Hearthstone Ii Hearthstonetech

How To Replace A Hearth With Slate Tile Ask This Old House
Related Posts