Building Your Own Fireplace Grate: A Comprehensive Guide
A fireplace grate serves a crucial function in wood-burning fireplaces. It elevates the wood, allowing for better air circulation around the logs, leading to a hotter, more efficient, and cleaner burn. While pre-made grates are readily available, constructing your own can be a cost-effective alternative, especially if you have specific size requirements or access to welding equipment. This article provides a detailed guide on building a durable and functional fireplace grate.
The primary benefit of building a custom grate lies in the ability to tailor its dimensions precisely to the fireplace. This ensures optimal placement of the wood and maximizes the burning efficiency within the available space. Furthermore, constructing a grate allows for the selection of specific materials that meet individual preferences for durability and aesthetics. This detailed approach can result in a superior product compared to many mass-produced grates.
Key Point 1: Planning and Design Considerations
The initial phase of building a fireplace grate involves careful planning and design. This stage is critical as it determines the overall functionality and longevity of the grate. Several factors must be considered before commencing the actual construction.
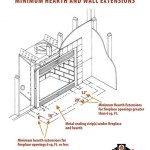
Fireplace Dimensions: Accurate measurement of the fireplace interior is paramount. Measure the width, depth, and height of the firebox. The grate should be slightly smaller than these dimensions to allow for easy placement and removal, as well as to prevent direct contact with the firebox walls, which can accelerate wear and tear. It's advisable to leave at least 2-3 inches of clearance on all sides.
Grate Style: Fireplace grates typically come in two main styles: ladder and basket. Ladder-style grates are simpler to construct, consisting of parallel bars supported by crossbars. Basket-style grates feature a more enclosed design, resembling a basket, which is effective for containing smaller pieces of wood and preventing them from rolling out. The choice depends on the preferred aesthetics and the type of wood typically burned.
Material Selection: The choice of material significantly impacts the grate's durability and resistance to high temperatures. Steel and cast iron are the most common materials. Steel, particularly thicker gauge steel, offers good strength and affordability. Cast iron excels in heat retention and is exceptionally durable, but it can be more challenging to work with. Consider using materials specifically rated for high-temperature applications.
Bar Spacing: The spacing between the bars of the grate is crucial for airflow. Excessive spacing may allow smaller pieces of burning wood to fall through, while insufficient spacing can restrict airflow and hinder efficient combustion. A spacing of approximately 1 to 2 inches is generally recommended.
Leg Height: The height of the grate legs determines the elevation of the wood, which directly affects the airflow beneath the logs. A leg height of 3 to 6 inches is usually sufficient to promote adequate ventilation. This height can be adjusted based on the draft characteristics of the fireplace.
Once these considerations are addressed, a detailed sketch or blueprint of the grate should be created, including precise dimensions and material specifications. This blueprint will serve as a reference throughout the construction process.
Key Point 2: Materials and Tools Required
Having the right materials and tools is essential for a successful grate-building project. The required items include:
Steel or Cast Iron: Choose appropriately sized and gauged steel bars or cast iron pieces based on the design. Consider using square or rectangular tubing for the frame to provide added strength.
Welding Machine: A welding machine is necessary for joining the metal components. MIG (Metal Inert Gas) or stick welding are common methods. It is critical to possess the necessary welding skills or seek assistance from a qualified welder.
Welding Helmet and Protective Gear: Safety is paramount when welding. A welding helmet with an auto-darkening lens, welding gloves, a welding jacket, and appropriate footwear are essential for protecting against sparks, heat, and UV radiation.
Angle Grinder: An angle grinder with cutting and grinding discs is needed for cutting the metal pieces to the required dimensions and for smoothing out any rough edges or welds.
Metal Cutting Saw: A metal cutting saw, such as a band saw or chop saw, can be used to make precise cuts in the metal. This is particularly useful for cutting multiple pieces to the same length.
Measuring Tape and Marking Tools: Accurate measurements are essential. Use a measuring tape, ruler, and marker to mark the cutting and welding points on the metal pieces.
Clamps and Vise: Clamps and a vise are helpful for holding the metal pieces in place during welding, ensuring accurate alignment.
Wire Brush: A wire brush is used to clean the metal surfaces before welding and to remove any scale or slag after welding.
Primer and High-Temperature Paint: Applying a primer and high-temperature paint will protect the grate from rust and corrosion, extending its lifespan. Choose a paint specifically designed for use on fireplaces or stoves.
Key Point 3: Construction Process and Safety Precautions
The construction process involves several steps, requiring careful attention to detail and adherence to safety precautions.
Cutting the Metal: Using the cutting saw or angle grinder, cut the steel or cast iron pieces to the dimensions specified in the blueprint. Ensure that all cuts are clean and accurate.
Welding the Frame: Begin by welding the frame of the grate. If using square or rectangular tubing, weld the corners together to form a rigid and stable structure. Use clamps to hold the pieces in place during welding.
Welding the Bars: Position the bars according to the desired spacing and weld them to the frame. Ensure that the welds are strong and secure. Pay attention to the alignment of the bars to maintain consistent spacing.
Welding the Legs: Weld the legs to the bottom of the frame, ensuring that they are evenly spaced and securely attached. The leg height should be consistent with the planned design.
Grinding and Cleaning: After welding, use the angle grinder to smooth out any rough edges or weld beads. Remove any slag or scale with a wire brush. This step is crucial for safety and aesthetics.
Applying Primer and Paint: Thoroughly clean the grate with a degreaser to remove any oil or grease. Apply a coat of metal primer to protect against rust. Allow the primer to dry completely before applying a coat of high-temperature paint. Follow the manufacturer's instructions for application and drying times.
Safety Precautions: Welding involves inherent risks. Always wear a welding helmet, gloves, and protective clothing. Work in a well-ventilated area to avoid inhaling fumes. Use clamps to secure the metal pieces during welding, preventing them from moving or falling. Be aware of fire hazards and keep a fire extinguisher nearby. Allow the metal to cool completely before handling it after welding. Follow all safety guidelines provided by the welding machine manufacturer.
Building a fireplace grate requires careful planning, precise execution, and adherence to safety protocols. By following these guidelines, individuals can create a durable and functional grate that enhances the efficiency and enjoyment of their wood-burning fireplace.

Diy Fire Place Grate Made Of Rebar Metal Working Welding

Home

Collapsible Steel Wood Grate Elevated Fire Diy Bbq Smoker Firebox Take Apart Denmark

Fireplace Grates For Wood Burning Fireplaces

Dollhouse Miniature Fireplace Grate Tutorial

Making A Fire Grate For Barbecue

Vertical Fireplace Grates Grate Wall Of Fire Fronts Inserts

Fireplace Grates The Complete Guide Including Types

Build Your Own Fireplace Blower Grate Doityourself Com

Fireplace Grates The Complete Guide Including Types
Related Posts

