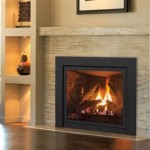
How to Update a Tile Fireplace Surround
A fireplace serves as a focal point in many homes, often dictating the aesthetic of the living space. The surrounding tile plays a significant role in achieving the desired look. Over time, the existing tile may become outdated, damaged, or simply no longer align with evolving design preferences. Updating the tile fireplace surround can dramatically revitalize the room, adding value and visual appeal.
The process of updating a tile fireplace surround requires careful planning and execution. Before embarking on the project, it is essential to assess the current condition of the existing tile and the substrate beneath. Determining the type of tile to be used and the desired design is also crucial. The following sections provide guidance on how to effectively update a tile fireplace surround, addressing key considerations and potential challenges.
Preparing for the Tile Update
Prior to commencing the tile removal, it is imperative to safeguard the surrounding areas. This involves covering the floor and any adjacent walls with drop cloths or plastic sheeting to protect them from debris and dust. Securing these protective materials with painter's tape will prevent them from shifting during the work process. It's also recommended to wear safety glasses and a dust mask during the demolition phase.
The removal process begins with loosening the existing tile. This can be accomplished using a hammer and chisel. Carefully position the chisel along the grout lines and gently tap it with the hammer to break the bond between the tile and the substrate. For larger areas, a power tool such as an oscillating multi-tool with a grout removal blade can expedite this process. Exercise caution to avoid damaging the fireplace structure itself while removing the tiles. Patience and controlled movements are essential to ensure a clean removal with minimal damage to the underlying surface.
After removing the tile, thoroughly inspect the substrate. It is likely that remnants of mortar or adhesive will remain. These need to be scraped away to create a smooth and even surface for the new tile. A wide putty knife or a floor scraper can be used for this purpose. If the substrate is damaged or uneven, it may require patching or resurfacing. This could involve applying a layer of patching compound or self-leveling mortar to create a suitable foundation for the new tile. Allow the patching compound or mortar to dry completely according to the manufacturer's instructions before proceeding.
Once the substrate is prepared, it is advisable to apply a sealant or primer. This will improve the adhesion of the new tile and protect the substrate from moisture. Choose a sealant or primer that is compatible with both the substrate and the chosen tile adhesive. Apply the sealant or primer evenly and allow it to dry completely before moving on to the installation phase.
Selecting and Installing the New Tile
The selection of new tile is a crucial step in updating the fireplace surround. Consider the overall style of the room and the existing fireplace design when choosing the tile. There are numerous options available, including ceramic, porcelain, natural stone, and glass tile. Each type of tile offers different aesthetic qualities and performance characteristics. Ceramic and porcelain tiles are generally durable and easy to maintain, while natural stone tiles offer a more organic and luxurious appearance. Glass tiles can add a touch of modern elegance and are available in a wide range of colors and textures.
Before installation, dry-fit the tiles on the fireplace surround to determine the layout and spacing. This allows for adjustments to be made before the adhesive is applied. Arrange the tiles in the desired pattern, taking into account grout lines and any decorative elements. Use tile spacers to maintain consistent grout lines. This step is vital for ensuring a professional and visually appealing final result. If necessary, use a wet saw to cut tiles to fit around the fireplace opening or any other obstacles. Always wear safety glasses when using a wet saw.
Once the layout is finalized, mix the tile adhesive according to the manufacturer's instructions. Apply the adhesive to the substrate using a notched trowel. The size of the notch should be appropriate for the size and type of tile being used. Apply the adhesive evenly, covering only a small area at a time to prevent it from drying out. Press the tiles firmly into the adhesive, ensuring that they are level and aligned. Use tile spacers to maintain consistent grout lines. Remove any excess adhesive with a damp sponge.
After the adhesive has cured according to the manufacturer's instructions, it is time to apply the grout. Select a grout color that complements the tile and the overall design. Mix the grout according to the manufacturer's instructions and apply it to the grout lines using a grout float. Work the grout into the spaces between the tiles, ensuring that they are completely filled. Remove any excess grout with the grout float. After allowing the grout to set for a short period, use a damp sponge to clean the tile surface and smooth the grout lines. Rinse the sponge frequently to avoid smearing the grout. Allow the grout to dry completely before sealing it.
Finishing Touches and Maintenance
Sealing the grout is an essential step in protecting it from stains and moisture. Apply a grout sealer according to the manufacturer's instructions. This will help to prevent the grout from absorbing dirt and grime, making it easier to clean. Reapply the grout sealer periodically as needed to maintain its protective properties.
Inspect the completed tile fireplace surround for any imperfections or areas that require touch-ups. Fill any gaps or cracks with caulk that matches the grout color. Clean the tile surface with a mild detergent and water. Avoid using harsh chemicals or abrasive cleaners, as they can damage the tile and grout. Wipe the tile dry with a soft cloth.
Regular maintenance is crucial for preserving the appearance and longevity of the tile fireplace surround. Clean the tile surface regularly to remove dust and debris. Wipe up any spills or splatters immediately to prevent staining. Inspect the grout lines periodically for signs of cracking or deterioration. Repair any damaged grout promptly to prevent water damage. With proper care and maintenance, the updated tile fireplace surround will provide years of beauty and enjoyment.

Easy Stick On Tiles Update Your Fireplace Porch Daydreamer

How To Paint Tile Easy Fireplace Makeover Setting For Four Interiors

Tiling Our Fireplace Surround 2 Day Project Huge Living Room Update Create Eoy

Er Friendly Fireplace Makeover With L Stick Tiles The Homes I Have Made

Fireplace Makeover How To Tile Over A Surround Love Remodeled

Remodel Update Tiling The Fireplace Hearth Houseful Of Handmade

How To Update Your Fireplace With Paint Lost Found Decor

How To Paint Fireplace Tile Easy Home Update Allisa Jacobs

Smart Tiles Diy Fireplace Makeover Judy Dill

Easy Stick On Tiles Update Your Fireplace Porch Daydreamer

